代码如下:
|
1
2
3
4
5
6
7
8
9
10
11
12
13
14
15
16
17
18
19
20
21
22
23
24
25
26
27
|
import
UIKit
class
ViewController
:
UIViewController
{
override
func
viewDidLoad() {
super
.viewDidLoad()
let
qrcodeImg =
UIImage
(named:
"codeBg.png"
)
ciImage:
CIImage
=
CIImage
(image:qrcodeImg!)!
context =
CIContext
(options:
nil
)
detector:
CIDetector
(ofType:
CIDetectorTypeQRCode
,
context: context,options: [
CIDetectorAccuracy
CIDetectorAccuracyHigh
])
features=detector.featuresInImage(ciImage)
//遍历所有的二维码,并框出
(feature.messageString)
}
}
didReceiveMemoryWarning() {
.didReceiveMemoryWarning()
}
}
|
控制台输出如下:
可以看到两个二维码都成功的读取到了。
(注:这个我原来用模拟器一直检测不到二维码,使用真机调试就没问题。
感谢网友“落叶”的提醒,模拟器选iphone5s及以上设备也是可以检测到的。)
2,从相册中选择图片读取二维码
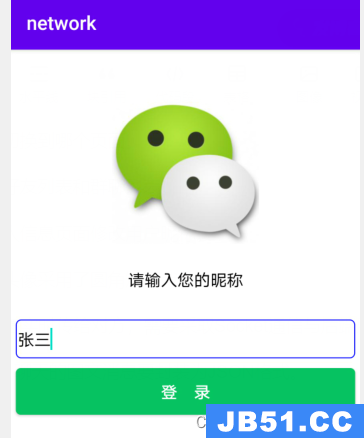
3,使用摄像头扫描读取二维码
(1)扫描主要使用的是 AVFoundation,用起来方便简单
(2)通过 AVCaptureMetadataOutput的 rectOfInterest属性,可以设置探测探测区域。同时给这个探测区域添加个方框,只有在框中的二维码才会被扫描到。
效果图如下:
代码如下:
2,从相册中选择图片读取二维码
|
1
2
3
4
5
6
7
8
9
10
11
12
13
14
15
16
17
18
19
20
21
22
23
24
25
26
27
28
29
30
31
32
33
34
35
36
37
38
39
40
41
42
43
44
45
46
47
48
49
50
51
52
53
54
55
56
57
|
import
UIKit
class
ViewController
:
UIViewController
ottom:auto!important; float:none!important; height:auto!important; left:auto!important; line-height:1.5em!important; margin:0px!important; overflow:visible!important; padding:1px 0px!important; position:static!important; right:auto!important; top:auto!important; vertical-align:baseline!important; width:auto!important; font-family:Consolas,
UIImagePickerControllerDelegate
ottom:auto!important; float:none!important; height:auto!important; left:auto!important; line-height:1.5em!important; margin:0px!important; overflow:visible!important; padding:1px 0px!important; position:static!important; right:auto!important; top:auto!important; vertical-align:baseline!important; width:auto!important; font-family:Consolas,
UINavigationControllerDelegate
{
override
func
viewDidLoad() {
super
.viewDidLoad()
}
//选取相册
@IBAction
fromAlbum(sender:
AnyObject
) {
if
UIImagePickerController
.isSourceTypeAvailable(.
PhotoLibrary
){
//初始化图片控制器
let
picker =
UIImagePickerController
()
//设置代理
picker.delegate =
self
//指定图片控制器类型
//弹出控制器,显示界面
self
.presentViewController(picker,animated:
true
ottom:auto!important; float:none!important; height:auto!important; left:auto!important; line-height:1.5em!important; margin:0px!important; overflow:visible!important; padding:1px 0px!important; position:static!important; right:auto!important; top:auto!important; vertical-align:baseline!important; width:auto!important; font-family:Consolas,completion: {
() ->
Void
in
})
}
else
{
}
}
//选择图片成功后代理
imagePickerController(picker:
ottom:auto!important; float:none!important; height:auto!important; left:auto!important; line-height:1.5em!important; margin:0px!important; overflow:visible!important; padding:1px 0px!important; position:static!important; right:auto!important; top:auto!important; vertical-align:baseline!important; width:auto!important; font-family:Consolas,
//获取选择的原图
image = info[
UIImagePickerControllerOriginalImage
]
as
!
UIImage
//二维码读取
ciImage:
CIImage
=
CIImage
(image:image)!
context =
CIContext
(options:
nil
)
detector:
CIDetector
(ofType:
CIDetectorTypeQRCode
ottom:auto!important; float:none!important; height:auto!important; left:auto!important; line-height:1.5em!important; margin:0px!important; overflow:visible!important; padding:1px 0px!important; position:static!important; right:auto!important; top:auto!important; vertical-align:baseline!important; width:auto!important; font-family:Consolas,
ottom:auto!important; float:none!important; height:auto!important; left:auto!important; line-height:1.5em!important; margin:0px!important; overflow:visible!important; padding:0px 1em!important; position:static!important; right:auto!important; top:auto!important; vertical-align:baseline!important; width:auto!important; min-height:auto!important; background:none rgb(249,options: [
CIDetectorAccuracy
CIDetectorAccuracyHigh
])
features=detector.featuresInImage(ciImage)
"扫描到二维码个数:\(features.count)"
)
//遍历所有的二维码,并框出
(feature.messageString)
}
picker.dismissViewControllerAnimated(
ottom:auto!important; float:none!important; height:auto!important; left:auto!important; line-height:1.5em!important; margin:0px!important; overflow:visible!important; padding:1px 0px!important; position:static!important; right:auto!important; top:auto!important; vertical-align:baseline!important; width:auto!important; font-family:Consolas,completion: {
() ->
Void
in
})
}
didReceiveMemoryWarning() {
.didReceiveMemoryWarning()
}
}
|
3,使用摄像头扫描读取二维码
(1)扫描主要使用的是 AVFoundation,用起来方便简单
(2)通过 AVCaptureMetadataOutput的 rectOfInterest属性,可以设置探测探测区域。同时给这个探测区域添加个方框,只有在框中的二维码才会被扫描到。
效果图如下:
代码如下:
|
1
2
3
4
5
6
7
8
9
10
11
12
13
14
15
16
17
18
19
20
21
22
23
24
25
26
27
28
29
30
31
32
33
34
35
36
37
38
39
40
41
42
43
44
45
46
47
48
49
50
51
52
53
54
55
56
57
58
59
60
61
62
63
64
65
66
67
68
69
70
71
72
73
74
75
76
77
78
79
80
81
82
83
84
85
86
87
88
89
90
91
92
93
94
95
96
97
98
99
100
101
102
103
104
105
106
107
108
109
110
111
|
import
UIKit
AVFoundation
class
ViewController
:
UIViewController
ottom:auto!important; float:none!important; height:auto!important; left:auto!important; line-height:1.5em!important; margin:0px!important; overflow:visible!important; padding:1px 0px!important; position:static!important; right:auto!important; top:auto!important; vertical-align:baseline!important; width:auto!important; font-family:Consolas,
AVCaptureMetadataOutputObjectsDelegate
ottom:auto!important; float:none!important; height:auto!important; left:auto!important; line-height:1.5em!important; margin:0px!important; overflow:visible!important; padding:1px 0px!important; position:static!important; right:auto!important; top:auto!important; vertical-align:baseline!important; width:auto!important; font-family:Consolas,
UIAlertViewDelegate
{
var
scanRectView:
UIView
!
device:
AVCaptureDevice
!
input:
AVCaptureDeviceInput
!
output:
AVCaptureMetadataOutput
!
session:
AVCaptureSession
!
preview:
AVCaptureVideoPreviewLayer
!
override
func
viewDidLoad() {
super
.viewDidLoad()
}
//通过摄像头扫描
@IBAction
fromCamera(sender:
AnyObject
) {
do{
self
.device =
AVCaptureDevice
.defaultDeviceWithMediaType(
AVMediaTypeVideo
)
.input = try
(device: device)
.output =
AVCaptureMetadataOutput
()
output.setMetadataObjectsDelegate(
ottom:auto!important; float:none!important; height:auto!important; left:auto!important; line-height:1.5em!important; margin:0px!important; overflow:visible!important; padding:1px 0px!important; position:static!important; right:auto!important; top:auto!important; vertical-align:baseline!important; width:auto!important; font-family:Consolas,queue: dispatch_get_main_queue())
.session =
()
if
UIScreen
.mainScreen().bounds.size.height<500 {
.session.sessionPreset =
AVCaptureSessionPreset640x480
}
else
{
AVCaptureSessionPresetHigh
}
.session.addInput(
.input)
.session.addOutput(
.output)
//计算中间可探测区域
let
windowSize:
CGSize
=
.mainScreen().bounds.size;
scanSize:
CGSizeMake
(windowSize.width*3/4,
windowSize.width*3/4);
scanRect:
CGRect
=
CGRectMake
((windowSize.width-scanSize.width)/2,
(windowSize.height-scanSize.height)/2,scanSize.width,scanSize.height);
//计算rectOfInterest 注意x,y交换位置
scanRect =
(scanRect.origin.y/windowSize.height,
scanRect.origin.x/windowSize.width,
scanRect.size.height/windowSize.height,
scanRect.size.width/windowSize.width);
//设置可探测区域
.output.rectOfInterest = scanRect
.preview =
AVCaptureVideoPreviewLayer
(session:
.session)
.preview.frame =
.mainScreen().bounds
.view.layer.insertSublayer(
.preview,atIndex:0)
.scanRectView =
UIView
();
.view.addSubview(
.scanRectView)
.scanRectView.frame =
CGRectMake
(0,scanSize.height);
.scanRectView.center =
CGPointMake
(
CGRectGetMidX
(
UIScreen
.mainScreen().bounds),
CGRectGetMidY
.mainScreen().bounds));
.scanRectView.layer.borderColor =
UIColor
.greenColor().
CGColor
.scanRectView.layer.borderWidth = 1;
//开始捕获
.session.startRunning()
}catch _
as
NSError
{
//打印错误消息
errorAlert =
UIAlertView
(title:
"提醒"
ottom:auto!important; float:none!important; height:auto!important; left:auto!important; line-height:1.5em!important; margin:0px!important; overflow:visible!important; padding:1px 0px!important; position:static!important; right:auto!important; top:auto!important; vertical-align:baseline!important; width:auto!important; font-family:Consolas,
message:
"请在iPhone的\"设置-隐私-相机\"选项中,允许本程序访问您的相机"
ottom:auto!important; float:none!important; height:auto!important; left:auto!important; line-height:1.5em!important; margin:0px!important; overflow:visible!important; padding:1px 0px!important; position:static!important; right:auto!important; top:auto!important; vertical-align:baseline!important; width:auto!important; font-family:Consolas,
delegate:
ottom:auto!important; float:none!important; height:auto!important; left:auto!important; line-height:1.5em!important; margin:0px!important; overflow:visible!important; padding:1px 0px!important; position:static!important; right:auto!important; top:auto!important; vertical-align:baseline!important; width:auto!important; font-family:Consolas,
cancelButtonTitle:
"确定"
)
errorAlert.show()
}
}
//摄像头捕获
captureOutput(captureOutput:
AVCaptureOutput
!,
fromConnection connection:
AVCaptureConnection
!) {
stringValue:
String
?
if
MetadataObjects.count > 0 {
stringValue = MetadataObject.stringValue
stringValue !=
nil
{
.session.stopRunning()
}
}
.session.stopRunning()
//输出结果
alertView =
UIAlertView
"二维码"
ottom:auto!important; float:none!important; height:auto!important; left:auto!important; line-height:1.5em!important; margin:0px!important; overflow:visible!important; padding:1px 0px!important; position:static!important; right:auto!important; top:auto!important; vertical-align:baseline!important; width:auto!important; font-family:Consolas,message: stringValue,
ottom:auto!important; float:none!important; height:auto!important; left:auto!important; line-height:1.5em!important; margin:0px!important; overflow:visible!important; padding:0px 1em!important; position:static!important; right:auto!important; top:auto!important; vertical-align:baseline!important; width:auto!important; min-height:auto!important; background:none rgb(249,cancelButtonTitle:
)
alertView.show()
}
//消息框确认后消失
alertView(alertView:
ottom:auto!important; float:none!important; height:auto!important; left:auto!important; line-height:1.5em!important; margin:0px!important; overflow:visible!important; padding:1px 0px!important; position:static!important; right:auto!important; top:auto!important; vertical-align:baseline!important; width:auto!important; font-family:Consolas,willdismissWithButtonIndex buttonIndex:
Int
) {
//继续扫描
.session.startRunning()
}
didReceiveMemoryWarning() {
.didReceiveMemoryWarning()
}
}
|
原文出自: www.hangge.com 转载请保留原文链接: http://www.hangge.com/blog/cache/detail_915.html
版权声明:本文内容由互联网用户自发贡献,该文观点与技术仅代表作者本人。本站仅提供信息存储空间服务,不拥有所有权,不承担相关法律责任。如发现本站有涉嫌侵权/违法违规的内容, 请发送邮件至 dio@foxmail.com 举报,一经查实,本站将立刻删除。