

一 前言
几大RPC框架介绍
1.支持多语言的RPC框架,google的gRPC,Apache(facebook)的Thrift 2.只支持特定语言的RPC框架,例如新浪的Motan 3.支持服务治理等服务化特性的分布式框架,例如阿里的dubbo 4.拥有完整生态的spring cloudspring cloud远程调用方式---Feign
Feign是一个声明似的web服务客户端,它使得编写web服务客户端变得更加容易。使用Fegin创建一个接口并对它进行注解。它具有可插拔的注解支持包括Feign注解与JAX-RS注解,Feign还支持可插拔的编码器与解码器,Spring Cloud 增加了对 Spring MVC的注解,Spring Web 默认使用了HttpMessageConverters, Spring Cloud 集成 Ribbon 和 Eureka 提供的负载均衡的HTTP客户端 Feign。
Feign提供了HTTP请求的模板,通过编写简单的接口和插入注解,就可以定义好HTTP请求的参数、格式、地址等信息。而Feign则会完全代理HTTP请求,我们只需要像调用方法一样调用它就可以完成服务请求及相关处理。SpringCloud对Feign进行了封装,使其支持SpringMVC标准注解和HttpMessageConverters。Feign可以与Eureka和Ribbon组合使用以支持负载均衡。
官方解释: Feign is a Java to HTTP client binder inspired by Retrofit, JAXRS-2.0, and WebSocket. Feign's first goal was reducing the complexity of binding Denominator uniformly to HTTP APIs regardless of ReSTfulness.
Feign的两种调用方式
1 直接在调用者声明Feign客户端
如下图所示, service-b 声明一个接口, 去调用路径为 /user/get 的服务 service-a 的服务

2 在被调用者接口Api中声明Feign客户端
如下图, 在被调用者中声明接口, 去调用自己, 这种方法遵循面向接口编程, 而且使用起来, 就类似dubbo一样, @Autowire直接注入就可以使用了.

以上可能看得读者一头雾水, 以下具体的代码流程, 可以方便更加具体的了解
二 案例1直接在调用者声明Feign客户端代码实现
以下步骤为手把手教学, 请明白我的良苦用心
步骤0 创建一个SpringCloud-Eureka注册中心
首先创建一个父项目

以下为父项目的依赖
<?xml version="1.0" encoding="UTF-8"?>
<project xmlns="http://maven.apache.org/POM/4.0.0" xmlns:xsi="http://www.w3.org/2001/XMLSchema-instance"
    xsi:schemaLocation="http://maven.apache.org/POM/4.0.0 https://maven.apache.org/xsd/maven-4.0.0.xsd">
    <modelVersion>4.0.0</modelVersion>

    <groupId>com.fegin</groupId>
    <artifactId>test</artifactId>
    <version>0.0.1-SNAPSHOT</version>

    <packaging>pom</packaging>

    <!--springboot version 2.1.4-->
    <parent>
        <groupId>org.springframework.boot</groupId>
        <artifactId>spring-boot-starter-parent</artifactId>
        <version>2.1.4.RELEASE</version>
        <relativePath/> <!-- lookup parent from repository -->
    </parent>


    <properties>
        <java.version>1.8</java.version>
        <spring-cloud.version>Greenwich.SR1</spring-cloud.version>
    </properties>

    <!--springcloud version Greenwish.SR1-->
    <dependencyManagement>
        <dependencies>
            <dependency>
                <groupId>org.springframework.cloud</groupId>
                <artifactId>spring-cloud-dependencies</artifactId>
                <version>${spring-cloud.version}</version>
                <type>pom</type>
                <scope>import</scope>
            </dependency>
        </dependencies>
    </dependencyManagement>

</project>
创建eureka项目

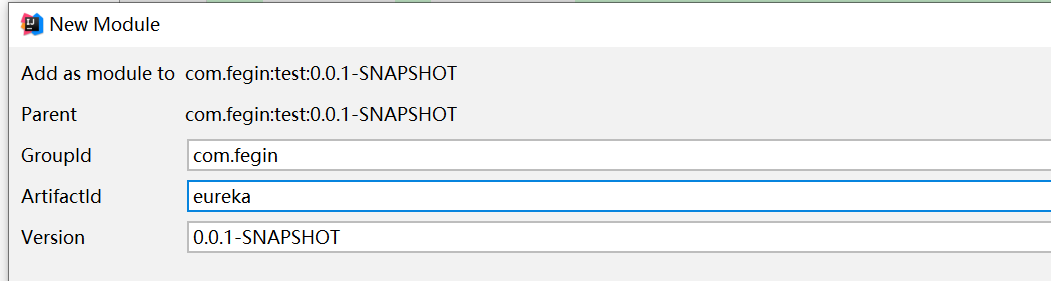
项目结构如图

添加eureka的依赖
<?xml version="1.0" encoding="UTF-8"?>
<project xmlns="http://maven.apache.org/POM/4.0.0"
         xmlns:xsi="http://www.w3.org/2001/XMLSchema-instance"
         xsi:schemaLocation="http://maven.apache.org/POM/4.0.0 http://maven.apache.org/xsd/maven-4.0.0.xsd">
    <parent>
        <artifactId>test</artifactId>
        <groupId>com.fegin</groupId>
        <version>0.0.1-SNAPSHOT</version>
    </parent>
    <modelVersion>4.0.0</modelVersion>

    <artifactId>eureka</artifactId>

    <!--eureka服务端配置-->
    <dependencies>
        <dependency>
            <groupId>org.springframework.cloud</groupId>
            <artifactId>spring-cloud-starter-netflix-eureka-server</artifactId>
        </dependency>
    </dependencies>
</project>
添加application.yml
server:
  port: 8761

eureka:
  instance:
    hostname: localhost
  client:
    # 是否把自己作为服务注册到其他服务注册中心
    registerWithEureka: false
    # 是否从其他的服务中心同步服务列表
    fetchRegistry: false
    serviceUrl:
      defaultZone: http://${eureka.instance.hostname}:${server.port}/eureka/
  server:
    # 关闭保护机制,默认true
    enable-self-preservation: false
    # 剔除失效服务间隔,默认60000
    eviction-interval-timer-in-ms: 3000
/**
 * @author c-can-z
 */
@EnableEurekaServer
@SpringBootApplication
public class EurekaApplication {

    public static void main(String[] args) {
        SpringApplication.run(EurekaApplication.class,args);
    }

}
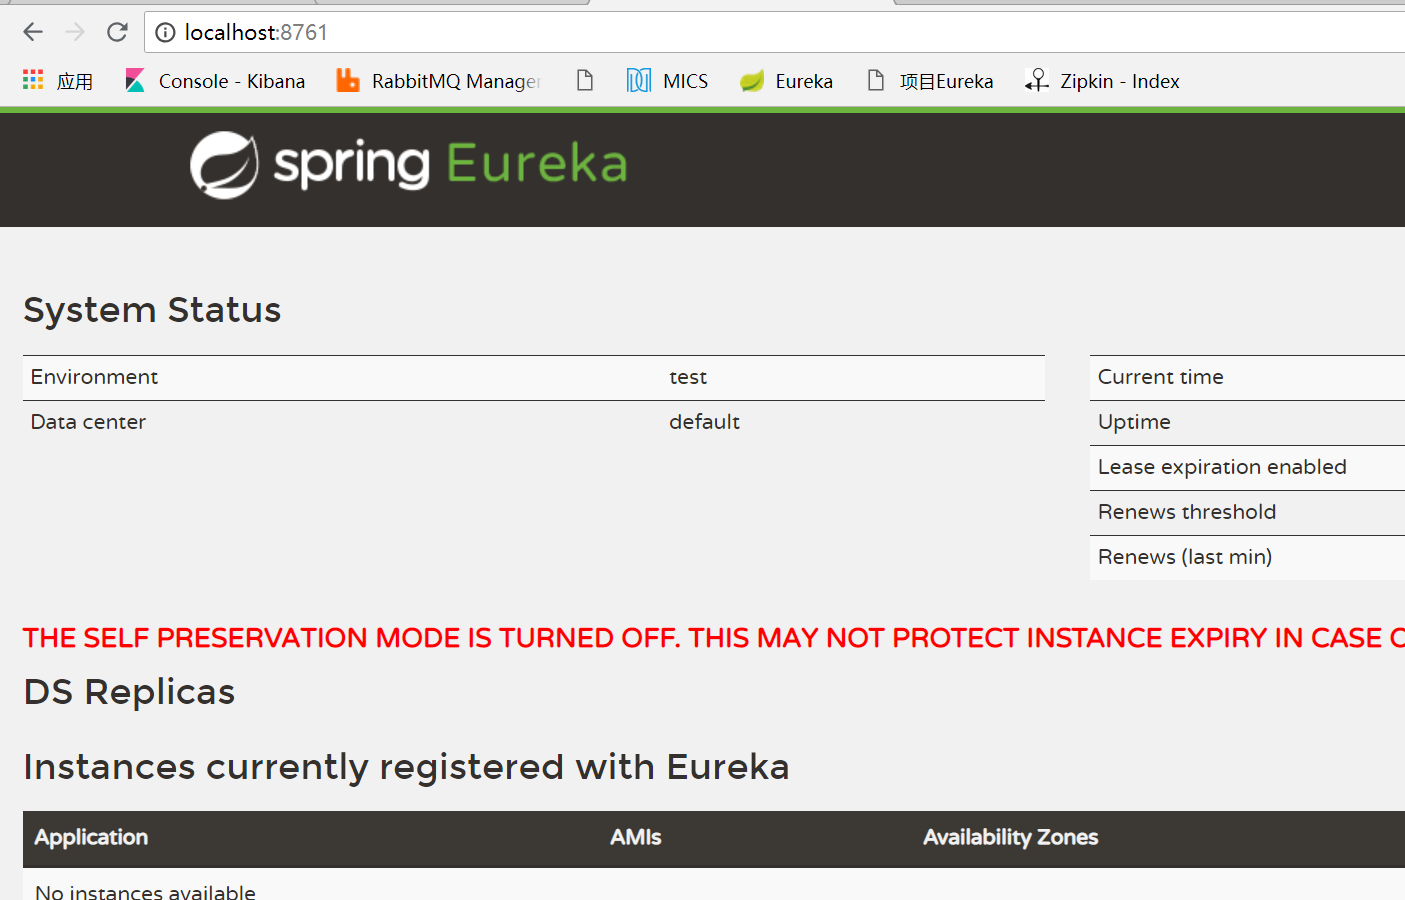
浏览器输入 http://localhost:8761/
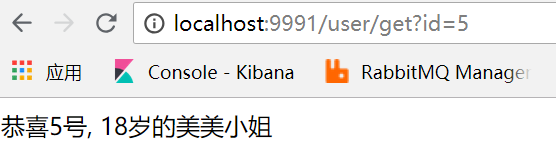
步骤1 准备一个服务servicea --- 该服务为被调用者
创建一个普通springboot服务, 服务名称为 service-a 在该服务上, 创建一个端口, 该端口为:9992 访问该路径: http://localhost:9991/user/get?id=5 返回为: 恭喜5号, 18岁的美美小姐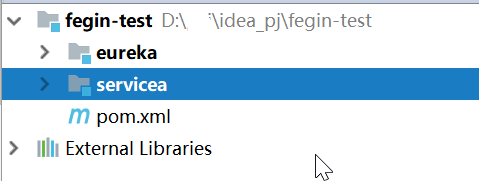
步骤2 准备一个服务serviceb --- 该服务为调用者
创建一个serviceb

添加一下serviceb必须的依赖
<?xml version="1.0" encoding="UTF-8"?>
<project xmlns="http://maven.apache.org/POM/4.0.0"
         xmlns:xsi="http://www.w3.org/2001/XMLSchema-instance"
         xsi:schemaLocation="http://maven.apache.org/POM/4.0.0 http://maven.apache.org/xsd/maven-4.0.0.xsd">
    <parent>
        <artifactId>test</artifactId>
        <groupId>com.fegin</groupId>
        <version>0.0.1-SNAPSHOT</version>
    </parent>
    <modelVersion>4.0.0</modelVersion>

    <artifactId>serviceb</artifactId>

    <dependencies>
        <!--springboot web-->
        <dependency>
            <groupId>org.springframework.boot</groupId>
            <artifactId>spring-boot-starter-web</artifactId>
        </dependency>
        <!--springboot 测试-->
        <dependency>
            <groupId>org.springframework.boot</groupId>
            <artifactId>spring-boot-starter-test</artifactId>
            <scope>test</scope>
        </dependency>
        <!--lombok-->
        <dependency>
            <groupId>org.projectlombok</groupId>
            <artifactId>lombok</artifactId>
        </dependency>
        <!--eureka客户端配置-->
        <dependency>
            <groupId>org.springframework.cloud</groupId>
            <artifactId>spring-cloud-starter-netflix-eureka-client</artifactId>
        </dependency>

        <dependency>
            <groupId>org.springframework.cloud</groupId>
            <artifactId>spring-cloud-starter-netflix-ribbon</artifactId>
        </dependency>
        <!--微服务调用-->
        <dependency>
            <groupId>org.springframework.cloud</groupId>
            <artifactId>spring-cloud-starter-openfeign</artifactId>
        </dependency>

        <!--zipkin客户端配置, 已经包含sleuth-->
        <dependency>
            <groupId>org.springframework.cloud</groupId>
            <artifactId>spring-cloud-starter-zipkin</artifactId>
        </dependency>
    </dependencies>

</project>
把 application.properties 修改为 application.yml, 本服务名称为 service-b 端口为 9992
server:
  port: 9992
spring:
  application:
    name: service-b
  zipkin:
    base-url: http://localhost:9411
  sleuth:
    sampler:
      probability: 1
eureka:
  client:
    serviceUrl:
      defaultZone: http://localhost:8761/eureka/
    registry-fetch-interval-seconds: 5 #eureka client刷新本地缓存时间,默认30
  instance:
    prefer-ip-address: true
    #Eureka客户端向服务端发送心跳的时间间隔,单位为秒(客户端告诉服务端自己会按照该规则),默认30
    lease-renewal-interval-in-seconds: 5
    #Eureka服务端在收到最后一次心跳之后等待的时间上限,单位为秒,超过则剔除(客户端告诉服务端按照此规则等待自己),默认90
    lease-expiration-duration-in-seconds: 7
feign:
  client:
    config:
      default:
        connectTimeout: 7000
        readTimeout: 7000
service-b:
  ribbon:
    NFLoadBalancerRuleClassName: com.netflix.loadbalancer.Randomrule
logging:
  level:
    root: info
导入启动类文件
@SpringBootApplication
@EnableFeignClients
public class SeriveBApplication {

    public static void main(String[] args) {
        SpringApplication.run(SeriveBApplication.class,args);
    }

}
创建Feign客户端
//在创建该步骤的时候, 需要关注一下步骤1的说明
//@FeignClient(name = "service-a")注解来绑定该接口对应servic-a服务
@FeignClient(name = "service-a")
public interface UserFeginClient {
    //service-a服务对应资源路径.必须加上@RequestParam, 否则会报错,返回参数也必须对应上
    @RequestMapping("user/get")
    String get(@RequestParam("id")Long id);
}
在controller中直接进行调用
@RestController
@RequestMapping("/product")
public class ProductController {

    @Autowired
    private UserFeginClient userFeginClient;

    @RequestMapping("/get")
    public String get(Long id){
        return "产品服务抽奖: "+userFeginClient.get(id);
    }
}
步骤3 测试Feign调用效果
http://localhost:9992/product/get?id=5
三 案例2 在被调用者接口Api中声明Feign客户端代码实现
步骤1 创建servicecapi, 该Api用来创建Feign客户端
可以在以上的项目上进行改造 项目结构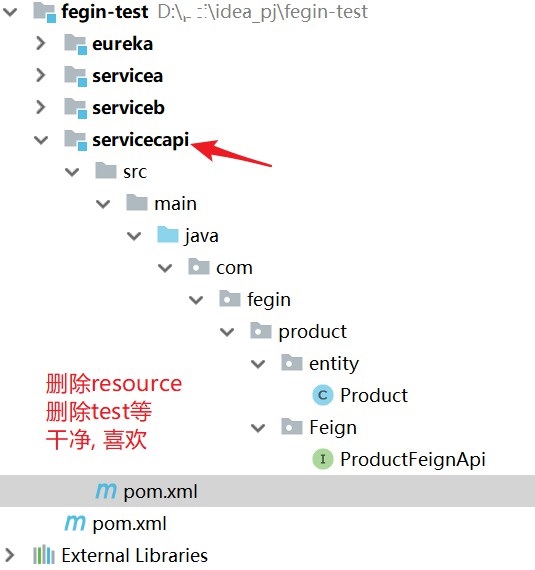
<?xml version="1.0" encoding="UTF-8"?>
<project xmlns="http://maven.apache.org/POM/4.0.0"
         xmlns:xsi="http://www.w3.org/2001/XMLSchema-instance"
         xsi:schemaLocation="http://maven.apache.org/POM/4.0.0 http://maven.apache.org/xsd/maven-4.0.0.xsd">
    <parent>
        <artifactId>test</artifactId>
        <groupId>com.fegin</groupId>
        <version>0.0.1-SNAPSHOT</version>
    </parent>
    <modelVersion>4.0.0</modelVersion>

    <artifactId>servicec-api</artifactId>

    <dependencies>
        <!--lombok-->
        <dependency>
            <groupId>org.projectlombok</groupId>
            <artifactId>lombok</artifactId>
        </dependency>

        <!--微服务调用-->
        <dependency>
            <groupId>org.springframework.cloud</groupId>
            <artifactId>spring-cloud-starter-openfeign</artifactId>
        </dependency>
    </dependencies>
</project>
实体类product
public class Product implements Serializable {
    private Long id;
    private String name;

    public Long getId() {
        return id;
    }

    public void setId(Long id) {
        this.id = id;
    }

    public String getName() {
        return name;
    }

    public void setName(String name) {
        this.name = name;
    }
}
feign客户端
/**
 * 服务名称
 * @author c-can-z
 */
@FeignClient(name="service-c")
public interface ProductFeignApi {

    //动态代理需要的地址, 但是我们实际操作不到
    @RequestMapping("/servicec/get")
    Product get(@RequestParam("id") Long id);
}
步骤2 创建servicec服务
项目结构

service项目依赖
<?xml version="1.0" encoding="UTF-8"?>
<project xmlns="http://maven.apache.org/POM/4.0.0"
         xmlns:xsi="http://www.w3.org/2001/XMLSchema-instance"
         xsi:schemaLocation="http://maven.apache.org/POM/4.0.0 http://maven.apache.org/xsd/maven-4.0.0.xsd">
    <parent>
        <artifactId>test</artifactId>
        <groupId>com.fegin</groupId>
        <version>0.0.1-SNAPSHOT</version>
    </parent>
    <modelVersion>4.0.0</modelVersion>

    <artifactId>servicec</artifactId>
    <dependencies>
        <!--springboot web-->
        <dependency>
            <groupId>org.springframework.boot</groupId>
            <artifactId>spring-boot-starter-web</artifactId>
        </dependency>
        <!--eureka客户端配置-->
        <dependency>
            <groupId>org.springframework.cloud</groupId>
            <artifactId>spring-cloud-starter-netflix-eureka-client</artifactId>
        </dependency>

        <!--zipkin客户端配置, 已经包含sleuth-->
        <dependency>
            <groupId>org.springframework.cloud</groupId>
            <artifactId>spring-cloud-starter-zipkin</artifactId>
        </dependency>

        <!--springboot 测试-->
        <dependency>
            <groupId>org.springframework.boot</groupId>
            <artifactId>spring-boot-starter-test</artifactId>
            <scope>test</scope>
        </dependency>
        <!--导入api-->
        <dependency>
            <groupId>com.fegin</groupId>
            <artifactId>servicec-api</artifactId>
            <version>0.0.1-SNAPSHOT</version>
        </dependency>
    </dependencies>

</project>
servicec的 application.yml
server:
  port: 9993
spring:
  application:
    name: service-c
  zipkin:
    base-url: http://localhost:9411
  sleuth:
    sampler:
      probability: 1
eureka:
  client:
    serviceUrl:
      defaultZone: http://localhost:8761/eureka/
    registry-fetch-interval-seconds: 5 #eureka client刷新本地缓存时间,默认30
  instance:
    prefer-ip-address: true
    #Eureka客户端向服务端发送心跳的时间间隔,单位为秒(客户端告诉服务端自己会按照该规则),默认30
    lease-renewal-interval-in-seconds: 5
    #Eureka服务端在收到最后一次心跳之后等待的时间上限,单位为秒,超过则剔除(客户端告诉服务端按照此规则等待自己),默认90
    lease-expiration-duration-in-seconds: 7
feign:
  client:
    config:
      default:
        connectTimeout: 7000
        readTimeout: 7000
logging:
  level:
    root: info
采用实现的方式
/**
 * 远程调用接口的实现类
 * @author c-can-z
 */
@RestController
public class ProductFeignClient implements ProductFeignApi {

    @Override
    public Product get(Long id) {
        Product product = new Product();
        product.setId(id);
        product.setName("我是服务C");
        return product;
    }
}
servicec的启动类
@SpringBootApplication
public class ProductServerApplication {
    public static void main(String[] args) {
        SpringApplication.run(ProductServerApplication.class, args);
    }
}
步骤3 创建serviced服务去调用servicec
项目结构
注意启动类的位置, servicecapi的路径必须被启动类扫描到

serviced的依赖,
注意, 必须引入servicec的api, 有人会说有代码侵入的问题, 但是对比案例1, 如果多个项目调用, 要创建多个Feign客户端, 孰是孰非, 还得看项目的具体需求
<?xml version="1.0" encoding="UTF-8"?>
<project xmlns="http://maven.apache.org/POM/4.0.0"
         xmlns:xsi="http://www.w3.org/2001/XMLSchema-instance"
         xsi:schemaLocation="http://maven.apache.org/POM/4.0.0 http://maven.apache.org/xsd/maven-4.0.0.xsd">
    <parent>
        <artifactId>test</artifactId>
        <groupId>com.fegin</groupId>
        <version>0.0.1-SNAPSHOT</version>
    </parent>
    <modelVersion>4.0.0</modelVersion>

    <artifactId>serviced</artifactId>

    <dependencies>
        <!--springboot web-->
        <dependency>
            <groupId>org.springframework.boot</groupId>
            <artifactId>spring-boot-starter-web</artifactId>
        </dependency>
        <!--springboot 测试-->
        <dependency>
            <groupId>org.springframework.boot</groupId>
            <artifactId>spring-boot-starter-test</artifactId>
            <scope>test</scope>
        </dependency>
        <!--lombok-->
        <dependency>
            <groupId>org.projectlombok</groupId>
            <artifactId>lombok</artifactId>
        </dependency>
        <!--eureka客户端配置-->
        <dependency>
            <groupId>org.springframework.cloud</groupId>
            <artifactId>spring-cloud-starter-netflix-eureka-client</artifactId>
        </dependency>
        <!--微服务调用-->
        <dependency>
            <groupId>org.springframework.cloud</groupId>
            <artifactId>spring-cloud-starter-openfeign</artifactId>
        </dependency>
        <!--zipkin客户端配置, 已经包含sleuth-->
        <dependency>
            <groupId>org.springframework.cloud</groupId>
            <artifactId>spring-cloud-starter-zipkin</artifactId>
        </dependency>

        <dependency>
            <groupId>com.fegin</groupId>
            <artifactId>servicec-api</artifactId>
            <version>0.0.1-SNAPSHOT</version>
        </dependency>
    </dependencies>
</project>
serviced的 application.yml
server:
  port: 9994
spring:
  application:
    name: service-d
  zipkin:
    base-url: http://localhost:9411
  sleuth:
    sampler:
      probability: 1
eureka:
  client:
    serviceUrl:
      defaultZone: http://localhost:8761/eureka/
    registry-fetch-interval-seconds: 5 #eureka client刷新本地缓存时间,默认30
  instance:
    prefer-ip-address: true
    #Eureka客户端向服务端发送心跳的时间间隔,单位为秒(客户端告诉服务端自己会按照该规则),默认30
    lease-renewal-interval-in-seconds: 5
    #Eureka服务端在收到最后一次心跳之后等待的时间上限,单位为秒,超过则剔除(客户端告诉服务端按照此规则等待自己),默认90
    lease-expiration-duration-in-seconds: 7
feign:
  client:
    config:
      default:
        connectTimeout: 7000
        readTimeout: 7000
logging:
  level:
    root: info
serviced的控制类
/**
 * @author c-can-z
 */
@RestController
@RequestMapping("/order")
public class OrderController {

    @Autowired
    private ProductFeignApi productFeignApi;

    @RequestMapping("/get")
    public String get(Long id){
        Product product = productFeignApi.get(id);
        return "订单为: 货品:" + product.getName() + ", 货品id:"+product.getId();
    }
}
serviced的启动类
/**
 * @author c-can-z
 */
@SpringBootApplication
@EnableFeignClients
public class ServiceDApplication {
    public static void main(String[] args) {
        SpringApplication.run(ServiceDApplication.class,args);
    }
}
步骤4 测试Feign调用效果
http://localhost:9994/order/get?id=5

四 总结
到了这里, 不知道你是否理解 直接在调用者声明Feign客户端 或者 在被调用者接口Api中声明Feign客户端
直接在调用者声明Feign客户端:
每一个服务调用其他服务, 就需要创建一个客户端, 从代码方面来说, 相对比较麻烦
在被调用者接口Api中声明Feign客户端:
从调用者来看, 使用起来就跟使用淘宝的dubbo一样方便, 但是每一个服务调用其他服务, 就需要引入其他服务的api依赖, 从项目之间的互相依赖来看, 相对来说, 也会比较麻烦.
版权声明:本文内容由互联网用户自发贡献,该文观点与技术仅代表作者本人。本站仅提供信息存储空间服务,不拥有所有权,不承担相关法律责任。如发现本站有涉嫌侵权/违法违规的内容, 请发送邮件至 [email protected] 举报,一经查实,本站将立刻删除。
