
为了处理文件,首先,导入 fstream 库。 在这个库里面有三种数据类型:
-
ofstream- 用于写入文件 -
ifstream- 用于从文件中读取 -
fstream- 用于读取和写入
为了打开文件,我们使用 open() 函数。 该函数接收两个参数:文件名和文件打开方式。
可以打开文件的模式如下:
- ios::in - 打开要读取的文件(ifstream 的默认值)
- ios::out - 打开要写入的文件(ofstream 的默认值)
- ios::binary - 以二进制模式打开文件
- ios::app- 打开文件以在末尾附加新信息
- ios::ate - 打开并将控件移动到文件末尾
- ios::trunc - 删除现有文件中的数据
- ios::nocreate - 仅在文件已存在时打开文件
- ios::noreplace - 仅在文件不存在时打开文件
我们还可以使用符号 | 组合不同的模式 例如: myFile.open(“saldinaFile.txt”,ios::out | ios::in); 在此示例中,我们打开 saldinaFile.txt 进行写入和读取。
1.读写txt文件
#include <iostream>
#include <fstream>
#include <string>
using namespace std;

int main()
{
	fstream myFile;
	myFile.open("saldina.txt", ios::out);  // write,清空再写入
	if (myFile.is_open())
	{
		myFile << "Hello\n";
		myFile << "This is second line\n";
		myFile.close();
	}
	myFile.open("saldina.txt", ios::app);  // append,追加
	if (myFile.is_open())
	{
		myFile << "Hello2\n";
		myFile << "This is third line\n";
		myFile.close();
	}
	myFile.open("saldina.txt", ios::in);  // read,读
	if (myFile.is_open())
	{
		string line;
		while (getline(myFile, line))
		{
			cout << line << endl;
		}
		myFile.close();
	}
}
2.C++读写CSV文件
据我所知,C++ STL 中没有内置 CSV 读取器/写入器。这不是对 C++ 的打击。它只是一种低级语言。如果我们想用 C++ 读写 CSV 文件,我们将不得不处理文件 I/O、数据类型和一些关于如何读取、解析和写入数据的低级逻辑。对我来说,这是构建和测试更多有趣程序(如机器学习模型)的必要步骤。
2.1 写入CSV
这里,ofstream是一个“输出文件流”。由于它派生自ostream,我们可以像对待cout一样对待它(它也是派生自ostream)。执行这个程序的结果是,我们在可执行文件所在的目录中得到了一个名为ones.csv的文件。让我们将它封装到write_csv()函数中。
#include <string>
#include <fstream>
#include <vector>

void write_csv(std::string filename, std::string colname, std::vector<int> vals){
    // Make a CSV file with one column of integer values
    // filename - the name of the file
    // colname - the name of the one and only column
    // vals - an integer vector of values

    // Create an output filestream object
    std::ofstream myFile(filename);

    // Send the column name to the stream
    myFile << colname << "\n";

    // Send data to the stream
    for(int i = 0; i < vals.size(); ++i)
    {
        myFile << vals.at(i) << "\n";
    }

    // Close the file
    myFile.close();
}

int main() {
    // Make a vector of length 100 filled with 1s
    std::vector<int> vec(100, 1);

    // Write the vector to CSV
    write_csv("ones.csv", "Col1", vec);

    return 0;
}

现在我们可以使用 write_csv() 轻松地将整数向量写入 CSV 文件。让我们对此进行扩展以支持多个整数向量和相应的列名。
#include <string>
#include <fstream>
#include <vector>
#include <utility> // std::pair

void write_csv(std::string filename, std::vector<std::pair<std::string, std::vector<int>>> dataset){
    // Make a CSV file with one or more columns of integer values
    // Each column of data is represented by the pair <column name,column data>
    //   as std::pair<std::string,std::vector<int>>
    // The dataset is represented as a vector of these columns
    // Note that all columns should be the same size

    // Create an output filestream object
    std::ofstream myFile(filename);

    // Send column names to the stream
    for(int j = 0; j < dataset.size(); ++j)
    {
        myFile << dataset.at(j).first;
        if(j != dataset.size() - 1) myFile << ","; // No comma at end of line
    }
    myFile << "\n";

    // Send data to the stream
    for(int i = 0; i < dataset.at(0).second.size(); ++i)
    {
        for(int j = 0; j < dataset.size(); ++j)
        {
            myFile << dataset.at(j).second.at(i);
            if(j != dataset.size() - 1) myFile << ","; // No comma at end of line
        }
        myFile << "\n";
    }

    // Close the file
    myFile.close();
}

int main() {
    // Make three vectors,each of length 100 filled with 1s,2s,and 3s
    std::vector<int> vec1(100, 1);
    std::vector<int> vec2(100, 2);
    std::vector<int> vec3(100, 3);

    // Wrap into a vector
    std::vector<std::pair<std::string, std::vector<int>>> vals = {{"One", vec1}, {"Two", vec2}, {"Three", vec3}};

    // Write the vector to CSV
    write_csv("three_cols.csv", vals);

    return 0;
}
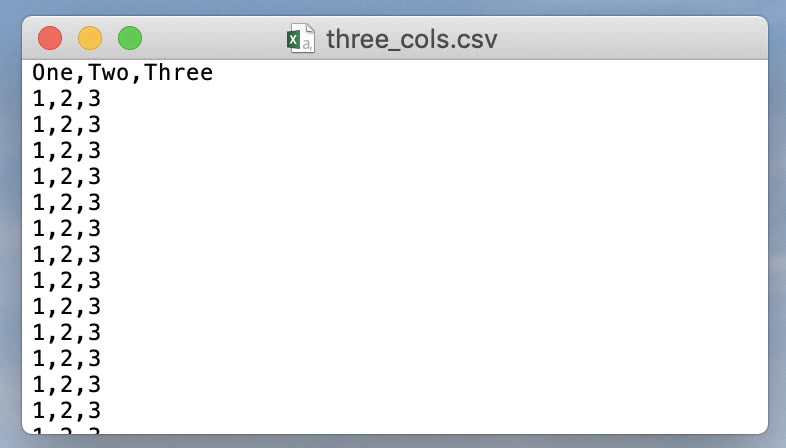
在这里,我们将每列数据表示为
<column name,column values> 的 std::pair,并将整个数据集表示为此类列的 std::vector。现在我们可以将可变数量的整数列写入 CSV 文件。
2.2 读取CSV文件(1)
现在我们已经编写了一些 CSV 文件,让我们尝试读取它们。现在让我们假设我们的文件包含整数数据和顶部的一行列名。
#include <string>
#include <fstream>
#include <vector>
#include <utility> // std::pair
#include <stdexcept> // std::runtime_error
#include <sstream> // std::stringstream

std::vector<std::pair<std::string, std::vector<int>>> read_csv(std::string filename){
    // Reads a CSV file into a vector of <string,vector<int>> pairs where
    // each pair represents <column name,column values>

    // Create a vector of <string,int vector> pairs to store the result
    std::vector<std::pair<std::string, std::vector<int>>> result;

    // Create an input filestream
    std::ifstream myFile(filename);

    // Make sure the file is open
    if(!myFile.is_open()) throw std::runtime_error("Could not open file");

    // Helper vars
    std::string line, colname;
    int val;

    // Read the column names
    if(myFile.good())
    {
        // Extract the first line in the file
        std::getline(myFile, line);

        // Create a stringstream from line
        std::stringstream ss(line);

        // Extract each column name
        while(std::getline(ss, colname, ',')){

            // Initialize and add <colname,int vector> pairs to result
            result.push_back({colname, std::vector<int> {}});
        }
    }

    // Read data,line by line
    while(std::getline(myFile, line))
    {
        // Create a stringstream of the current line
        std::stringstream ss(line);

        // Keep track of the current column index
        int colIdx = 0;

        // Extract each integer
        while(ss >> val){

            // Add the current integer to the 'colIdx' column's values vector
            result.at(colIdx).second.push_back(val);

            // If the next token is a comma,ignore it and move on
            if(ss.peek() == ',') ss.ignore();

            // Increment the column index
            colIdx++;
        }
    }

    // Close file
    myFile.close();

    return result;
}

int main() {
    // Read three_cols.csv and ones.csv
    std::vector<std::pair<std::string, std::vector<int>>> three_cols = read_csv("three_cols.csv");
    std::vector<std::pair<std::string, std::vector<int>>> ones = read_csv("ones.csv");

    // Write to another file to check that this was successful
    write_csv("three_cols_copy.csv", three_cols);
    write_csv("ones_copy.csv", ones);

    return 0;
}
该程序读取我们之前创建的 CSV 文件并将每个数据集写入一个新文件,本质上是创建原始文件的副本。
2.3 读取CSV文件(2)
示例CSV文件如下所示。
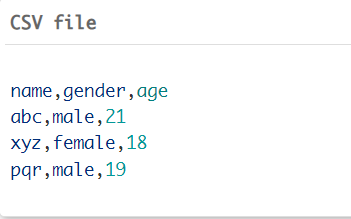
在这个文件中,每行中的每个值都由逗号分隔。第一行表示列名,分别为姓名、性别和年龄。在每一行之后,都有一个换行符,该换行符存储在内部,在文件中不可见。文件中的每一行表示一个不同的记录,而每个逗号分隔的值表示记录的一个字段。
读取 CSV 文件本质上类似于读取 C++ 中的所有其他文件。不同之处在于从行中提取值的方式。要读取 CSV 文件,
- 我们将使用C++ 库的
fstream或ifstream打开文件。然后,我们将使用getline()方法逐行读取文件,因为每一行都以换行符结尾。 - 该
getline()方法将文件流作为其第一个输入参数,将一个字符串变量作为其第二个参数。执行后,它将文件流的下一行存储在字符串变量中。它还接受一个可选参数delimitor。如果我们将分隔符作为输入参数传递,它会读取文件直到找到分隔符。否则,它会读取文件直到找到换行符。 - 提取一行后,我们将使用
stringstream提取该行中用逗号分隔的单词。顾名思义,stringstream将字符串转换为类似文件流的对象。 - 在这里,我们将使用
getline()方法来读取由stringstream创建的字符串流。使用getline()时,除了字符串流和名为word的字符串变量外,我们还将,作为第三个参数传递给getline()函数。通过这种方式,getline()函数只读取数据,直到一行中的下一个逗号符号。 - 我们将每个单词存储在一个名为
row的向量中,每个单词row存储在一个名为content的二维向量中。执行整个程序后,我们得到一个二维向量,其中每一行代表 CSV 文件中的一条记录,每一行的每一列代表其中的数据。
#include <iostream>
#include <fstream>
#include <string>
#include <vector>
#include <sstream>

using namespace std;

int main()
{
	string fname;
	cout<<"Enter the file name: ";
	cin>>fname;

	vector<vector<string>> content;
	vector<string> row;
	string line, word;

	fstream file (fname, ios::in);
	if(file.is_open())
	{
		while(getline(file, line))
		{
			row.clear();

			stringstream str(line);

			while(getline(str, word,'))
				row.push_back(word);
			content.push_back(row);
		}
	}
	else
		cout<<"Could not open the file\n";

	for(int i=0;i<content.size();i++)
	{
		for(int j=0;j<content[i].size();j++)
		{
			cout<<content[i][j]<<" ";
		}
		cout<<"\n";
	}

	return 0;
}
上述代码的输出如下所示。我们使用上面给出的 CSV 文件作为程序的输入。

2.4 用c++读写二进制文件(1)
/**
 * @description - Read any ASCII,BINARY or HEX file.
 * @param - Source file name and file type.
 * @return - Returns data in tuple format,use std::get<TUPLE_ID>(TUPLE_OBJ) to get data.
 */
/*Including STD-C++ libraries*/
#include <iostream> /*For basic I/O.*/
#include <fstream> /*For basic I/O.*/
#include <sstream> /*For basic I/O.*/
#include <vector> /*For STL vector.*/
#include <tuple>  /*For packing multi data.*/

using std::string;

#define BINARY_FILE 0
#define ASCII_FILE 1
#define HEX_FILE 2
std::tuple<std::vector<uint8_t>, string, string> ReadFile(string, int);
bool WriteFile(string file_name, int);

/*
Example of binary file:
	auto file_type = ReadFile("user_data.dat",BINARY_FILE);
	auto file_data = std::get<BINARY_FILE>(file_type);

Example of ASCII file:
	auto file_type = ReadFile("my_file.txt",ASCII_FILE);
	auto file_data = std::get<ASCII_FILE>(file_type);
*/

std::tuple<std::vector<uint8_t>, string> ReadFile(string file_name, int file_type)
{
	/*Buffers to store output data from file.*/
	string str_buf, hex_buf;
	std::vector<uint8_t> vec_buf;

	try {
		if (file_type == BINARY_FILE) {

			/*Open the stream in binary mode.*/
			std::ifstream bin_file(file_name, std::ios::binary);

			if (bin_file.good()) {
				/*Read Binary data using streambuffer iterators.*/
				std::vector<uint8_t> v_buf((std::istreambuf_iterator<char>(bin_file)), (std::istreambuf_iterator<char>()));
				vec_buf = v_buf;
				bin_file.close();
			}

			else {
				throw std::exception();
			}

		}

		else if (file_type == ASCII_FILE) {

			/*Open the stream in default mode.*/
			std::ifstream ascii_file(file_name);
			string ascii_data;

			if (ascii_file.good()) {
				/*Read ASCII data using getline*/
				while (getline(ascii_file, ascii_data))
					str_buf += ascii_data + "\n";

				ascii_file.close();
			}
			else {
				throw std::exception();
			}
		}

		else if (file_type == HEX_FILE) {

			/*Open the stream in default mode.*/
			std::ifstream hex_file(file_name);

			if (hex_file.good()) {
				/*Read Hex data using streambuffer iterators.*/
				std::vector<char> h_buf((std::istreambuf_iterator<char>(hex_file)), (std::istreambuf_iterator<char>()));
				string hex_str_buf(h_buf.begin(), h_buf.end());
				hex_buf = hex_str_buf;

				hex_file.close();
			}
			else {
				throw std::exception();
			}
		}

	}

	catch (std::exception const& ex) {
		string ex_str = "Error: " + file_name + ": No such file or directory";
		throw std::exception(ex_str.c_str());
	}

	auto tuple_data = make_tuple(vec_buf, str_buf, hex_buf);
	return tuple_data;
}

/**
 * @description - Write data to any ASCII,BINARY or HEX file.
 * @param - Source file name,file data and file type.
 * @return - Returns true on successfully written data otherwise returns false.
 */

bool WriteFile(string file_name, string file_data, int file_type)
{
	bool write_status = false;
	std::ofstream out_stream(file_name, (file_type == ASCII_FILE) ? std::ios::out : (file_type == BINARY_FILE || file_type == HEX_FILE) ? std::ios::binary : std::ios::out);

	if (out_stream.is_open()) {
		if (file_type == ASCII_FILE) {
			out_stream << file_data;
			write_status = true;
		}

		else if (file_type == BINARY_FILE) {
			out_stream << file_data;
			write_status = true;
		}

		else if (file_type == HEX_FILE) {
			int bin_data;
			std::stringstream ss;
			ss << std::hex << file_data;

			while (ss >> bin_data)
				out_stream.write(reinterpret_cast<const char*>(&bin_data), sizeof(char));

			write_status = true;
		}
		out_stream.close();
	}
	else {
		string ex_str = "Error: couldn't open " + file_name + " for output";
		throw std::exception(ex_str.c_str());
	}
	return write_status;
}
2.5 用c++读写二进制文件(2)
- 1.写
用C++写二进制文件,请使用write方法,它用于在给定流上写入给定数量的字节,从put指针的位置开始。如果put指针当前位于文件的末尾,则扩展文件。如果该指针指向文件的中间,则文件中的字符将被新数据覆盖。如果在写入文件期间发生了任何错误,则将流置于错误状态。
写方法的语法:ostream& write(const char*,int); - 2.读
要在c++中读取二进制文件,请使用read方法。它从给定的流中提取给定数量的字节,并将它们放入由第一个参数指向的内存中。如果在读取文件期间发生任何错误,则将流置于错误状态,随后所有的读取操作都将失败。gcount()可用于统计已经读取的字符数。然后可以使用clear()将流重置为可用状态。
读方法的语法:ifstream& write(const char*,int); - 3.伪代码
Begin
   Create a structure Student to declare variables.
   Open binary file to write.
   Check if any error occurs in file opening.
   Initialize the variables with data.
   If file open successfully,write the binary data using write method.
      Close the file for writing.
   Open the binary file to read.
   Check if any error occurs in file opening.
   If file open successfully,read the binary data file using read method.
      Close the file for reading.
   Check if any error occurs.
   Print the data.
End.
- 4.示例代码
#include<iostream>
#include<fstream>
using namespace std;
struct Student {
   int roll_no;
   string name;
};
int main() {
   ofstream wf("student.dat", ios::out | ios::binary);
   if(!wf) {
      cout << "Cannot open file!" << endl;
      return 1;
   }
   Student wstu[3];
   wstu[0].roll_no = 1;
   wstu[0].name = "Ram";
   wstu[1].roll_no = 2;
   wstu[1].name = "Shyam";
   wstu[2].roll_no = 3;
   wstu[2].name = "Madhu";
   for(int i = 0; i < 3; i++)
      wf.write((char *) &wstu[i], sizeof(Student));
   wf.close();
   if(!wf.good()) {
      cout << "Error occurred at writing time!" << endl;
      return 1;
   }
   ifstream rf("student.dat", ios::out | ios::binary);
   if(!rf) {
      cout << "Cannot open file!" << endl;
      return 1;
   }
   Student rstu[3];
   for(int i = 0; i < 3; i++)
      rf.read((char *) &rstu[i], sizeof(Student));
   rf.close();
   if(!rf.good()) {
      cout << "Error occurred at reading time!" << endl;
      return 1;
   }
   cout<<"Student's Details:"<<endl;
   for(int i=0; i < 3; i++) {
      cout << "Roll No: " << wstu[i].roll_no << endl;
      cout << "Name: " << wstu[i].name << endl;
      cout << endl;
   }
   return 0;
}
输出:
Student’s Details:
Roll No: 1
Name: Ram
Roll No: 2
Name: Shyam
Roll No: 3
Name: Madhu
2.6 用c++读写二进制文件(3)
- 1.问题描述
我使用以下代码创建一个简单的二进制文件。
ofstream outfile("binary.txt", ofstream::binary);
string text = "Hello cplusplus forum!";
outfile.write((char*)&text, text.size());
outfile.close();
当我打开此文件时,它是二进制文件,但每当我尝试使用此代码将此文件读回程序时:
char* buffer = (char*)malloc(sizeof(string));
ifstream infile("binary.txt", ifstream::binary);
infile.read(buffer, sizeof(string));
string* elem = (string*)buffer;
cout << *elem << '\n';
infile.close();
程序和Visual Studio崩溃了。
- 2.解答
第一部分有几个问题:
ofstream outfile("binary.txt", text.size());
outfile.close();
该代码可能会毫无问题地运行。但是文件 binary.txt 中包含什么?对于这类工作,十六进制编辑器很有用。在 Windows 上,您可以尝试 Hxdhttps://mh-nexus.de/en/hxd/
在我的系统上看到的是这样的:TA>.$ÀÂw..>.LXH.èUH.@? 这很没有意义。这是因为字符串对象可能不包含字符串的文本,而是包含指向堆上保存的字符串的指针,以及可能的一些其他信息。
第一步是编写字符串本身的实际文本内容。
可以通过替换第3行来实现:outfile.write((char*)&text,text.size());改为outfile.write( text.c_str(),text.size());
现在,如果您再看一下文件的内容,它应该更有意义。
但这仍然留下一个问题。你将如何读回它?如果这就是文件包含的所有内容,这很容易,只需阅读到文件末尾即可。但是,如果您只想读取原始字符串,不多也不少怎么办?
那么你可以先在文件中存储大小。像这样:
unsigned int size = text.size();
outfile.write(reinterpret_cast<char *>(&size), sizeof(size)  );
要读取文件,请按相反的步骤执行。
#include <iostream>
#include <fstream>
#include <string>

using namespace std;

int main()
{

    string text = "Hello cplusplus forum!";

    ofstream outfile("binary.txt", ofstream::binary);
    unsigned int size = text.size();                                 // get the size
    outfile.write(reinterpret_cast<char *>(&size), sizeof(size)  );  // write it to the file
    outfile.write( text.c_str(), text.size() );                      // write the actual text
    outfile.close();


    //----------------------------------------

    ifstream infile("binary.txt", ifstream::binary);

    // read the size
    size = 0;
    infile.read(reinterpret_cast<char *>(&size), sizeof(size)  );

    // Allocate a string,make it large enough to hold the input
    string buffer;
    buffer.resize(size);

    // read the text into the string
    infile.read(&buffer[0],  buffer.size() );
    infile.close();

    cout << "buffer = \n" << buffer << '\n';

}
3.C++读写Yaml文件
它的基本语法规则如下:
- 大小写敏感
- 使用缩进表示层级关系
- 缩进时不允许使用Tab键,只允许使用空格。
- 缩进的空格数目不重要,只要相同层级的元素左侧对齐即可
YAML支持的数据结构有三种。
- 对象:键值对的集合,又称为映射(mapping)/ 哈希(hashes) / 字典(dictionary)
- 数组:一组按次序排列的值,又称为序列(sequence) / 列表(list)
- 纯量(scalars):单个的、不可再分的值
一般常用yaml-cpp和OpenCV进行解析
相比yaml-cpp,OpenCV的优点是可以在YAML文件中存储矩阵,读出来就是cv::Mat格式;缺点是OpenCV要求YAML文件有一个特殊的头,与标准的YAML文件并不兼容。或者也可以理解为OpenCV定义了一种新的YAML格式。# 表示注释,从这个字符一直到行尾,都会被解析器忽略。
3.1安装yaml-cpp
https://github.com/jbeder/yaml-cpp/
- 编译环境
Windows10
VS2019
cmake-3.19.8-win64-x64 - yaml-cpp的编译
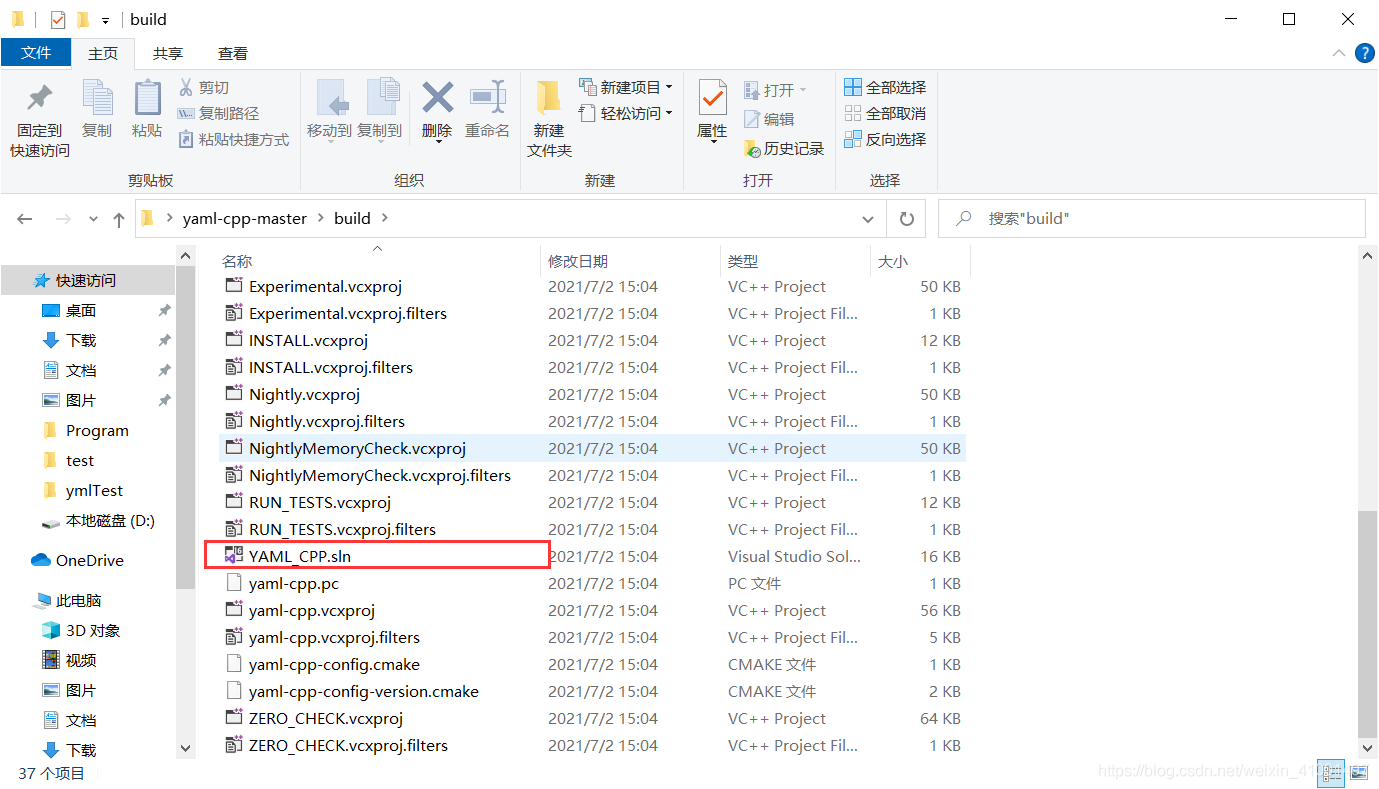
将下载好的yaml-cpp-master.zip进行解压,在源码目录下创建一个build文件夹并进入这个文件夹
mkdir build
cd build
cmake ..
接着将会看到在build目录下有一个名为YAM_-CPP.sln的文件,用VS打开它
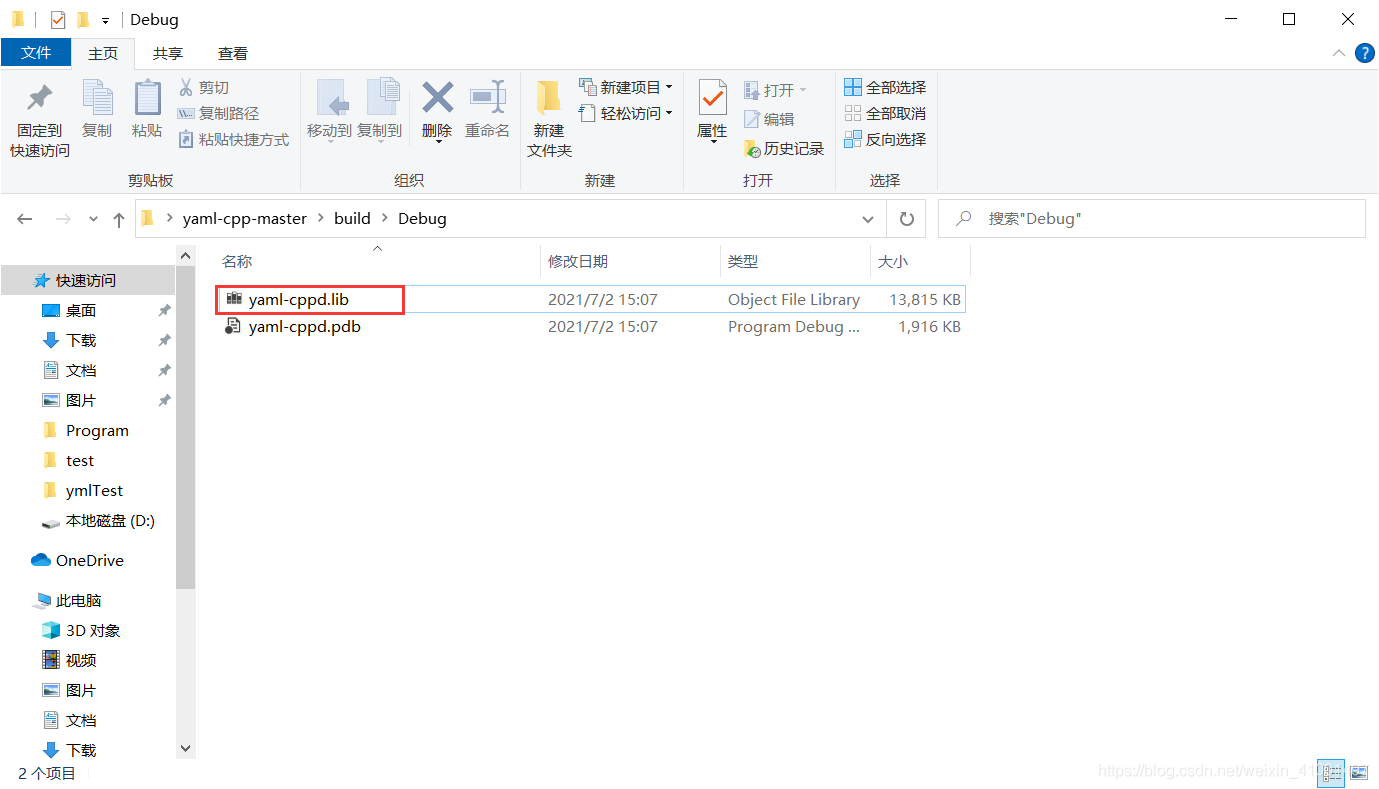
对ALL_BUILD生成解决方案,成功生成后,会在build/Debug目录下得到yaml-cppd.lib文件
3.2 yaml文件的解析(1)
- 1)
config.yaml配置文件
custom_db:
    db_domain: 10.0.0.8
    db_username: root
    db_passwd: my_passwd
    db_schema: test

redis:
    redis_domain: 10.0.0.10
    redis_passwd: 123456

hello:
    num_config: [1141studio]
    name_config: [powered, by, 1141studio]
- 2)
config_test.cpp
#include <iostream>
#include <string>
#include <stdio.h>
#include <unistd.h>
#include "yaml-cpp/yaml.h"
#include <vector>
const std::string DB_CONF = "config.yaml";
int main(int argc, char * argv[]) {
    /*----------------------------------- test yaml ----------------------------------------*/
    printf("hello world\n");
    std::cout << "this code is only for test yaml" << std::endl;

    /* Node conf. */
    YAML::Node conf = YAML::LoadFile(DB_CONF);

    /*----------------------------------- display db_config ----------------------------------------*/
    std::cout << "Database:"<< std::endl;
    std::cout << "domain:  " << conf["custom_db"]["db_domain"].as<std::string>() << std::endl;
    std::cout << "username:" << conf["custom_db"]["db_username"].as<std::string>() << std::endl;
    std::cout << "passwd:  " << conf["custom_db"]["db_passwd"].as<std::string>() << std::endl;
    std::cout << "schema:  " << conf["custom_db"]["db_schema"].as<std::string>() << std::endl;

    /*----------------------------------- display redis ----------------------------------------*/
    std::cout << "Redis" << std::endl;
    std::cout << "redis_domain: " << conf["redis"]["redis_domain"].as<std::string>() << std::endl;
    std::cout << "redis_passwd: " << conf["redis"]["redis_passwd"].as<std::string>() << std::endl;

    /*----------------------------------- display hello ----------------------------------------*/
    std::cout << "HelloServer" << std::endl;

    /* vector of name string. */
    std::vector<std::string> name_vec = conf["hello"]["num_config"].as<std::vector<std::string> >();
    if(!name_vec.empty())
      std::cout << name_vec[0] << std::endl;
    return 0;
}
- 3)CmakeLists.txt配置情况如下
cmake_minimum_required(VERSION 3.5.1)
project(nanodet-mnn)
SET(CMAKE_BUILD_TYPE "Release")

SET(CMAKE_CXX_FLAGS_RELEASE "$ENV{CXXFLAGS} -O3 -Wall")
set(CMAKE_CXX_FLAGS "${CMAKE_CXX_FLAGS} -std=c++11 -Wall")
set(EXECUTABLE_OUTPUT_PATH ${PROJECT_SOURCE_DIR}/)

# yaml-cpp的包含目录
include_directories("/gzy_mnt/YAML_X86/include")
file(GLOB SOURCE_FILES *.cpp)
add_executable(${CMAKE_PROJECT_NAME} ${SOURCE_FILES})

target_link_libraries (
        ${CMAKE_PROJECT_NAME}
        pthread
        /gzy_mnt/YAML_X86/lib/libyaml-cpp.so
)
3.3 yaml文件的解析(2)
- config.yaml配置文件
name: frank
sex: male
age: 18

skills:
    c++: 1
    java: 1
    android: 1
    python: 1
- config_demo.cpp
#include <iostream>
#include "yaml-cpp/yaml.h"
#include <fstream>

using namespace std;

int main(int argc,char** argv)
{
    YAML::Node config;
    try{
         config = YAML::LoadFile("../config.yaml");
    }catch(YAML::BadFile &e){
        std::cout<<"read error!"<<std::endl;
        return -1;
    }

    cout << "Node type " << config.Type() << endl;
    cout << "skills type " << config["skills"].Type() << endl;

    //可以用string类型作为下表,读取参数
    string age = "age";
    cout << "age when string is label:" << config[age].as<int>() << endl;

    cout << "name:" << config["name"].as<string>() << endl;
    cout << "sex:" << config["sex"].as<string>() << endl;
    cout << "age:" << config["age"].as<int>() << endl;

    //读取不存在的node值,报YAML::TypedBadConversion异常
    try{
        string label = config["label"].as<string>();
    }catch(YAML::TypedBadConversion<string> &e){
        std::cout<<"label node is NULL"<<std::endl;
    }//TypedBadConversion是模板类,读取什么类型的参数就传入什么类型


    cout << "skills c++:" << config["skills"]["c++"].as<int>() << endl;
    cout << "skills java:" << config["skills"]["java"].as<int>() << endl;
    cout << "skills android:" << config["skills"]["android"].as<int>() << endl;
    cout << "skills python:" << config["skills"]["python"].as<int>() << endl;
 	// yaml-cpp 中也可以通过迭代的方式,访问 Node 中的内容。
	// 比如,访问 skills 下面的各个元素。
    for(YAML::const_iterator it= config["skills"].begin(); it != config["skills"].end();++it)
    {
        cout << it->first.as<string>() << ":" << it->second.as<int>() << endl;
    }

    YAML::Node test1 = YAML::Load("[1,2,3,4]");
    cout << " Type: " << test1.Type() << endl;

    YAML::Node test2 = YAML::Load("1");
    cout << " Type: " << test2.Type() << endl;

    YAML::Node test3 = YAML::Load("{'id':1,'degree':'senior'}");
    cout << " Type: " << test3.Type() << endl;

    ofstream fout("./testconfig.yaml"); //保存config为yaml文件

    config["score"] = 99;//添加新元素

    fout << config;

    fout.close();


    return 0;
}
3.4 node的增删改查
#include <fstream>
#include <yaml-cpp/yaml.h>
#include <iostream>
#include <assert.h>

int main()
{
    YAML::Node node;
    assert(node.IsNull());  //初始化的节点是Null类型
    node["key"] = "value";  //当你给它赋值键值对,它转变为Map类型
    //node.force_insert("key","value");//这个操作和上面等价,但是它不会检查是否存在"key"键,不推荐使用
    if(node["mascot"])
        std::cout << node["mascot"].as<std::string>() << "\n";//单纯的查询操作不会增加一个key,当然上面的if不会执行

    node["number"] = 255;
    assert(node.IsMap());   //node是一个Map
    node["seq"].push_back("first element");
    node["seq"].push_back("second element");//node的seq下是Sequence类型,有两个参数

    YAML::Node node_2;
    node_2.push_back("first item");//如果你不给node_2键值对,它是一个sequence类型
    node_2.push_back("second_item");
    node_2.push_back("third_item");
    std::vector<int> v = {1,3,5,7,9};//给node_2插入了一个Sequence
    node_2.push_back(v);
    assert(node_2.IsSequence());//当然,node_2仍然是一个Sequence

    assert(node_2[0].as<std::string>() == "first item");
    //对于Sequence类型,你可以使用它的下标来访问
    //注意这里as<T>是一个模板转换,node_2[0]的type是NodeType::Scalar
    auto it = node_2.begin();
    for(; it != node_2.end(); it++)
        std::cout << *(it) << std::endl;
    //当然,你也可以用迭代器来访问
    //他们的类型分别是NodeType::Scalar,NodeType::Scalar,NodeType::Scalar,NodeType::Sequence
    //取值时记得使用as进行模板转换
    node_2["key"] = "value";
    assert(node_2.IsMap());//一旦node_2接收到键值对,它转变为Map类型
    assert(node_2[0].as<std::string>() == "first item");//此时,Sequence时的下标变为它的key值
    node["node_2"] = node_2;//将node_2作为node的一个子项
    node["pointer_to_first_element"] = node["seq"][0];//你也可以给已有的node设置一个别名,类似于一个指针
    assert(node["pointer_to_first_element"].as<std::string>() == "first element");//你可以通过这个指针访问那个node

    node.remove(node["seq"][0]);//你可以通过指定一个node来删除它
    node.remove("pointer_to_first_element");//你也可以通过指定key来删除它
}
如果你执行std::cout<<node<<endl;
应该会得到以下结果
key: value
number: 255
seq:
  - first element
  - second element
node_2:
  0: first item
  1: second_item
  2: third_item
  3:
    - 1
    - 3
    - 5
    - 7
    - 9
  key: value
参考目录
https://java2blog.com/read-csv-file-in-cpp/#:~:text=To%20read%20a%20CSV%20file%2C,variable%20as%20its%20second%20argument.
https://gist.github.com/haseeb-heaven/ee3f5931f7951106bea550c119a68c57
http://www.cplusplus.com/forum/beginner/224309/
https://blog.csdn.net/qq_23123181/article/details/123627596
https://blog.csdn.net/xhtchina/article/details/113868147
原文地址:https://blog.csdn.net/weixin_43229348
版权声明:本文内容由互联网用户自发贡献,该文观点与技术仅代表作者本人。本站仅提供信息存储空间服务,不拥有所有权,不承担相关法律责任。如发现本站有涉嫌侵权/违法违规的内容, 请发送邮件至 dio@foxmail.com 举报,一经查实,本站将立刻删除。