

一、背景
在flink本地环境安装完成之后,就想着怎么能调试和运行一个flink示例程序,本文记录下过程。
二、获取flink源码
通过如下命令,获取flink源码,在源码中有flink-examples模块,该模块中包含简单的SocketwindowWordCount.java示例程序。
git clone https://github.com/apache/flink.git
其中SocketwindowWordCount.java示例程序源码如下:
/*
 * Licensed to the Apache Software Foundation (ASF) under one
 * or more contributor license agreements.  See the NOTICE file
 * distributed with this work for additional @R_239_4045@ion
 * regarding copyright ownership.  The ASF licenses this file
 * to you under the Apache License, Version 2.0 (the
 * "License"); you may not use this file except in compliance
 * with the License.  You may obtain a copy of the License at
 *
 * http://www.apache.org/licenses/LICENSE-2.0
 *
 * Unless required by applicable law or agreed to in writing, software
 * distributed under the License is distributed on an "AS IS" BASIS,
 * WITHOUT WARRANTIES OR CONDITIONS OF ANY KIND, either express or implied.
 * See the License for the specific language governing permissions and
 * limitations under the License.
 */

package org.apache.flink.streaming.examples.socket;

import org.apache.flink.api.common.functions.FlatMapFunction;
import org.apache.flink.api.common.functions.ReduceFunction;
import org.apache.flink.api.java.utils.ParameterTool;
import org.apache.flink.streaming.api.datastream.DataStream;
import org.apache.flink.streaming.api.environment.StreamExecutionEnvironment;
import org.apache.flink.streaming.api.windowing.time.Time;
import org.apache.flink.util.Collector;

/**
 * Implements a streaming windowed version of the "WordCount" program.
 *
 * <p>This program connects to a server socket and reads strings from the socket.
 * The easiest way to try this out is to open a text server (at port 12345)
 * using the <i>netcat</i> tool via
 * <pre>
 * nc -l 12345
 * </pre>
 * and run this example with the hostname and the port as arguments.
 */
@SuppressWarnings("serial")
public class SocketwindowWordCount {

	public static void main(String[] args) throws Exception {

		// the host and the port to connect to
		final String hostname;
		final int port;
		try {
			final ParameterTool params = ParameterTool.fromArgs(args);
			hostname = params.has("hostname") ? params.get("hostname") : "localhost";
			port = params.getInt("port");
		} catch (Exception e) {
			System.err.println("No port specified. Please run 'SocketwindowWordCount " +
				"--hostname <hostname> --port <port>', where hostname (localhost by default) " +
				"and port is the address of the text server");
			System.err.println("To start a simple text server, run 'netcat -l <port>' and " +
				"type the input text into the command line");
			return;
		}

		// get the execution environment
		final StreamExecutionEnvironment env = StreamExecutionEnvironment.getExecutionEnvironment();

		// get input data by connecting to the socket
		DataStream<String> text = env.socketTextStream(hostname, port, "\n");

		// parse the data, group it, window it, and aggregate the counts
		DataStream<WordWithCount> windowCounts = text

				.flatMap(new FlatMapFunction<String, WordWithCount>() {
					@Override
					public void flatMap(String value, Collector<WordWithCount> out) {
						for (String word : value.split("\\s")) {
							out.collect(new WordWithCount(word, 1L));
						}
					}
				})

				.keyBy("word")
				.timeWindow(Time.seconds(5))

				.reduce(new ReduceFunction<WordWithCount>() {
					@Override
					public WordWithCount reduce(WordWithCount a, WordWithCount b) {
						return new WordWithCount(a.word, a.count + b.count);
					}
				});

		// print the results with a single thread, rather than in parallel
		windowCounts.print().setParallelism(1);

		env.execute("Socket Window WordCount");
	}

	// ------------------------------------------------------------------------

	/**
	 * Data type for words with count.
	 */
	public static class WordWithCount {

		public String word;
		public long count;

		public WordWithCount() {}

		public WordWithCount(String word, long count) {
			this.word = word;
			this.count = count;
		}

		@Override
		public String toString() {
			return word + " : " + count;
		}
	}
}
三、运行示例程序
新建idea独立工程flink-exercise,把SocketwindowWordCount.java拷贝到该工程下,目录结构如下:

1、本地调试运行
本地调试共分如下步骤:
(1)启动nc
在命令行下输入如下命令:
nc -l 9000
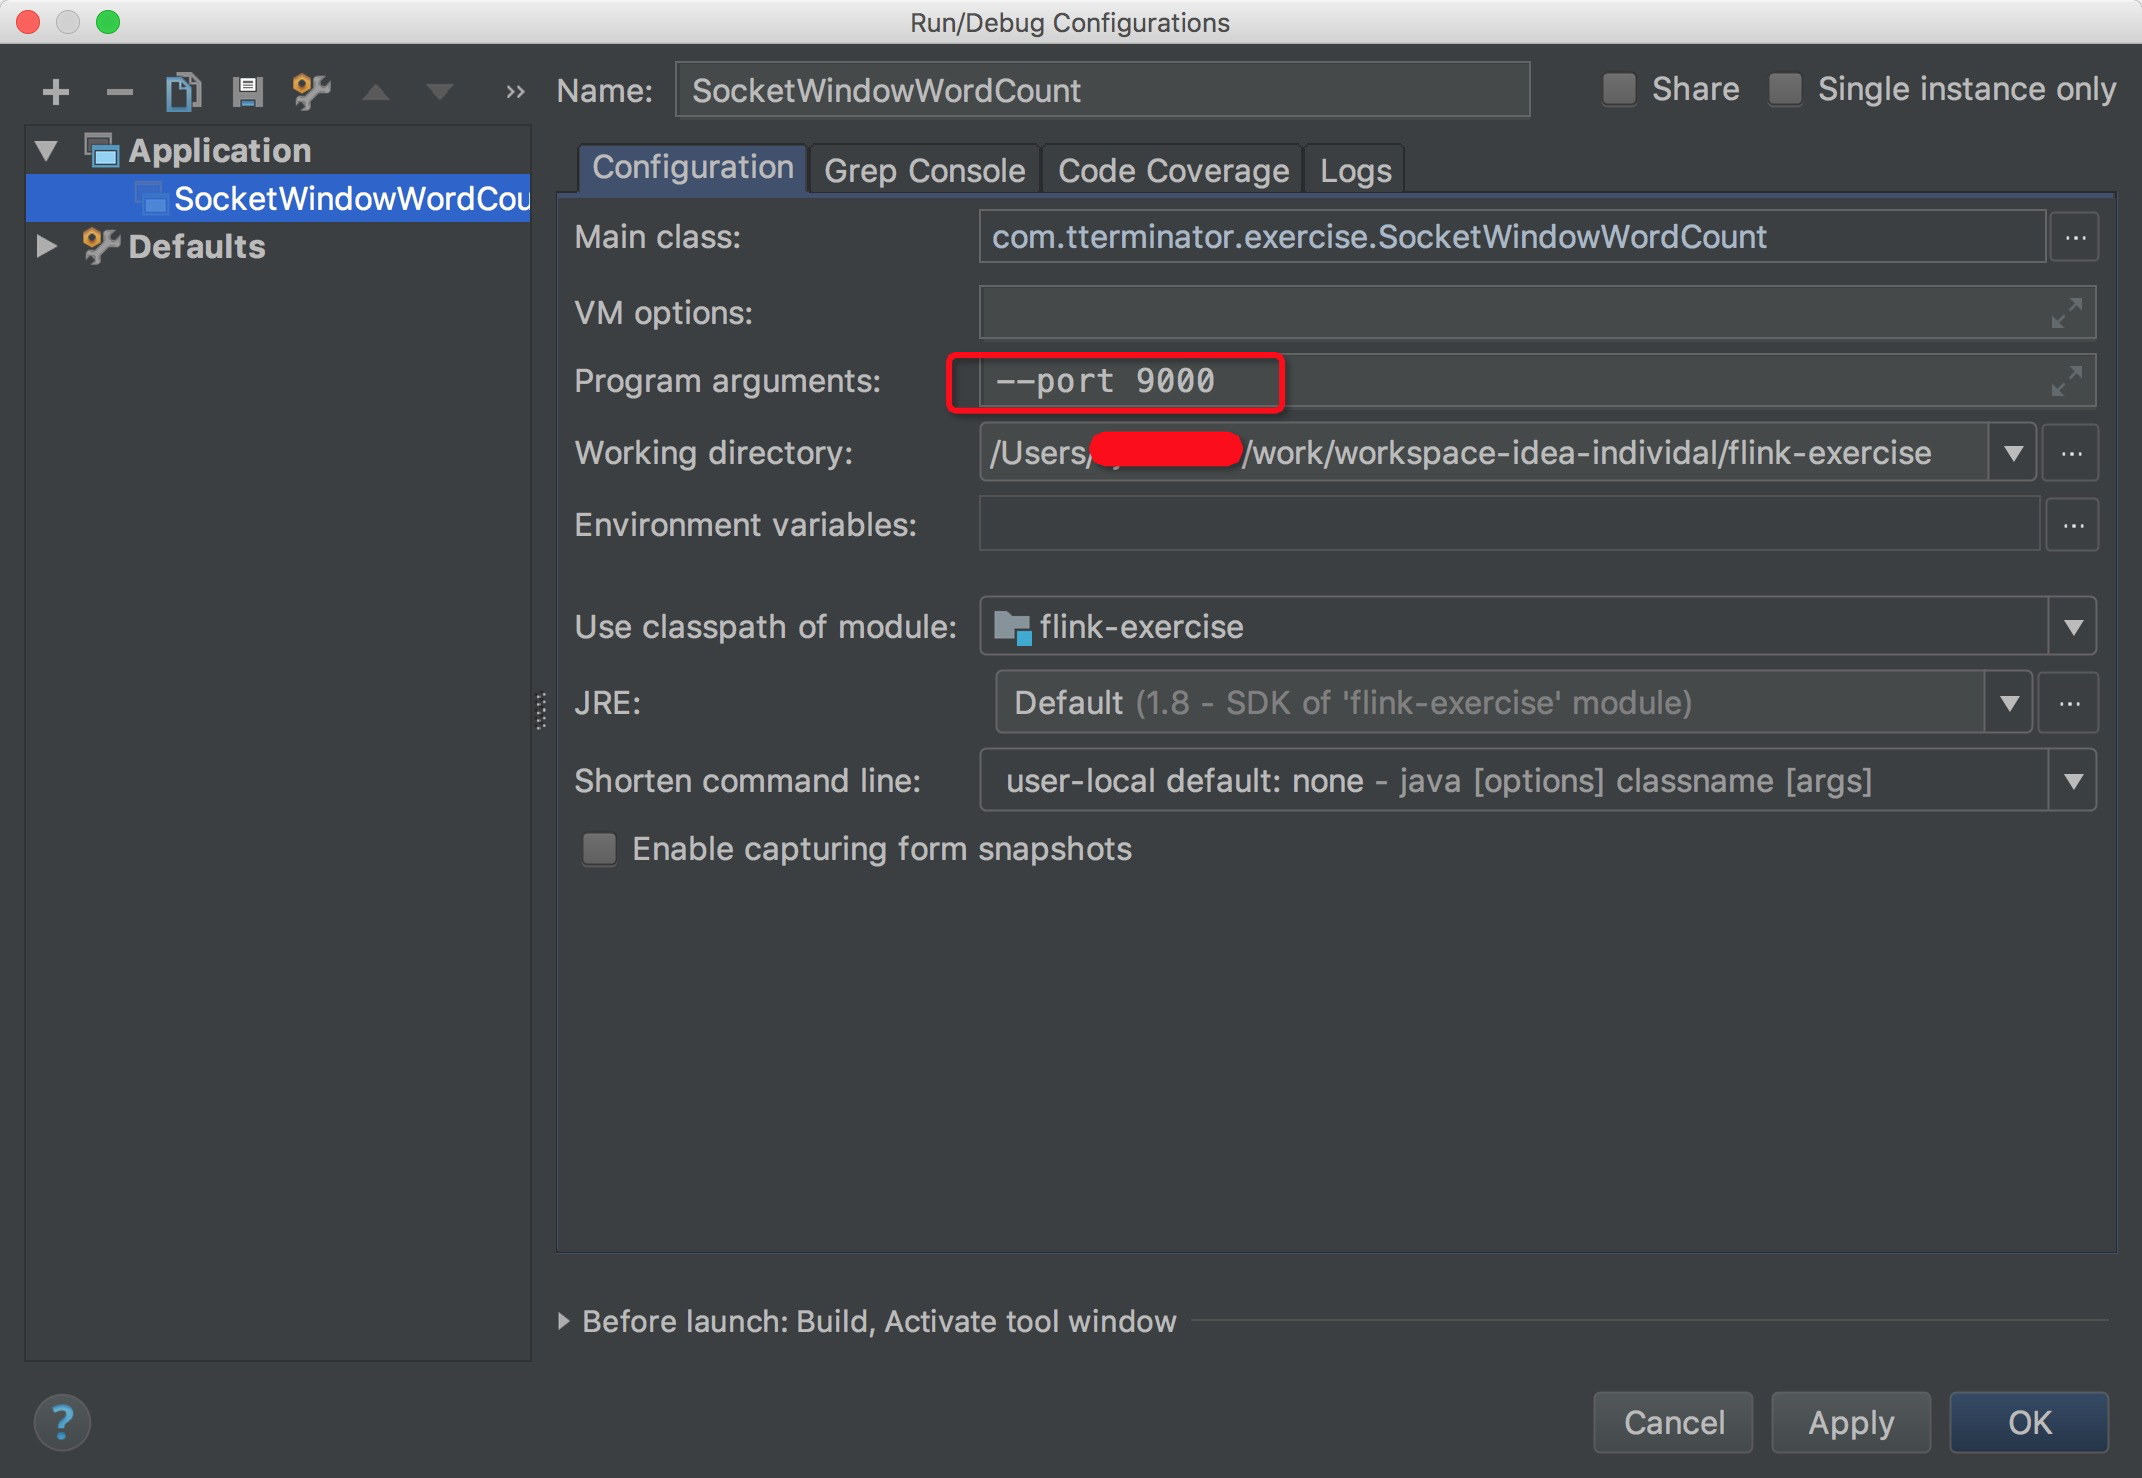
(2)启动flink程序
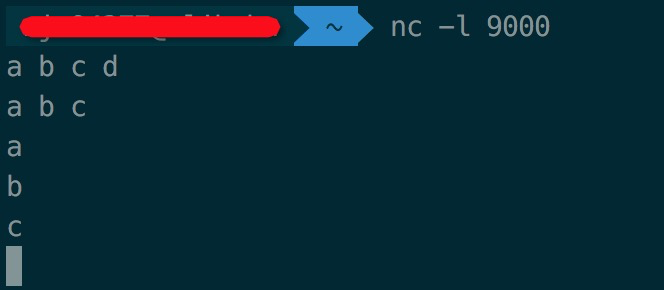
(3)nc命令行下输入内容
在nc阻塞命令窗口下输入如下内容:
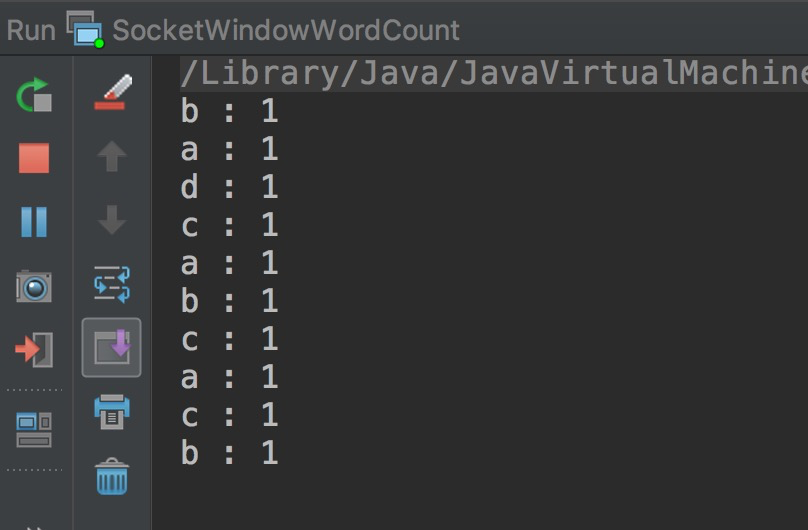
(4) 查看flink程序输出
2、提交本地集群运行
提交本地集群运行共分如下步骤:
(1)打包flink程序为jar包
<?xml version="1.0" encoding="UTF-8"?>

<project xmlns="http://maven.apache.org/POM/4.0.0" xmlns:xsi="http://www.w3.org/2001/XMLSchema-instance"
  xsi:schemaLocation="http://maven.apache.org/POM/4.0.0 http://maven.apache.org/xsd/maven-4.0.0.xsd">
  <modelVersion>4.0.0</modelVersion>

  <groupId>com.tterminator</groupId>
  <artifactId>flink-exercise</artifactId>
  <version>1.0-SNAPSHOT</version>

  <name>flink-exercise</name>
  <url>http://www.example.com</url>

  <properties>
    <maven.compiler.source>1.8</maven.compiler.source>
    <maven.compiler.target>1.8</maven.compiler.target>
    <encoding>UTF-8</encoding>
    <scala.version>2.11.12</scala.version>
    <scala.binary.version>2.11</scala.binary.version>
    <hadoop.version>2.7.6</hadoop.version>
    <flink.version>1.6.1</flink.version>
  </properties>
  <dependencies>
    <dependency>
      <groupId>org.scala-lang</groupId>
      <artifactId>scala-library</artifactId>
      <version>${scala.version}</version>
    </dependency>
    <dependency>
      <groupId>org.apache.flink</groupId>
      <artifactId>flink-java</artifactId>
      <version>${flink.version}</version>
    </dependency>
    <dependency>
      <groupId>org.apache.flink</groupId>
      <artifactId>flink-streaming-java_${scala.binary.version}</artifactId>
      <version>${flink.version}</version>
    </dependency>
    <dependency>
      <groupId>org.apache.flink</groupId>
      <artifactId>flink-scala_${scala.binary.version}</artifactId>
      <version>${flink.version}</version>
    </dependency>
    <dependency>
      <groupId>org.apache.flink</groupId>
      <artifactId>flink-streaming-scala_${scala.binary.version}</artifactId>
      <version>${flink.version}</version>
    </dependency>
    <dependency>
      <groupId>org.apache.flink</groupId>
      <artifactId>flink-table_${scala.binary.version}</artifactId>
      <version>${flink.version}</version>
    </dependency>
    <dependency>
      <groupId>org.apache.flink</groupId>
      <artifactId>flink-clients_${scala.binary.version}</artifactId>
      <version>${flink.version}</version>
    </dependency>
    <dependency>
      <groupId>org.apache.flink</groupId>
      <artifactId>flink-connector-kafka-0.10_${scala.binary.version}</artifactId>
      <version>${flink.version}</version>
    </dependency>
    <dependency>
      <groupId>org.apache.hadoop</groupId>
      <artifactId>hadoop-client</artifactId>
      <version>${hadoop.version}</version>
    </dependency>
    <dependency>
      <groupId>MysqL</groupId>
      <artifactId>mysql-connector-java</artifactId>
      <version>5.1.38</version>
    </dependency>
    <dependency>
      <groupId>com.alibaba</groupId>
      <artifactId>fastjson</artifactId>
      <version>1.2.22</version>
    </dependency>
    <dependency>
      <groupId>junit</groupId>
      <artifactId>junit</artifactId>
      <version>4.10</version>
      <scope>test</scope>
    </dependency>

  </dependencies>
  <build>
    <sourceDirectory>src/main/java</sourceDirectory>
    <testSourceDirectory>src/test/java</testSourceDirectory>
    <plugins>
      <plugin>
        <groupId>net.alchim31.maven</groupId>
        <artifactId>scala-maven-plugin</artifactId>
        <version>3.2.0</version>
        <executions>
          <execution>
            <goals>
              <goal>compile</goal>
              <goal>testCompile</goal>
            </goals>
            <configuration>
              <args>
                <!-- <arg>-make:transitive</arg> -->
                <arg>-dependencyfile</arg>
                <arg>${project.build.directory}/.scala_dependencies</arg>
              </args>
            </configuration>
          </execution>
        </executions>
      </plugin>
      <plugin>
        <groupId>org.apache.maven.plugins</groupId>
        <artifactId>maven-surefire-plugin</artifactId>
        <version>2.18.1</version>
        <configuration>
          <useFile>false</useFile>
          <disableXmlReport>true</disableXmlReport>
          <includes>
            <include>**/*Test.*</include>
            <include>**/*Suite.*</include>
          </includes>
        </configuration>
      </plugin>
      <plugin>
        <groupId>org.apache.maven.plugins</groupId>
        <artifactId>maven-shade-plugin</artifactId>
        <version>3.0.0</version>
        <executions>
          <execution>
            <phase>package</phase>
            <goals>
              <goal>shade</goal>
            </goals>
            <configuration>
              <filters>
                <filter>
                  <artifact>*:*</artifact>
                  <excludes>
                    <exclude>meta-inf/*.SF</exclude>
                    <exclude>meta-inf/*.DSA</exclude>
                    <exclude>meta-inf/*.RSA</exclude>
                  </excludes>
                </filter>
              </filters>
              <transformers>
                <transformer implementation="org.apache.maven.plugins.shade.resource.ManifestResourceTransformer">
                  <mainClass>com.tterminator.exercise.socketwindowWordCount</mainClass>
                </transformer>
              </transformers>
            </configuration>
          </execution>
        </executions>
      </plugin>
    </plugins>
  </build>
</project>
其中有一个<mainClass>需要修改为程序入口类SocketwindowWordCount。
打包好的jar名称为flink-exercise-1.0-SNAPSHOT.jar。
(2)启动本地flink集群
进入到flink本地安装目录/usr/local/Cellar/apache-flink/1.8.0/libexec/bin,执行如下命令,启动本地flink集群:
sh ./start-cluster.sh
(3)启动nc
在命令行下输入如下命令:
nc -l 9000
(4)提交flink程序到本地集群
在jar所在路径下执行如下命令:
flink run ./flink-exercise-1.0-SNAPSHOT.jar --port 9000
得到如下结果:

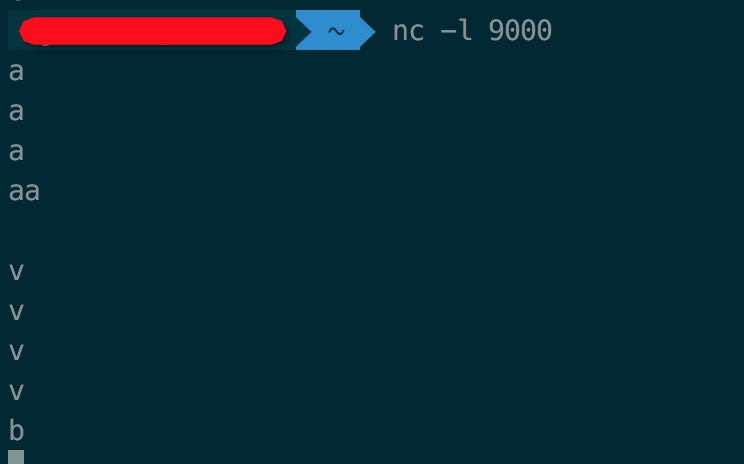
(5)nc命令行下输入内容
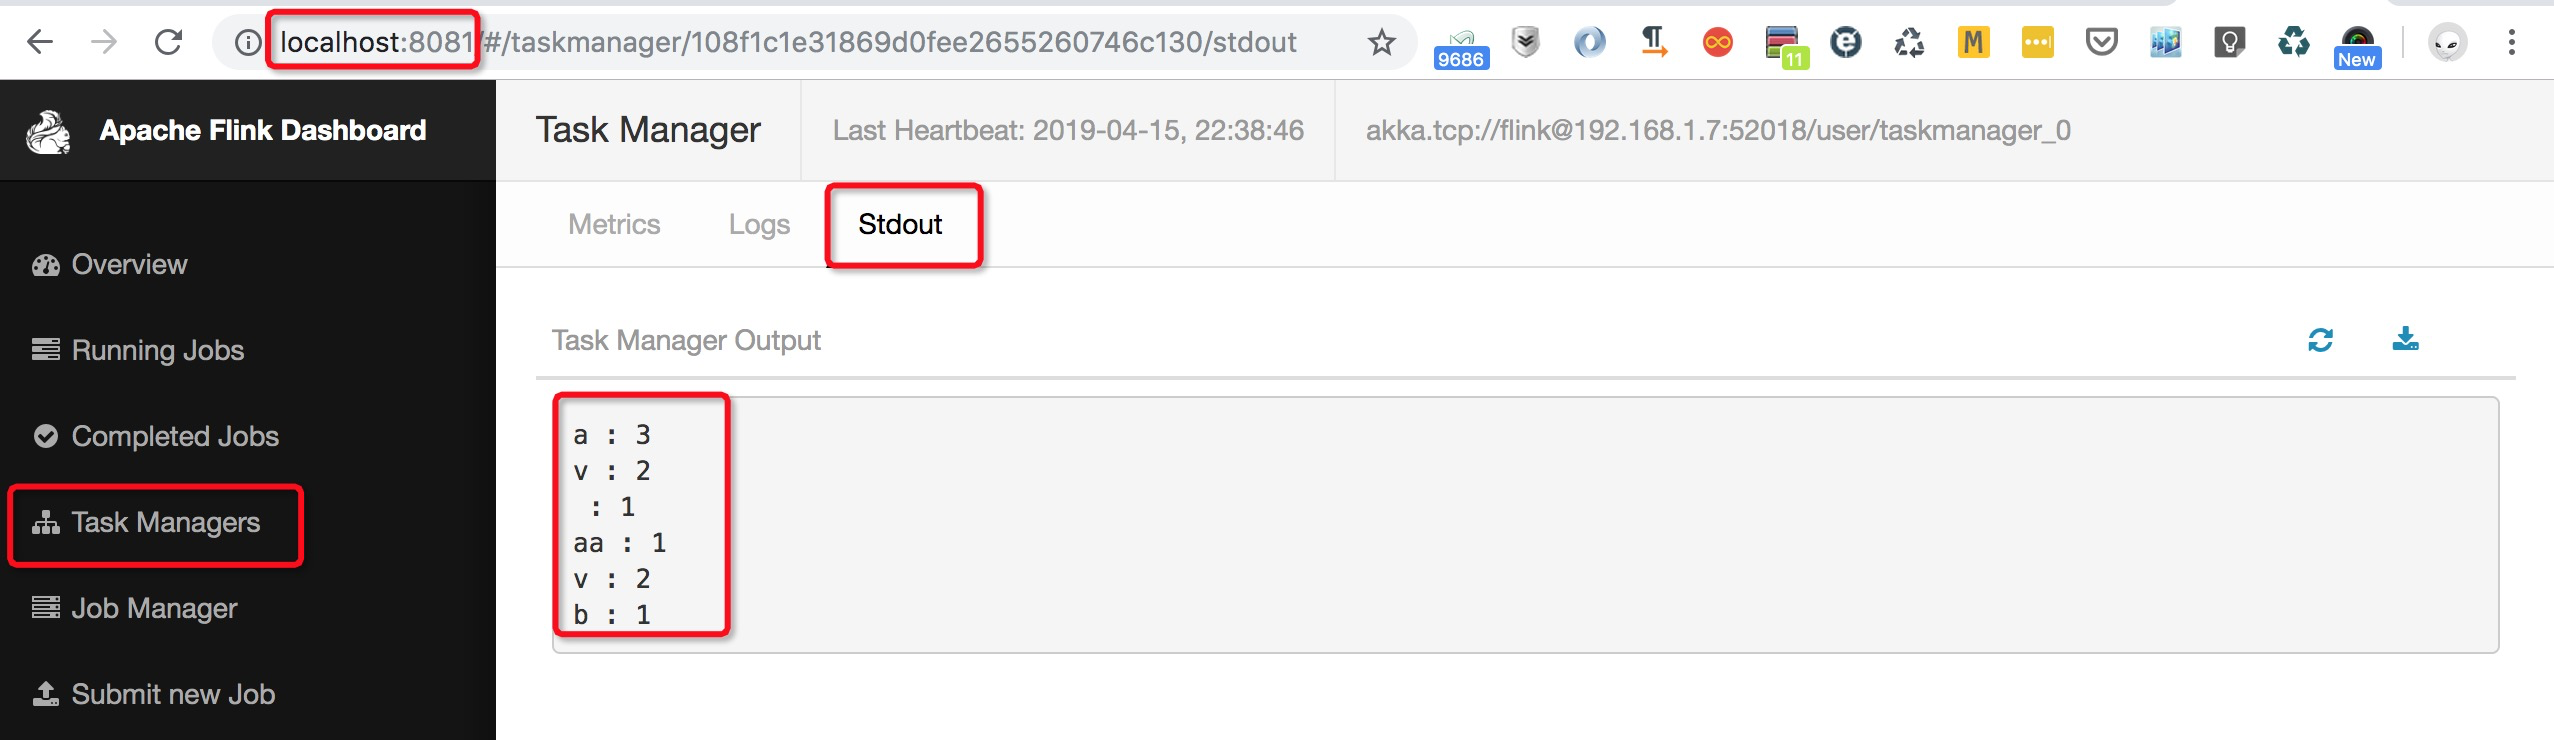
(6)使用flink集群控制台查看输出
(7)结束程序
进入到flink本地安装目录/usr/local/Cellar/apache-flink/1.8.0/libexec/bin,执行如下命令,关闭本地flink集群:
sh ./stop-cluster.sh
版权声明:本文内容由互联网用户自发贡献,该文观点与技术仅代表作者本人。本站仅提供信息存储空间服务,不拥有所有权,不承担相关法律责任。如发现本站有涉嫌侵权/违法违规的内容, 请发送邮件至 [email protected] 举报,一经查实,本站将立刻删除。
