
RV1126 SDK编译错误及解决记录
1:错误:
you need to install 'unbuffer' (from package expect or expect-dev)
log saved on /home/h00003/RV1126/rv1126_rv1109_v2.2.0_20210825/br.log
tail: cannot open '/home/h00003/RV1126/rv1126_rv1109_v2.2.0_20210825/br.log' for reading: No such file or directory
Command exited with non-zero status 1
you take 0:00.85 to build builroot
ERROR: Running build_buildroot failed!
出现问题,输入:
sudo apt install expect
重新编译。
2:错误:
2023-03-01T21:54:25 checking whether mkfifo rejects trailing slashes... yes
2023-03-01T21:54:25 checking whether mknod can create fifo without root privileges... configure: error: in `/home/h00003/RV1126/rv1126_rv1109_v2.2.0_20210825/buildroot/output/rockchip_rv1126_rv1109/build/host-tar-1.29':
2023-03-01T21:54:25 configure: error: you should not run configure as root (set FORCE_UNSAFE_CONFIGURE=1 in environment to bypass this check)
2023-03-01T21:54:25 See `config.log' for more details
2023-03-01T21:54:25 make[1]: *** [package/pkg-generic.mk:221: /home/h00003/RV1126/rv1126_rv1109_v2.2.0_20210825/buildroot/output/rockchip_rv1126_rv1109/build/host-tar-1.29/.stamp_configured] Error 1
2023-03-01T21:54:25 make: *** [/home/h00003/RV1126/rv1126_rv1109_v2.2.0_20210825/buildroot/output/rockchip_rv1126_rv1109/Makefile:16: _all] Error 2
Command exited with non-zero status 1
you take 0:44.29 to build builroot
ERROR: Running build_buildroot failed!
ERROR: exit code 1 from line 547:
解决:
1.su 回车-----------进入root用户模式
2.export FORCE_UNSAFE_CONFIGURE=1 回车------设置
3.重新编译
3:错误:
/bin/sh: 1: lz4c: not found
arch/arm/boot/compressed/Makefile:191: recipe for target 'arch/arm/boot/compressed/piggy_data' failed
make[2]: *** [arch/arm/boot/compressed/piggy_data] Error 1
arch/arm/boot/Makefile:71: recipe for target 'arch/arm/boot/compressed/vmlinux' failed
make[1]: *** [arch/arm/boot/compressed/vmlinux] Error 2
arch/arm/Makefile:351: recipe for target 'zImage' failed
make: *** [zImage] Error 2
ERROR: Running build_kernel failed!
ERROR: exit code 2 from line 500:
解决:
sudo apt-get install liblz4-tool
4:错误:
2023-03-02T00:24:58 make[2]: g++: Command not found
解决:
sudo apt-get install g++
5:错误:
2023-03-02T01:09:28 Resolving cdn.kernel.org (cdn.kernel.org)... 151.101.109.176,2a04:4e42:1a::432
2023-03-02T01:09:28 Connecting to cdn.kernel.org (cdn.kernel.org)|151.101.109.176|:443... connected.
2023-03-02T01:10:06 Unable to establish SSL connection.
2023-03-02T01:10:06 --2023-03-02 01:10:06-- http://sources.buildroot.net/iw-4.9.tar.xz
2023-03-02T01:10:06 Resolving sources.buildroot.net (sources.buildroot.net)... 172.67.72.56,2606:4700:20::681a:25,2606:4700:20::681a:125,...
2023-03-02T01:10:27 Connecting to sources.buildroot.net (sources.buildroot.net)|172.67.72.56|:80... failed: Connection refused.
2023-03-02T01:10:27 Connecting to sources.buildroot.net (sources.buildroot.net)|2606:4700:20::681a:25|:80... failed: Network is unreachable.
2023-03-02T01:10:27 Connecting to sources.buildroot.net (sources.buildroot.net)|2606:4700:20::681a:125|:80... failed: Network is unreachable.
2023-03-02T01:10:27 Connecting to sources.buildroot.net (sources.buildroot.net)|2606:4700:20::ac43:4838|:80... failed: Network is unreachable.
2023-03-02T01:10:27 package/pkg-generic.mk:138: recipe for target '/home/han/RV1126/rv1126_rv1109_v2.2.0_20210825/buildroot/output/rockchip_rv1126_rv1109/build/iw-4.9/.stamp_downloaded' failed
2023-03-02T01:10:27 make[1]: *** [/home/han/RV1126/rv1126_rv1109_v2.2.0_20210825/buildroot/output/rockchip_rv1126_rv1109/build/iw-4.9/.stamp_downloaded] Error 1
2023-03-02T01:10:27 /home/han/RV1126/rv1126_rv1109_v2.2.0_20210825/buildroot/output/rockchip_rv1126_rv1109/Makefile:16: recipe for target '_all' failed
2023-03-02T01:10:27 make: *** [_all] Error 2
_handshake() failed: Error in the pull function.
2023-03-02T01:49:35 Shallow clone failed,falling back to doing a full clone
2023-03-02T01:49:35 Doing full clone
2023-03-02T01:49:35 Cloning into 'stressapptest-master'...
2023-03-02T01:49:56 fatal: unable to access 'https://github.com/stressapptest/stressapptest/': Failed to connect to github.com port 443: Connection refused
2023-03-02T01:49:57 --2023-03-02 01:49:57-- http://sources.buildroot.net/stressapptest-master.tar.gz
2023-03-02T01:49:57 Resolving sources.buildroot.net (sources.buildroot.net)... 104.26.0.37,...
2023-03-02T01:49:57 Connecting to sources.buildroot.net (sources.buildroot.net)|104.26.0.37|:80... connected.
2023-03-02T01:49:57 HTTP request sent,awaiting response... 404 Not Found
2023-03-02T01:49:57 2023-03-02 01:49:57 ERROR 404: Not Found.
2023-03-02T01:49:57
2023-03-02T01:49:57 package/pkg-generic.mk:138: recipe for target '/home/han/RV1126/rv1126_rv1109_v2.2.0_20210825/buildroot/output/rockchip_rv1126_rv1109/build/stressapptest-master/.stamp_downloaded' failed
2023-03-02T01:49:57 make[1]: *** [/home/han/RV1126/rv1126_rv1109_v2.2.0_20210825/buildroot/output/rockchip_rv1126_rv1109/build/stressapptest-master/.stamp_downloaded] Error 1
2023-03-02T01:49:57 /home/han/RV1126/rv1126_rv1109_v2.2.0_20210825/buildroot/output/rockchip_rv1126_rv1109/Makefile:16: recipe for target '_all' failed
2023-03-02T01:49:57 make: *** [_all] Error 2
解决:
env|grep -I proxy
http_proxy=http://127.0.0.1:8118
ftp_proxy=http://127.0.0.1:8118
https_proxy=http://127.0.0.1:8118
unset http_proxy
unset ftp_proxy
unset https_proxy
6:错误:
you take 13:26.31 to build recovery
Running build_recovery succeeded.
Skipping build_ramboot for missing configs: RK_CFG_RAMBOOT.
Running build_all succeeded.
Install fakeroot First.
sudo apt-get install fakeroot
ERROR: Running build_firmware failed!
ERROR: exit code 255 from line 775:
./mkfirmware.sh $BOARD_CONFIG
解决:sudo apt-get install fakeroot
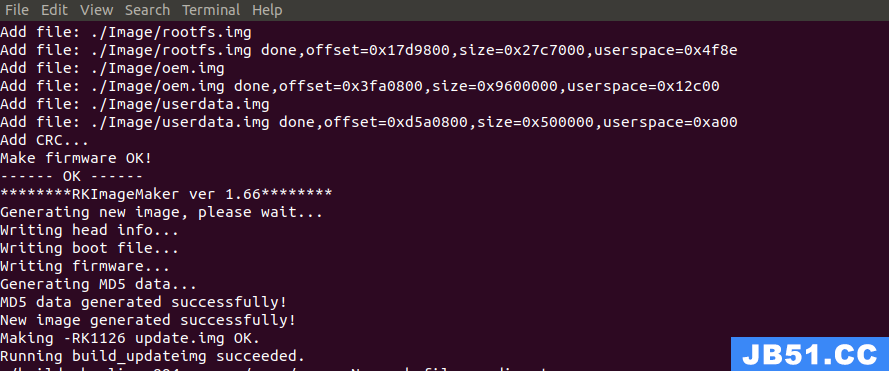
编译成功:
原文地址:https://blog.csdn.net/anhuihbo/article/details/129306218
版权声明:本文内容由互联网用户自发贡献,该文观点与技术仅代表作者本人。本站仅提供信息存储空间服务,不拥有所有权,不承担相关法律责任。如发现本站有涉嫌侵权/违法违规的内容, 请发送邮件至 dio@foxmail.com 举报,一经查实,本站将立刻删除。