

一.为什么要使用Mybatis?
MyBatis是一个半自动化的持久化层框架。
JDBC – SQL夹在Java代码块里,耦合度高导致硬编码内伤 ,维护不易且实际开发需求中sql是有变化,频繁修改的情况多见. Hibernate和JPA – 长难复杂SQL,对于Hibernate而言处理也不容易 – 内部自动生产的SQL,不容易做特殊优化。 – 基于全映射的全自动框架,大量字段的POJO进行部分映射时比较困难。 导致数据库性能下降。
对开发人员而言,核心sql还是需要自己优化 .sql和java编码分开,功能边界清晰,一个专注业务、 一个专注数据。MyBatis 避免了几乎所有的 JDBC 代码和手动设置参数以及获取结果集。
二 .Mybatis的简单使用
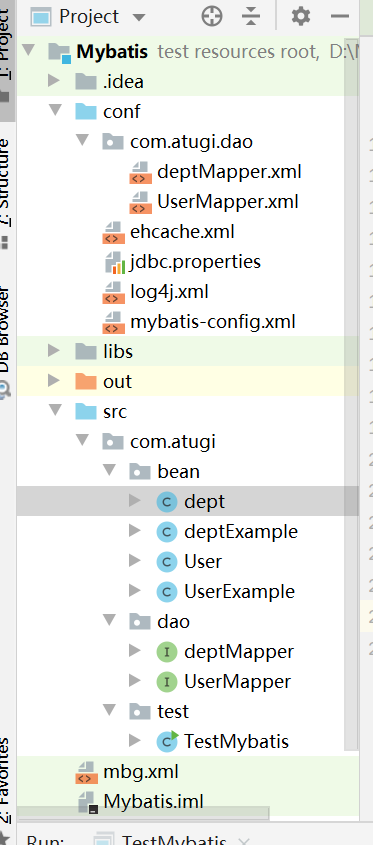
在数据库中新建一张user表,包含id(int),username(varchar),age(int)三个字段,新建一个普通的java工程,新建一个conf包,把它置为Resources Root,在建三个包分别是bean,dao,test包
新建一个名为mybatis-config.xml来配置mybatis的信息
<?xml version="1.0" encoding="UTF-8" ?>
<!DOCTYPE configuration
 PUBLIC "-//mybatis.org//DTD Config 3.0//EN"
 "http://mybatis.org/dtd/mybatis-3-config.dtd">
<configuration>

  <!-- 引入数据库文件信息 -->
 <properties resource="jdbc.properties"/>


  <!-- MyBatis 的运行时行为 -->
 <!-- 开启驼峰命名 -->
    <settings>
        <setting name= "mapUnderscoreToCamelCase" value="true" />
    </settings>

 <!-- 开启别名-->
    <typeAliases>
		<package name="com.atugi.bean"/>
	</typeAliases>

<!--
        environments配置项目的运行环境, 可以配置多个
        default: 启用的环境
        transactionManager: type: JDBC(使用了 JDBC 的提交和回滚设置) | MANAGED(不提交或回滚一个连接、让容器来管理
事务的整个生命周期) | 自定义(实现TransactionFactory接口,type=全类名/)
        dataSource type: UNPOOLED(不使用连接池) | POOLED | JNDI(在EJB 或应用服务器这类容器中查找指定的数
据源) | 自定义(实现DataSourceFactory接口,定义数据源的获取方式。)
     -->

	<environments default="development">
		<environment id="development">
			<transactionManager type="JDBC" />
			<dataSource type="POOLED">
				<property name="driver" value="${jdbc.driver}" />
				<property name="url" value="${jdbc.url}" />
				<property name="username" value="${jdbc.username}" />
				<property name="password" value="${jdbc.password}" />
			</dataSource>
		</environment>
	</environments>


	 <databaseIdProvider type="DB_VENDOR">
		<property name="MySQL" value= "mysqL" />
		<property name="OracLe" value="oracle" />
		<property name="SQL Server" value="sqLserver" />
	</databaseIdProvider>

	<!-- 将我们写好的sql映射文件(UserMapper.xml)一定要注册到全局配置文件(mybatis-config.xml)中 -->
	<mappers>
		<package name="com.atugi.dao" />
	</mappers>


</configuration>
jdbc.properties文件
jdbc.driver=com.mysql.jdbc.Driver
jdbc.url=jdbc:mysql://localhost:3306/mybatis
jdbc.username=root
jdbc.password=123456
//在bean层添加User类
public class User {
private int id;
private String username;
private int age;
public User() {
}
public User(int id, String username, int age) {
this.id = id;
this.username = username;
this.age = age;
}
省掉了get和set方法
}
//在dao层添加如下接口
public interface UserMapper {
List<User> findAllUser();
}
接下来来配置UserMapper.xml文件(这里xml文件必须与接口文件同名,注解不用配置此文件,而且此文件所属的包名也要和接口相同(因为我这里用的<package name="">来注册映射文件),当然可以把文件和接口直接放一起)
<?xml version="1.0" encoding="UTF-8" ?>
<!DOCTYPE mapper
        PUBLIC "-//mybatis.org//DTD Mapper 3.0//EN"
        "http://mybatis.org/dtd/mybatis-3-mapper.dtd">
<mapper namespace="com.atugi.dao.UserMapper">
    <!--
    namespace:名称空间;指定为接口的全类名
    id:唯一标识
    resultType:返回值类型
    #{id}:从传递过来的参数中取出id值
     -->
    <select id="findAllUser" resultType="com.atugi.bean.User" databaseId="mysqL">
		select * from User
	</select>

    <select id="findById" resultType="com.atugi.bean.User" databaseId="mysqL">
		select * from User where id=#{id}
	</select>

	<select id="getEmpByIdReturnUser" resultType="map" databaseId="mysqL">
		select * from User where id=#{id}
	</select>
    <!-- parameterType:参数类型,可以省略,
    获取自增主键的值:
    mysql支持自增主键,自增主键值的获取,mybatis也是利用statement.getGenreatedKeys();
    useGeneratedKeys="true";使用自增主键获取主键值策略
    keyProperty;指定对应的主键属性,也就是mybatis获取到主键值以后,将这个值封装给javaBean的哪个属性
-->

	<insert id="addUser" parameterType="com.atugi.bean.User" useGeneratedKeys="true" keyProperty="id" databaseId="mysqL">
		insert into USER (username,age ) values (#{username},#{age})
	</insert>

    <update id="updateUser">
		update USER
		set username=#{username},age=#{age}
		where id=#{id}
	</update>

    <delete id="deleteUserById">
		delete from USER where id=#{id}
	</delete>

</mapper>
    public static void testUser() throws IOException {
        InputStream resourceAsStream = Resources.getResourceAsStream("mybatis-config.xml");
        SqlSessionFactory build = new SqlSessionFactoryBuilder().build(resourceAsStream);
        SqlSession sqlSession = build.openSession();
        UserMapper mapper = sqlSession.getMapper(UserMapper.class);
        System.out.println(mapper.addUser(new User(null,"陈四",13)));
        System.out.println(mapper.updateUser(new User(1,"陈一",20)));
        System.out.println(mapper.findAllUser());
        mapper.deleteUserById(4);
        sqlSession.commit();
    }
过程:
1、根据xml配置文件(全局配置文件)创建一个SqlSessionFactory对象 有数据源一些运行环境信息
2、sql映射文件;配置了每一个sql,以及sql的封装规则等。
3、将sql映射文件注册在全局配置文件中
4、写代码:
e 1)、根据全局配置文件得到SqlSessionFactory;
2)、使用sqlSession工厂,获取到sqlSession对象使用他来执行增删改查
一个sqlSession就是代表和数据库的一次会话,用完关闭
3)、使用sql的唯一标志来告诉MyBatis执行哪个sql。sql都是保存在sql映射文件中的。
基础的增删改查已经完成,接下来测试多表联合查询,我们给User加上一个dept字段,在建一张dept表,它有部门id和部门名字,并建立相对应得bean类
public class User {

    private Integer id;
    private String username;
    private int age;
    private dept dept;

    public User() {
    }

    public com.atugi.bean.dept getDept() {
        return dept;
    }

    public void setDept(com.atugi.bean.dept dept) {
        this.dept = dept;
    }

    public User(Integer id, String username, int age) {
        this.id = id;
        this.username = username;
        this.age = age;
    }

    public int getId() {
        return id;
    }

    public void setId(int id) {
        this.id = id;
    }

    public String getUsername() {
        return username;
    }

    public void setUsername(String username) {
        this.username = username;
    }

    public int getAge() {
        return age;
    }

    public void setAge(int age) {
        this.age = age;
    }

    @Override
    public String toString() {
        return "User{" +
                "id=" + id +
                ", username='" + username + '\'' +
                ", age=" + age +
                ", deptid=" + dept.getD_id() +
                '}';
    }
}

//新增接口
public interface UserMapperPlus {

    User getUserById(Integer id);

    public User getUserAndDept(Integer id);

}
//测试类
    public static void testUserAndDept() throws IOException {
        InputStream resourceAsStream = Resources.getResourceAsStream("mybatis-config.xml");
        SqlSessionFactory build = new SqlSessionFactoryBuilder().build(resourceAsStream);
        //手动提交事务
        SqlSession sqlSession = build.openSession(true);
        UserMapperPlus mapper = sqlSession.getMapper(UserMapperPlus.class);
       // System.out.println(mapper.getUserById(1));

        User userAndDept = mapper.getUserAndDept(1);
        System.out.println(userAndDept);
    }
新增一个配置文件UserMapperPlus.xml,xml文件配置如下
<?xml version="1.0" encoding="UTF-8"?>
<!DOCTYPE mapper
        PUBLIC "-//mybatis.org//DTD Mapper 3.0//EN"
        "http://mybatis.org/dtd/mybatis-3-mapper.dtd">
<mapper namespace="com.atugi.dao.UserMapperPlus">

    <!--自定义某个javaBean的封装规则
        type:自定义规则的Java类型
        id:唯一id方便引用
          -->
    <resultMap type="com.atugi.bean.User" id="MySimpleUser">
        <!--指定主键列的封装规则
        id定义主键会底层有优化;
        column:指定哪一列
        property:指定对应的javaBean属性
          -->
        <id column="id" property="id"/>
        <!-- 定义普通列封装规则 -->
        <result column="username" property="username"/>
        <!-- 其他不指定的列会自动封装:我们只要写resultMap就把全部的映射规则都写上。 -->
        <result column="age" property="age"/>
    </resultMap>

    <!-- resultMap:自定义结果集映射规则;  -->
    <select id="getUserById"  resultMap="MySimpleUser">
		select * from User where id=#{id}
	</select>


    <resultMap type="com.atugi.bean.User" id="MyDifEmp">
        <id column="id" property="id"/>
        <result column="username" property="username"/>
        <result column="age" property="age"/>
        <result column="d_id" property="dept.d_id"/>
        <result column="d_name" property="dept.d_name"/>
    </resultMap>

    <!--
		使用association定义关联的单个对象的封装规则;
	 -->
    <resultMap type="com.atugi.bean.User" id="MyDifEmp2">
        <id column="id" property="id"/>
        <result column="username" property="username"/>
        <result column="age" property="age"/>

        <!--  association可以指定联合的javaBean对象
        property="dept":指定哪个属性是联合的对象
        javaType:指定这个属性对象的类型[不能省略]
        select:表明当前属性是调用select指定的方法查出的结果
	 	column:指定将哪一列的值传给这个方法
        -->
        <association property="dept" javaType="com.atugi.bean.dept">
            <id column="d_id" property="d_id"/>
            <result column="d_name" property="d_name"/>
        </association>
    </resultMap>
    <select id="getUserAndDept" resultMap="MyDifEmp">
		SELECT e.id id,e.username username,e.d_id d_id,
		d.d_id did,d.d_name dept_name FROM USER e,dept d
		WHERE e.d_id=d.d_id AND e.id=#{id}
	</select>

</mapper>
三.动态sql
在实际开发中,我们sql代码的查询参数并不一定确定,mybatis提供了多组标签让我们可以根据需求选择合适的参数,来看例子
首选要新建一个新的接口(UserSQL.java)和UserSQL.xml xml配置如下
<?xml version="1.0" encoding="UTF-8"?>
<!DOCTYPE mapper
PUBLIC "-//mybatis.org//DTD Mapper 3.0//EN"
"http://mybatis.org/dtd/mybatis-3-mapper.dtd">
<mapper namespace="com.atugi.dao.UserSQL">
<!--
• if:判断
• choose (when, otherwise):分支选择;带了break的swtich-case
如果带了id就用id查,如果带了username就用username查;只会进入其中一个
• trim 字符串截取(where(封装查询条件), set(封装修改条件))
• foreach 遍历集合
-->
<select id="getUsersTestInnerParameter" resultType="com.atugi.bean.User">
select * from User
<where>
<if test="id!=null">id=#{id}</if>
<!-- $quot ->"",&->& -->
<if test="username!=null && username!=""">and username like #{username}</if>
<if test="age!=null">and age=#{age}</if>
</where>
</select>
<select id="getUsersByConditionTrim" resultType="com.atugi.bean.User">
<!-- 后面多出的and或者or where标签不能解决
prefix="":前缀:trim标签体中是整个字符串拼串 后的结果。
prefix给拼串后的整个字符串加一个前缀
prefixOverrides="":
前缀覆盖: 去掉整个字符串前面多余的字符
suffix="":后缀
suffix给拼串后的整个字符串加一个后缀
suffixOverrides=""
后缀覆盖:去掉整个字符串后面多余的字符
-->
<!-- 自定义字符串的截取规则 -->
select * from User
<trim prefix="where" suffixOverrides="and">
<if test="id!=null">
id=#{id} and
</if>
<if test="username!=null && username!=""">
username like #{username} and
</if>
<if test="age!=null && age!=""">
age=#{age}
</if>
</trim>
</select>
<update id="updateUser">
<!-- Set标签的使用 -->
update User
<trim prefix="set" suffixOverrides=",">
<if test="username!=null">
username=#{username},
</if>
<if test="age!=null">
age=#{age},
</if>
</trim>
where id=#{id}
</update>
<!--
collection:指定要遍历的集合:
list类型的参数会特殊处理封装在map中,map的key就叫list
item:将当前遍历出的元素赋值给指定的变量
separator:每个元素之间的分隔符
open:遍历出所有结果拼接一个开始的字符
close:遍历出所有结果拼接一个结束的字符
index:索引。遍历list的时候是index就是索引,item就是当前值
遍历map的时候index表示的就是map的key,item就是map的值
#{变量名}就能取出变量的值也就是当前遍历出的元素
-->
<insert id="addUser">
<foreach collection="users" item="user" separator=",">
insert into User (username,age,d_id)
values(#{user.username},#{user.age},#{user.dept.d_id})
</foreach>
</insert>
</mapper>测试代码如下
public static void testSQl() throws IOException {
        InputStream resourceAsStream = Resources.getResourceAsStream("mybatis-config.xml");
        SqlSessionFactory build = new SqlSessionFactoryBuilder().build(resourceAsStream);
        //手动提交事务
        SqlSession sqlSession = build.openSession(true);
        UserSQL mapper = sqlSession.getMapper(UserSQL.class);
        List<User> list = mapper.getUsersTestInnerParameter(new User(null, "陈一", 20));
       System.out.println(list);
        mapper.getUsersByConditionTrim(new User(null, "陈一", 20));
        mapper.updateUser(new User(1, "陈一", 19));
        ArrayList<User> users = new ArrayList<>();
        users.add(new User(null,"陈五",21, new dept(1)));
        mapper.addUser(users);
    }
四.缓存机制
来了解一下缓存机制
两级缓存: 一级缓存:(本地缓存):sqlSession级别的缓存。一级缓存是一直开启的;
SqlSession级别的一个Map 与数据库同一次会话期间查询到的数据会放在本地缓存中。
 以后如果需要获取相同的数据,直接从缓存中拿,没必要再去查询数据库;

 一级缓存失效情况(没有使用到当前一级缓存的情况,效果就是,还需要再向数据库发出查询):
        1、sqlSession不同。
        2、sqlSession相同,查询条件不同.(当前一级缓存中还没有这个数据)
        3、sqlSession相同,两次查询之间执行了增删改操作(这次增删改可能对当前数据有影响)
        4、sqlSession相同,手动清除了一级缓存(缓存清空)

 二级缓存:(全局缓存):基于namespace级别的缓存:一个namespace对应一个二级缓存:
工作机制:
        1、一个会话,查询一条数据,这个数据就会被放在当前会话的一级缓存中;
        2、如果会话关闭;一级缓存中的数据会被保存到二级缓存中;新的会话查询信息,就可以参照二级缓存中的内容;
        3、sqlSession===EmployeeMapper==>Employee DepartmentMapper===>Department
 不同namespace查出的数据会放在自己对应的缓存中(map) 效果:数据会从二级缓存中获取 查出的数据都会被默认先放在一级缓存中。
  只有会话提交或者关闭以后,一级缓存中的数据才会转移到二级缓存中 使用:
        1)、开启全局二级缓存配置:<setting name="cacheEnabled" value="true"/>
        2)、去mapper.xml中配置使用二级缓存: <cache></cache>
        3)、我们的POJO需要实现序列化接口
 和缓存有关的设置/属性:
        1)、cacheEnabled=true:false:关闭缓存(二级缓存关闭)(一级缓存一直可用的)
        2)、每个select标签都有useCache="true": false:不使用缓存(一级缓存依然使用,二级缓存不使用)
        3)、【每个增删改标签的:flushCache="true":(一级二级都会清除)】 增删改执行完成后就会清除缓存;
        测试:flushCache="true":一级缓存就清空了;二级也会被清除; 查询标签:flushCache="false":
        如果flushCache=true;每次查询之后都会清空缓存;缓存是没有被使用的;
        4)、sqlSession.clearCache();只是清除当前session的一级缓存;
        5)、localCacheScope:本地缓存作用域:(一级缓存SESSION);当前会话的所有数据保存在会话缓存中;
        STATEMENT:可以禁用一级缓存;
  第三方缓存整合: 1)、导入第三方缓存包即可; 2)、导入与第三方缓存整合的适配包;官方有; 3)、mapper.xml中使用自定义缓存
  <cache type="org.mybatis.caches.ehcache.EhcacheCache"></cache>
public static void testLevelCache() throws IOException {
InputStream resourceAsStream = Resources.getResourceAsStream("mybatis-config.xml");
SqlSessionFactory build = new SqlSessionFactoryBuilder().build(resourceAsStream);
//手动提交事务
SqlSession sqlSession = build.openSession(true);
final SqlSession sqlSession1 = build.openSession(true);
UserMapper mapper = sqlSession.getMapper(UserMapper.class);
UserMapper mapper1 = sqlSession1.getMapper(UserMapper.class);
mapper.getEmpByIdReturnUser(1);
sqlSession.close();
mapper1.getEmpByIdReturnUser(1);
}观察日志可以清楚的看到两次 查询,但只发送了一条sql
五.逆向工程
首先需要一个mbg.xml,将其放在类路径下,其内容如下
<?xml version="1.0" encoding="UTF-8"?>
<!DOCTYPE generatorConfiguration
  PUBLIC "-//mybatis.org//DTD MyBatis Generator Configuration 1.0//EN"
  "http://mybatis.org/dtd/mybatis-generator-config_1_0.dtd">
<generatorConfiguration>

	<!--
		targetRuntime="MyBatis3Simple":生成简单版的CRUD
		MyBatis3:豪华版

	 -->
  <context id="DB2Tables" targetRuntime="MyBatis3">
  	<!-- jdbcConnection:指定如何连接到目标数据库 -->
    <jdbcConnection driverClass="com.mysql.jdbc.Driver"
        connectionURL="jdbc:mysql://localhost:3306/mybatis?allowMultiQueries=true"
        userId="root"
        password="123456">
    </jdbcConnection>

	<!--  -->
    <javaTypeResolver >
      <property name="forceBigDecimals" value="false" />
    </javaTypeResolver>

	<!-- javaModelGenerator:指定javaBean的生成策略
	targetPackage="test.model":目标包名
	targetProject="\MBGTestProject\src":目标工程
	-->
    <javaModelGenerator targetPackage="com.atugi.bean"
    		targetProject=".\src">
      <property name="enableSubPackages" value="true" />
      <property name="trimStrings" value="true" />
    </javaModelGenerator>

	<!-- sqlMapGenerator:sql映射生成策略: -->
    <sqlMapGenerator targetPackage="com.atugi.dao"
    	targetProject=".\conf">
      <property name="enableSubPackages" value="true" />
    </sqlMapGenerator>

	<!-- javaClientGenerator:指定mapper接口所在的位置 -->
    <javaClientGenerator type="XMLMAPPER" targetPackage="com.atugi.dao"
    	targetProject=".\src">
      <property name="enableSubPackages" value="true" />
    </javaClientGenerator>

	<!-- 指定要逆向分析哪些表:根据表要创建javaBean -->
    <table tableName="User" domainObjectName="User"></table>
    <table tableName="dept" domainObjectName="dept"></table>
  </context>
</generatorConfiguration>
第二,将直接的xml文件和bean类删掉, 测试代码如下
public class TestMybatis {

    public static void main(String[] args) throws Exception{
        List<String> warnings = new ArrayList<String>();
        boolean overwrite = true;
        File configFile = new File("mbg.xml");
        ConfigurationParser cp = new ConfigurationParser(warnings);
        Configuration config = cp.parseConfiguration(configFile);
        DefaultShellCallback callback = new DefaultShellCallback(overwrite);
        MyBatisGenerator myBatisGenerator = new MyBatisGenerator(config, callback, warnings);
        myBatisGenerator.generate(null);
    }

}
版权声明:本文内容由互联网用户自发贡献,该文观点与技术仅代表作者本人。本站仅提供信息存储空间服务,不拥有所有权,不承担相关法律责任。如发现本站有涉嫌侵权/违法违规的内容, 请发送邮件至 [email protected] 举报,一经查实,本站将立刻删除。