
文章目录
实验准备
- 一台rhel6.5的虚拟机(因为Mysql编译安装需要空间比较大,所以配置最好为内存2g,硬盘20g)
- 硬盘如果已经是10g,需要扩容的,参考lvm的逻辑卷扩展。
Nginx模块
Nginx的源码编译
- (1)官网下载源码包并解压
[root@LNMPserver1 ~]# tar zxf nginx-1.17.0.tar.gz
[root@LNMPserver1 ~]# ls
nginx-1.17.0  nginx-1.17.0.tar.gz
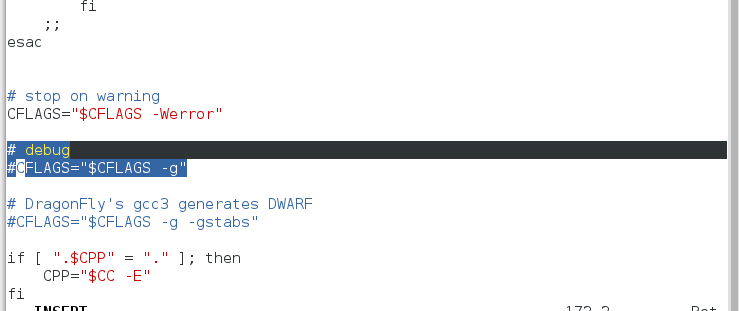
- (2)关闭debug日志,否则生产环境中会产生很多debug日志,比较占内存。
[root@LNMPserver1 nginx-1.17.0]# ls
auto     CHANGES.ru  configure  html     man     src
CHANGES  conf        contrib    LICENSE  README
[root@LNMPserver1 nginx-1.17.0]# cd auto/cc
[root@LNMPserver1 cc]# ls
acc  bcc  ccc  clang  conf  gcc  icc  msvc  name  owc  sunc
[root@LNMPserver1 cc]# vim gcc
- (3)安装编译所需要的相关依赖性的包
yum install -y pcre-devel zlib-devel gcc openssl-devel
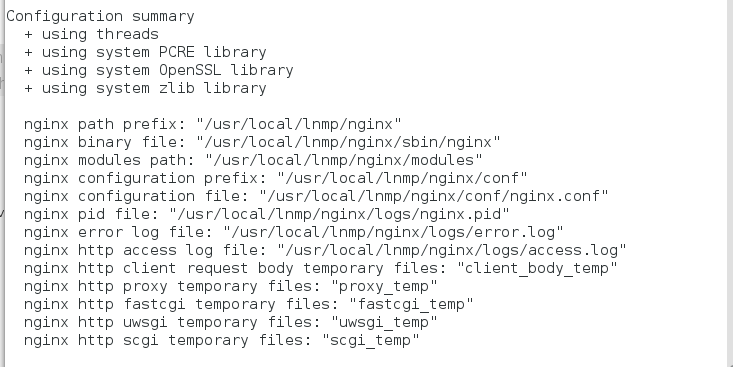
- (4)检测系统的环境,生成Makefile。
./configure --prefix=/usr/local/lnmp/nginx --with-http_ssl_module --with-http_stub_status_module --with-threads --with-file-aio
出现下面情况说明成功,否则需要根据提示安装相关依赖的包。
- (5)编译和安装
[root@LNMPserver1 nginx-1.17.0]# ls
auto     CHANGES.ru  configure  html     Makefile  objs    src
CHANGES  conf        contrib    LICENSE  man       README
[root@LNMPserver1 nginx-1.17.0]# make && make install
Nginx相关配置
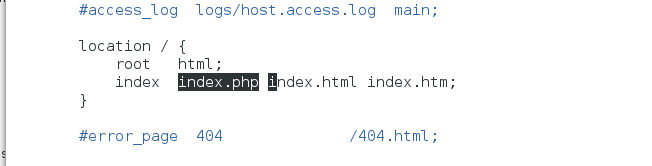
- (1)配置文件中添加php内容
[root@LNMPserver1 nginx-1.17.0]# cd /usr/local/lnmp/nginx/
[root@LNMPserver1 nginx]# ls
conf  html  logs  sbin
[root@LNMPserver1 nginx]# cd conf/
[root@LNMPserver1 conf]# ls
fastcgi.conf            koi-win             scgi_params
fastcgi.conf.default    mime.types          scgi_params.default
fastcgi_params          mime.types.default  uwsgi_params
fastcgi_params.default  nginx.conf          uwsgi_params.default
koi-utf                 nginx.conf.default  win-utf
[root@LNMPserver1 conf]# vim nginx.conf
- 默认发布页面下添加php页面
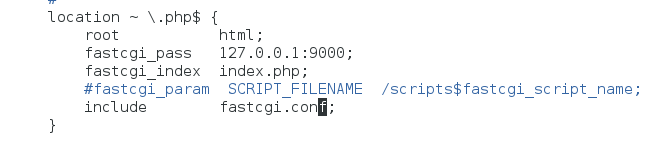
- 打开与php交互的Fastcgi接口
- (2)创建软链接方便调用
ln -s /usr/local/lnmp/nginx/sbin/nginx /usr/local/sbin/
- (3) 检测Nginx是否有语法错误,打开服务,查看端口。
[root@LNMPserver1 conf]# nginx -t
nginx: the configuration file /usr/local/lnmp/nginx/conf/nginx.conf syntax is ok
nginx: configuration file /usr/local/lnmp/nginx/conf/nginx.conf test is successful
[root@LNMPserver1 conf]# nginx
[root@LNMPserver1 conf]# netstat -tnlp
Active Internet connections (only servers)
Proto Recv-Q Send-Q Local Address               Foreign Address             State       PID/Program name
tcp        0      0 0.0.0.0:80                  0.0.0.0:*                   LISTEN      5068/nginx
tcp        0      0 0.0.0.0:22                  0.0.0.0:*                   LISTEN      886/sshd
tcp        0      0 127.0.0.1:25                0.0.0.0:*                   LISTEN      962/master
tcp        0      0 :::22                       :::*                        LISTEN      886/sshd
tcp        0      0 ::1:25                      :::*                        LISTEN      962/master
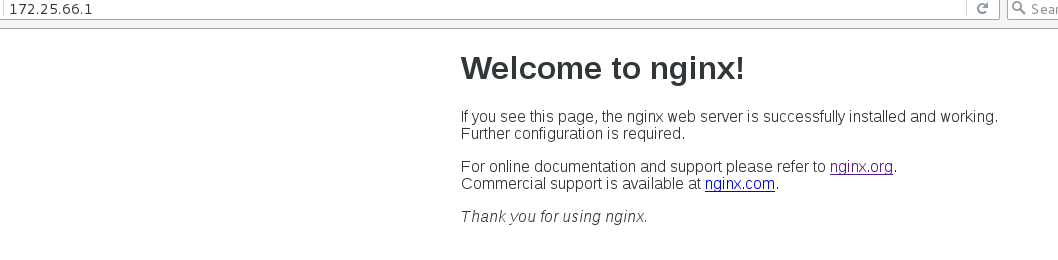
- (4)浏览器查看是否可用
Mysql模块
Mysql的编译和安装
- (1)官网下载Mysql源码包解压
[root@LNMPserver1 ~]# tar zxf mysql-boost-5.7.17.tar.gz
[root@LNMPserver1 ~]# ls
libmcrypt-2.5.8-9.el6.x86_64.rpm        mysql-boost-5.7.17.tar.gz  php-5.6.35
libmcrypt-devel-2.5.8-9.el6.x86_64.rpm  nginx-1.17.0               php-5.6.35.tar.bz2
mysql-5.7.17                            nginx-1.17.0.tar.gz
[root@LNMPserver1 ~]# cd mysql-5.7.17/
[root@LNMPserver1 mysql-5.7.17]# ls
boost           configure.cmake      INSTALL              man         README      support-files
BUILD           COPYING              libbinlogevents      mysql-test  regex       testclients
client          dbug                 libbinlogstandalone  mysys       scripts     unittest
cmake           Docs                 libevent             mysys_ssl   sql         VERSION
CMakeLists.txt  Doxyfile-perfschema  libmysql             packaging   sql-common  vio
cmd-line-utils  extra                libmysqld            plugin      storage     win
config.h.cmake  include              libservices          rapid       strings     zlib
- (2)安装源码编译检测工具cmake
我们这里从pkg.org下载了一个2.8版本的cmake包
yum install -y cmake-2.8.12.2-4.el6.x86_64.rpm
- (3)安装编译的依赖包
yum install -y ncurses-devel gcc gcc-c++ bison
- (4)使用cmake进行环境检测
cmake -DCMAKE_INSTALL_PREFIX=/usr/local/lnmp/mysql -DMYSQL_DATADIR=/usr/local/lnmp/mysql/data -DMYSQL_UNIX_ADDR=/usr/local/lnmp/mysql/data/mysql.sock -DWITH_MYISAM_STORAGE_ENGINE=1 -DWITH_INNOBASE_STORAGE_ENGINE=1 -DDEFAULT_CHARSET=utf8 -DDEFAULT_COLLATION=utf8_general_ci -DEXTRA_CHARSETS=all -DWITH_BOOST=boost/boost_1_59_0/
注意:cmake检测过后可能会保留缓存文件,会影响下一次检测,所以需要rm -rf CMakeCache.txt
同时,编译过一次,记得make clean清楚缓存。
- (5)编译&&安装
make && make install
这个过程可能会比较长,大家耐心等待即可。
Mysql配置
- (1)将mysql的启动脚本复制到系统启动服务的脚本目录中,并给执行权限。
[root@LNMPserver1 mysql-5.7.17]# cd support-files/
[root@LNMPserver1 support-files]# ls
build-tags              dtrace             mysqld_multi.server     mysql.server.sh
CMakeFiles              MacOSX             mysqld_multi.server.sh  mysql.server-sys5.sh
cmake_install.cmake     magic              mysql-log-rotate        plugins.files
CMakeLists.txt          Makefile           mysql-log-rotate.sh
compiler_warnings.supp  my-default.cnf     mysql.m4
CTestTestfile.cmake     my-default.cnf.sh  mysql.server
[root@LNMPserver1 support-files]# cp mysql.server /etc/init.d/mysqld
[root@LNMPserver1 support-files]# chmod +x /etc/init.d/mysqld
- (2)进入源码编译目录,将编译安装后的mysql的配置文件放到系统/etc/my.conf,同时做好备份。
[root@LNMPserver1 etc]# cp my.cnf my.cnf.bak
[root@LNMPserver1 mysql-5.7.17]# cd support-files/
[root@LNMPserver1 support-files]# ls
build-tags              dtrace             mysqld_multi.server     mysql.server.sh
CMakeFiles              MacOSX             mysqld_multi.server.sh  mysql.server-sys5.sh
cmake_install.cmake     magic              mysql-log-rotate        plugins.files
CMakeLists.txt          Makefile           mysql-log-rotate.sh
compiler_warnings.supp  my-default.cnf     mysql.m4
CTestTestfile.cmake     my-default.cnf.sh  mysql.server
[root@LNMPserver1 support-files]# cp my-default.cnf /etc/my.cnf
cp: overwrite `/etc/my.cnf'? y
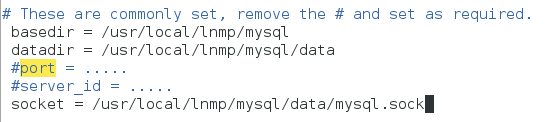
- (3)编辑配置文件/etc/my.conf,添加mysql存放路径。
vim /etc/my.cnf
- (4)添加mysql用户,对mysql服务进行限制,将mysql服务的工作空间局限在mysql用户的家目录中
[root@LNMPserver1 support-files]# groupadd -g 27 mysql
[root@LNMPserver1 support-files]# useradd -u 27 -g 27 -M -d /usr/local/lnmp/mysql/data -s /sbin/nologin mysql
- (5)创建数据目录data
将mysql目录下的所有文件的所有组都改为mysql用户,实现mysql用户的管理,并且将数据data的目录的所有人改为mysql,实现对其的操作。
[root@LNMPserver1 mysql-5.7.17]# cd /usr/local/lnmp/mysql/
[root@LNMPserver1 mysql]# ls
bin  COPYING  docs  include  lib  man  mysql-test  README  share  support-files
[root@LNMPserver1 mysql]# mkdir data
[root@LNMPserver1 mysql]# ll
total 60
drwxr-xr-x  2 root root  4096 Jul 26 16:40 bin
-rw-r--r--  1 root root 17987 Nov 28  2016 COPYING
drwxr-xr-x  2 root root  4096 Jul 26 16:51 data
drwxr-xr-x  2 root root  4096 Jul 26 16:40 docs
drwxr-xr-x  3 root root  4096 Jul 26 16:40 include
drwxr-xr-x  4 root root  4096 Jul 26 16:40 lib
drwxr-xr-x  4 root root  4096 Jul 26 16:40 man
drwxr-xr-x 10 root root  4096 Jul 26 16:41 mysql-test
-rw-r--r--  1 root root  2478 Nov 28  2016 README
drwxr-xr-x 28 root root  4096 Jul 26 16:41 share
drwxr-xr-x  2 root root  4096 Jul 26 16:41 support-files
[root@LNMPserver1 mysql]# chgrp -R mysql /usr/local/lnmp/mysql/
[root@LNMPserver1 mysql]# chown -R mysql /usr/local/lnmp/mysql/data/
[root@LNMPserver1 mysql]# ll
total 60
drwxr-xr-x  2 root  mysql  4096 Jul 26 16:40 bin
-rw-r--r--  1 root  mysql 17987 Nov 28  2016 COPYING
drwxr-xr-x  2 mysql mysql  4096 Jul 26 16:51 data
drwxr-xr-x  2 root  mysql  4096 Jul 26 16:40 docs
drwxr-xr-x  3 root  mysql  4096 Jul 26 16:40 include
drwxr-xr-x  4 root  mysql  4096 Jul 26 16:40 lib
drwxr-xr-x  4 root  mysql  4096 Jul 26 16:40 man
drwxr-xr-x 10 root  mysql  4096 Jul 26 16:41 mysql-test
-rw-r--r--  1 root  mysql  2478 Nov 28  2016 README
drwxr-xr-x 28 root  mysql  4096 Jul 26 16:41 share
drwxr-xr-x  2 root  mysql  4096 Jul 26 16:41 support-files
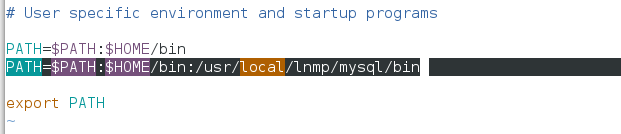
- (6)将编译生成的mysql二进制命令放进系统的环境变量中,方便调用。
[root@LNMPserver1 mysql]# vim ~/.bash_profile
[root@LNMPserver1 mysql]# source ~/.bash_profile
[root@LNMPserver1 mysql]# mysql
mysql                       mysqld_multi                mysql_secure_installation
mysqladmin                  mysqld_safe                 mysqlshow
mysqlbinlog                 mysqldump                   mysqlslap
mysqlcheck                  mysqldumpslow               mysql_ssl_rsa_setup
mysql_client_test           mysql_embedded              mysqltest
mysql_client_test_embedded  mysqlimport                 mysqltest_embedded
mysql_config                mysql_install_db            mysql_tzinfo_to_sql
mysql_config_editor         mysql_plugin                mysql_upgrade
mysqld                      mysqlpump                   mysqlxtest
- (7)执行mysql的配置初始化文件
mysqld --user=mysql --initialize
# 命令执行后最后一行会有初始密码:
2019-07-26T08:55:52.192099Z 1 [Note] A temporary password is generated for root@localhost: dVvYXr!0p/Fi
注意:如果初始化出现问题,则进入data数据的目录下将已经生成的东西删掉,再次执行即可
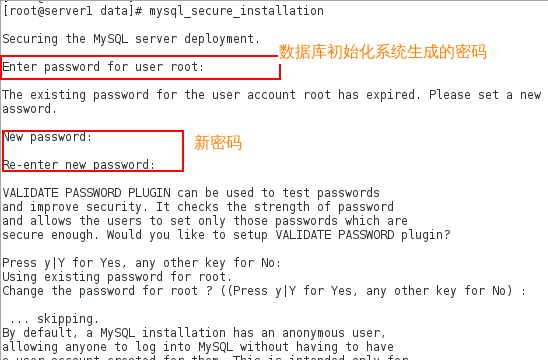
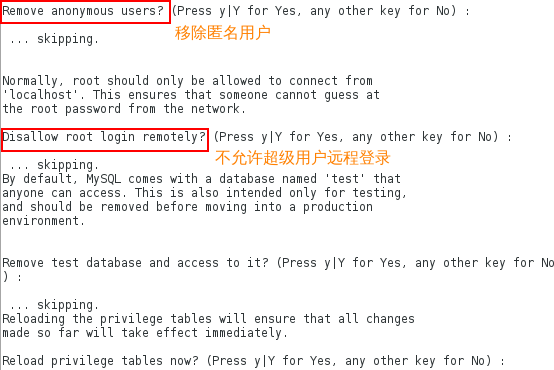
- (8)开启数据库,mysql的安全初始化
[root@LNMPserver1 mysql]# /etc/init.d/mysqld start
Starting MySQL.Logging to '/usr/local/lnmp/mysql/data/LNMPserver1.err'.
 SUCCESS!
[root@LNMPserver1 mysql]# mysql_secure_installation
- (9)使用新密码重新登录再次测试。
[root@LNMPserver1 mysql]# mysql -uroot -predhat
mysql: [Warning] Using a password on the command line interface can be insecure.
Welcome to the MySQL monitor.  Commands end with ; or \g.
Your MySQL connection id is 6
Server version: 5.7.17 Source distribution

Copyright (c) 2000, 2016, Oracle and/or its affiliates. All rights reserved.

Oracle is a registered trademark of Oracle Corporation and/or its
affiliates. Other names may be trademarks of their respective
owners.

Type 'help;' or '\h' for help. Type '\c' to clear the current input statement.

mysql> show databases;
+--------------------+
| Database           |
+--------------------+
| information_schema |
| mysql              |
| performance_schema |
| sys                |
+--------------------+
4 rows in set (0.00 sec)
Php模块
php的编译和安装
- (1)官网下载php源码包解压
[root@LNMPserver1 ~]# tar jxf php-5.6.35.tar.bz2
[root@LNMPserver1 ~]# ls
nginx-1.17.0  nginx-1.17.0.tar.gz  php-5.6.35  php-5.6.35.tar.bz2
[root@LNMPserver1 ~]# cd php-5.6.35
- (2)安装编译时所需的依赖性
yum install libmcrypt-devel-2.5.8-9.el6.x86_64.rpm libmcrypt-2.5.8-9.el6.x86_64.rpm -y
# 这两个包需要去官网上下载,比如pkg.org等。
yum install -y libxml2-devel
yum install -y libcurl-devel openssl-devel
yum install -y libjpeg-turbo-1.2.1-1.el6.x86_64
yum install -y 2:libpng-1.2.49-1.el6_2.x86_64
yum install -y freetype-devel
yum install -y gmp-devel-4.3.1-7.el6_2.2.x86_64
yum install -y net-snmp-devel
- (3)进入php目录进行环境检测,生成makefile
./configure --prefix=/usr/local/lnmp/php --with-config-file-path=/usr/local/lnmp/php/etc --with-openssl --with-snmp --with-gd --with-zlib --with-curl --with-libxml-dir --with-png-dir --with-jpeg-dir --with-freetype-dir --with-gmp --with-gettext --with-pear --enable-mysqlnd --with-mysql=mysqlnd --with-mysqli=mysqlnd --with-pdo-mysql=mysqlnd --enable-inline-optimization --enable-soap --enable-ftp --enable-sockets --enable-mbstring --enable-fpm --with-fpm-user=nginx --with-fpm-group=nginx --with-mcrypt --with-mhash
检测成功:
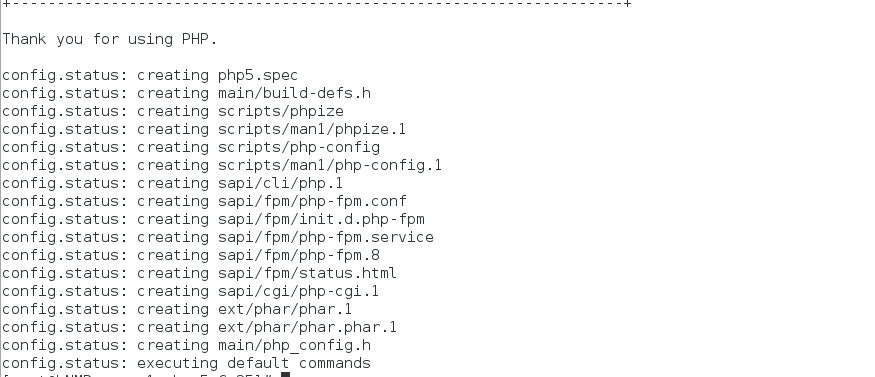
- (4)编译&&安装
make && make install
php相关配置
- (1)创建nginx用户实现对php的控制
useradd nginx
- (2)复制配置文件的模板到php配置目录中
[root@LNMPserver1 php-5.6.35]# cd /usr/local/lnmp/php/
[root@LNMPserver1 php]# ls
bin  etc  include  lib  php  sbin  var
[root@LNMPserver1 php]# cd etc/
[root@LNMPserver1 etc]# ls
pear.conf  php-fpm.conf.default
[root@LNMPserver1 etc]# cp php-fpm.conf.default php-fpm.conf
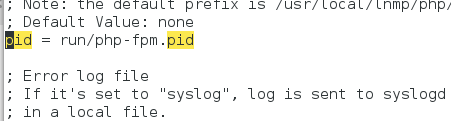
- (3)编辑php配置文件,配置pid,以及查看所属用户和组是否为nginx
vim php-fpm.conf

- (4)将php启动脚本复制到系统启动目录下,并添加执行权限
[root@LNMPserver1 fpm]# ls
config.m4  init.d.php-fpm     Makefile.frag  php-fpm.8.in     php-fpm.service     status.html.in
CREDITS    init.d.php-fpm.in  php-fpm        php-fpm.conf     php-fpm.service.in  tests
fpm        LICENSE            php-fpm.8      php-fpm.conf.in  status.html         www.conf.in
[root@LNMPserver1 fpm]# pwd
/root/php-5.6.35/sapi/fpm
[root@LNMPserver1 fpm]# cp init.d.php-fpm /etc/init.d/php-fpm
[root@LNMPserver1 fpm]# chmod +x /etc/init.d/php-fpm
- (5)开启服务,并查看其端口,默认为9000
[root@LNMPserver1 fpm]# /etc/init.d/php-fpm start
Starting php-fpm  done
[root@LNMPserver1 fpm]# netstat -tnlp
Active Internet connections (only servers)
Proto Recv-Q Send-Q Local Address               Foreign Address             State       PID/Program name
tcp        0      0 0.0.0.0:80                  0.0.0.0:*                   LISTEN      5068/nginx
tcp        0      0 0.0.0.0:22                  0.0.0.0:*                   LISTEN      5089/sshd
tcp        0      0 127.0.0.1:25                0.0.0.0:*                   LISTEN      962/master
tcp        0      0 127.0.0.1:9000              0.0.0.0:*                   LISTEN      9462/php-fpm
tcp        0      0 :::22                       :::*                        LISTEN      5089/sshd
tcp        0      0 ::1:25                      :::*                        LISTEN      962/master
验证测试
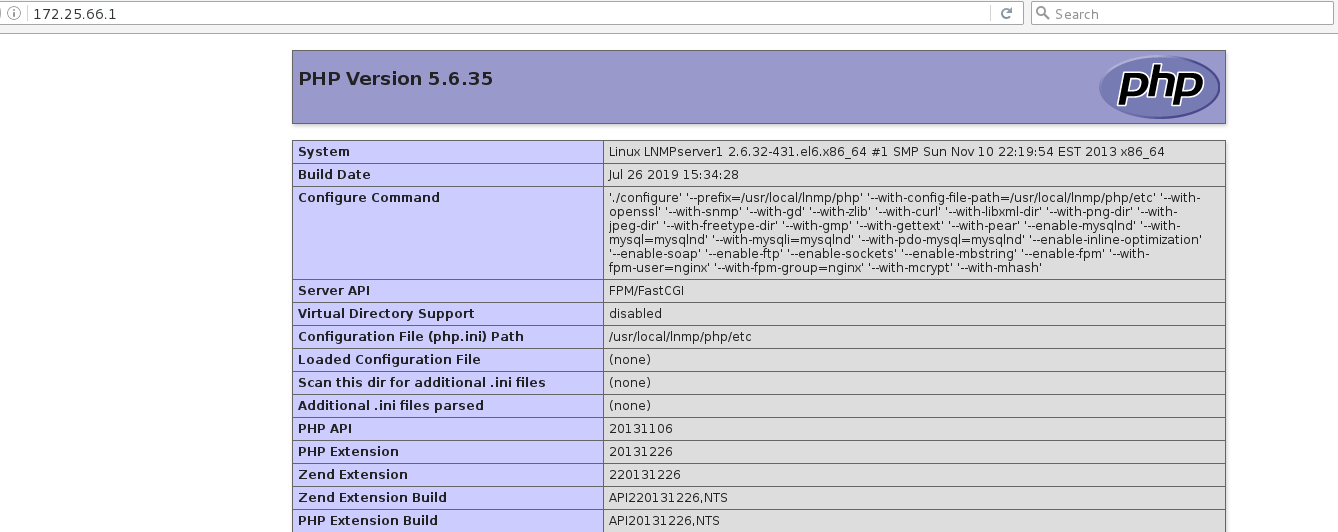
- 在nginx的默认发布目录下添加所要识别的php页面
[root@LNMPserver1 html]# vim index.php
[root@LNMPserver1 html]# cat index.php
<?php
  phpinfo()
?>
- 浏览器查看,至此,我们的LNMP架构搭建成功!
原文地址:https://blog.csdn.net/weixin_38044888/article/details/97389131
版权声明:本文内容由互联网用户自发贡献,该文观点与技术仅代表作者本人。本站仅提供信息存储空间服务,不拥有所有权,不承担相关法律责任。如发现本站有涉嫌侵权/违法违规的内容, 请发送邮件至 dio@foxmail.com 举报,一经查实,本站将立刻删除。