
1.编译安装LNMP,并安装wordpress
1.准备nginx安装环境
[root@lnmp ~]# systemctl stop firewalld
[root@lnmp ~]# setenforce 0
[root@lnmp ~]# yum -y install gcc pcre-devel openssl-devel zlib-devel
[root@lnmp ~]# useradd -r -s /sbin/nologin nginx
[root@lnmp ~]# mkdir /apps/
2.下载nginx包并解压
[root@lnmp ~]# tar -zxvf nginx-1.20.1.tar.gz -C /apps/
3.编译安装nginx
[root@lnmp ~]# cd /apps/nginx-1.20.1/
[root@lnmp nginx-1.20.1]# ll
total 792
drwxr-xr-x. 6 1001 1001   4096 Aug 16 09:42 auto
-rw-r--r--. 1 1001 1001 311503 May 25 20:35 CHANGES
-rw-r--r--. 1 1001 1001 475396 May 25 20:35 CHANGES.ru
drwxr-xr-x. 2 1001 1001    168 Aug 16 09:42 conf
-rwxr-xr-x. 1 1001 1001   2590 May 25 20:35 configure
drwxr-xr-x. 4 1001 1001     72 Aug 16 09:42 contrib
drwxr-xr-x. 2 1001 1001     40 Aug 16 09:42 html
-rw-r--r--. 1 1001 1001   1397 May 25 20:35 LICENSE
drwxr-xr-x. 2 1001 1001     21 Aug 16 09:42 man
-rw-r--r--. 1 1001 1001     49 May 25 20:35 README
drwxr-xr-x. 9 1001 1001     91 Aug 16 09:42 src
[root@lnmp nginx-1.20.1]# ./configure --prefix=/apps/nginx \
> --user=nginx \
> --group=nginx \
> --with-http_ssl_module \
> --with-http_v2_module \
> --with-http_realip_module \
> --with-http_stub_status_module \
> --with-http_gzip_static_module \
> --with-pcre \
> --with-stream \
> --with-stream_ssl_module \
> --with-stream_realip_module
[root@lnmp nginx-1.20.1]# make && make install
4.配置nginx.conf
[root@lnmp conf]# cd /apps/nginx/conf/
[root@lnmp conf]# cp nginx.conf nginx.conf.bak
[root@lnmp conf]# vim nginx.conf
user nginx nginx
[root@lnmp conf]# vim /etc/profile  ##最后添加一下两行
PATH=$PATH:/apps/nginx/sbin/
export PATH
[root@lnmp conf]# source /etc/profile
[root@lnmp conf]# nginx -t
nginx: the configuration file /apps/nginx/conf/nginx.conf syntax is ok
nginx: configuration file /apps/nginx/conf/nginx.conf test is successful
5.启动nginx
[root@lnmp conf]# nginx
[root@lnmp conf]# ps -aux |grep nginx
root      33072  0.0  0.0  20572   612 ?        Ss   10:21   0:00 nginx: master process nginx
nobody    33073  0.0  0.0  21016  1308 ?        S    10:21   0:00 nginx: worker process
root      33082  0.0  0.0 112812   976 pts/0    S+   10:21   0:00 grep --color=auto nginx
6.安装mariadb依赖包
[root@lnmp ~]# yum install bison bison-devel zlib-devel libcurl-devel libarch ive-devel boost-devel gcc gcc-c++ cmake ncurses-devel gnutls-devel libxml2-devel openssl-devel libevent-devel libaio-devel -y
7.准备mysql用户和数据存放目录
[root@lnmp ~]# useradd -r -s /sbin/nologin -d /data/mysql mysql
[root@lnmp ~]# ll /data/
total 0
[root@lnmp ~]# mkdir /data/mysql
[root@lnmp ~]# chown mysql.mysql /data/mysql/
[root@lnmp ~]# mkdir /apps/mysql
8.编译安装mariadb
[root@lnmp ~]# tar xvf mariadb-10.2.23.tar.gz
[root@lnmp ~]# cd
[root@lnmp mariadb-10.2.23]# cmake . \
-DCMAKE_INSTALL_PREFIX=/apps/mysql \
-DMYSQL_DATADIR=/data/mysql/ \
-DSYSCONFDIR=/etc/mysql \
-DMYSQL_USER=mysql \
-DWITH_INNOBASE_STORAGE_ENGINE=1 \
-DWITH_ARCHIVE_STORAGE_ENGINE=1 \
-DWITH_BLACKHOLE_STORAGE_ENGINE=1 \
-DWITH_PARTITION_STORAGE_ENGINE=1 \
-DWITHOUT_MROONGA_STORAGE_ENGINE=1 \
-DWITH_DEBUG=0 \
-DWITH_READLINE=1 \
-DWITH_SSL=system \
-DWITH_ZLIB=system \
-DWITH_LIBWRAP=0 \
-DENABLED_LOCAL_INFILE=1 \
-DMYSQL_UNIX_ADDR=/data/mysql/mysql.sock \
-DDEFAULT_CHARSET=utf8 \
-DDEFAULT_COLLATION=utf8_general_ci
[root@lnmp mariadb-10.2.23]# make && make install
9.设置环境变量
[root@lnmp ~]# vim /etc/profile
PATH=$PATH:/apps/mysql/bin
export PATH
[root@lnmp ~]# source /etc/profile
10.准备配置文件和生成数据库初始化文件
[root@lnmp ~]# cd /apps/mysql/
[root@lnmp mysql]# ./scripts/mysql_install_db --datadir=/data/mysql --user=mysql
[root@lnmp mysql]# cd /apps/
[root@lnmp apps]# cp /apps/mysql/support-files/my-huge.cnf /etc/my.cnf
cp: overwrite ‘/etc/my.cnf’? y
11.准备启动脚本并启动验证
[root@lnmp apps]# cp /apps/mysql/support-files/mysql.server /etc/init.d/mysqld
[root@lnmp apps]# service mysqld start
Reloading systemd:                                         [  OK  ]
Starting mysqld (via systemctl):                           [  OK  ]
[root@lnmp apps]# mysql
Welcome to the MariaDB monitor.  Commands end with ; or \g.
Your MariaDB connection id is 10
Server version: 10.2.23-MariaDB-log Source distribution

Copyright (c) 2000, 2018, Oracle, MariaDB Corporation Ab and others.

Type 'help;' or '\h' for help. Type '\c' to clear the current input statement.

MariaDB [(none)]> exit
Bye
12.安装php的依赖包
[root@lnmp ~]# yum install -y libxml2-devel openssl-devel libcurl-devel libjpeg-turbo-devel libpng-devel freetype-devel gmp-devel bzip2-devel libmcrypt-devel libzip-devel sqlite-devel libxslt-devel
13.解压php源码包,并进行编译安装
[root@lnmp ~]# tar xvf php-7.4.7.tar.xz
[root@lnmp php-7.4.7]# ./configure --prefix=/apps/php \
--enable-fpm \
--with-fpm-user=www \
--with-fpm-group=www \
--with-pear \
--with-curl \
--with-png-dir \
--with-freetype-dir \
--with-iconv \
--with-mhash \
--with-zlib \
--with-xmlrpc \
--with-xsl \
--with-openssl \
--with-mysqli=mysqlnd \
--with-pdo-mysql=mysqlnd \
--disable-debug \
--enable-mysqlnd \
--enable-zip \
--enable-sockets \
--enable-soap \
--enable-inline-optimization \
--enable-xml \
--enable-ftp \
--enable-exif \
--enable-wddx \
--enable-bcmath \
--enable-calendar \
--enable-shmop \
--enable-dba \
--enable-sysvsem \
--enable-sysvshm \
--enable-sysvmsg
[root@lnmp php-7.4.7]# make -j 4 && make install
14.准备php的配置文件
[root@lnmp apps]# cd /apps/php/etc/php-fpm.d/
[root@lnmp php-fpm.d]# mv www.conf.default www.conf
[root@lnmp php-fpm.d]# cp /root/php-7.4.7/php.ini-production /apps/php/etc/php.ini
[root@lnmp php-fpm.d]# cd ..
[root@lnmp etc]# cp php
php-fpm.conf.default  php-fpm.d/            php.ini
[root@lnmp etc]# cp php-fpm.conf.default php-fpm.conf
15.创建php的运行账号并启动php-fpm
[root@lnmp etc]# useradd -r -s /sbin/nologin www
[root@lnmp etc]# /apps/php/sbin/php-fpm -t
[16-Aug-2021 16:44:46] NOTICE: configuration file /apps/php/etc/php-fpm.conf test is successful

[root@lnmp etc]# /apps/php/sbin/php-fpm -c /apps/php/etc/php.ini
[root@lnmp etc]# ps -ef |grep php-fpm
root      83470      1  0 16:45 ?        00:00:00 php-fpm: master process (/apps/php/etc/php-fpm.conf)
www       83471  83470  0 16:45 ?        00:00:00 php-fpm: pool www
www       83472  83470  0 16:45 ?        00:00:00 php-fpm: pool www
root      83483  25945  0 16:45 pts/0    00:00:00 grep --color=auto php-fpm
[root@lnmp etc]# ss -tanlp |grep php-fpm
LISTEN     0      128    127.0.0.1:9000                     *:*                   users:(("php-fpm",pid=83472,fd=5),("php-fpm",pid=83471,fd=5),("php-fpm",pid=83470,fd=7))
16.配置nginx支持php-fpm
[root@lnmp nginx]# vim /apps/nginx/conf/nginx.conf
        location / {
            root   html;
            index  index.php index.html index.htm;
        }
        location ~ \.php$ {
            root           html;
            fastcgi_pass   127.0.0.1:9000;
            fastcgi_index  index.php;
            fastcgi_param  SCRIPT_FILENAME  $document_root$fastcgi_script_name;
            include        fastcgi_params;
        }
[root@lnmp nginx]# nginx -t
nginx: the configuration file /apps/nginx/conf/nginx.conf syntax is ok
nginx: configuration file /apps/nginx/conf/nginx.conf test is successful
17.准备php的测试页面并测试
[root@lnmp nginx]# vim /apps/nginx/html/index.php
cat /apps/nginx/html/index.php
<?php
phpinfo();
?>

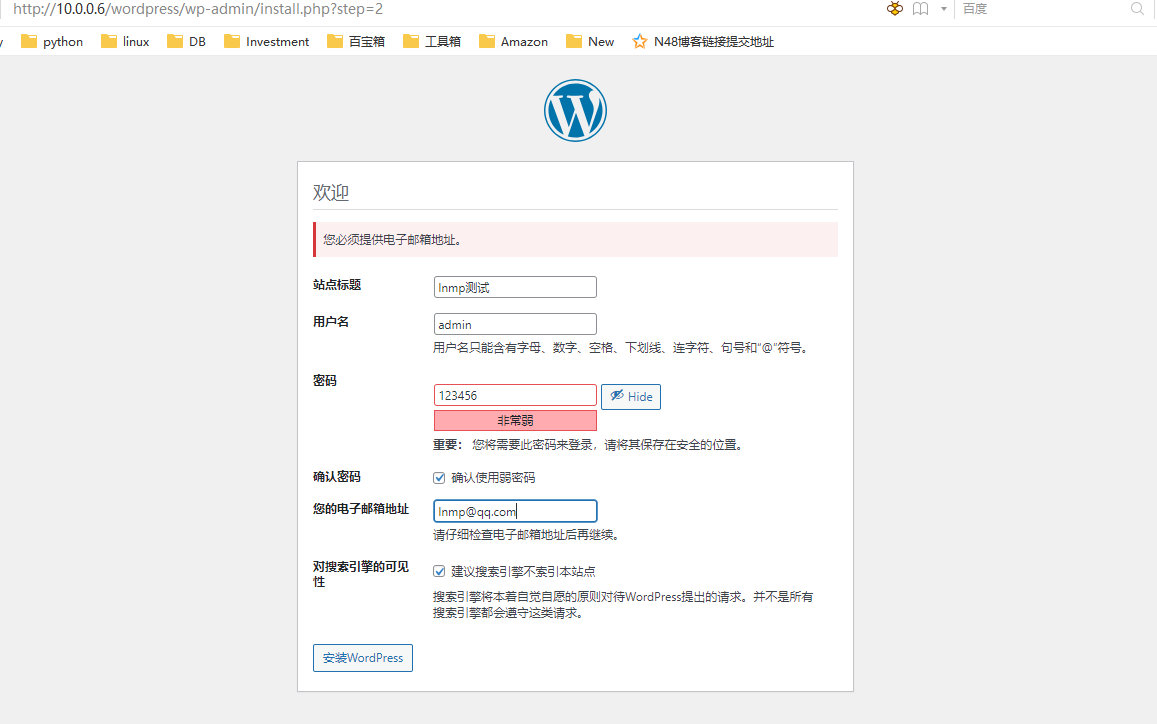
18.部署个人博客软件wordpress
[root@lnmp ~]# tar xvf wordpress-5.7.2-zh_CN.tar.gz
[root@lnmp ~]# cp -r wordpress /apps/nginx/html/
[root@lnmp ~]# cd /apps/nginx/html/wordpress/
[root@lnmp wordpress]# cp wp-config-sample.php wp-config.php
[root@lnmp wordpress]# vim wp-config.php

[root@lnmp wordpress]# mysql
Welcome to the MariaDB monitor.  Commands end with ; or \g.
Your MariaDB connection id is 11
Server version: 10.2.23-MariaDB-log Source distribution

Copyright (c) 2000, 2018, Oracle, MariaDB Corporation Ab and others.

Type 'help;' or '\h' for help. Type '\c' to clear the current input statement.

MariaDB [(none)]> grant all privileges on wordpress.* to 'wpuser'@'localhost' identified by '123456';
Query OK, 0 rows affected (0.01 sec)

MariaDB [(none)]> create database wordpress;
Query OK, 1 row affected (0.01 sec)

MariaDB [(none)]> exit
Bye
[root@lnmp wordpress]# mysql -uwpuser -p123456
Welcome to the MariaDB monitor.  Commands end with ; or \g.
Your MariaDB connection id is 12
Server version: 10.2.23-MariaDB-log Source distribution

Copyright (c) 2000, 2018, Oracle, MariaDB Corporation Ab and others.

Type 'help;' or '\h' for help. Type '\c' to clear the current input statement.

MariaDB [(none)]> status
--------------
mysql  Ver 15.1 Distrib 10.2.23-MariaDB, for Linux (x86_64) using readline 5.1

Connection id:		12
Current database:
Current user:		wpuser@localhost
SSL:			Not in use
Current pager:		stdout
Using outfile:		''
Using delimiter:	;
Server:			MariaDB
Server version:		10.2.23-MariaDB-log Source distribution
Protocol version:	10
Connection:		Localhost via UNIX socket
Server characterset:	utf8
Db     characterset:	utf8
Client characterset:	utf8
Conn.  characterset:	utf8
UNIX socket:		/data/mysql/mysql.sock
Uptime:			1 hour 12 min 19 sec

Threads: 8  Questions: 10  Slow queries: 0  Opens: 17  Flush tables: 1  Open tables: 11  Queries per second avg: 0.002
--------------

MariaDB [(none)]>


2.配置虚拟主机,www.x.com域名实现首页访问,admin.x.com域名实现wordpress的后台访问。
1.部署LNMP和wordpress参照作业1
2.配置nginx多虚拟主机
[root@lnmp ~]# cd /apps/nginx/conf/
[root@lnmp conf]# vim nginx.conf
    server {
        listen       80;
        server_name  www.x.com;
        location / {
            root   /apps/nginx/html;
            index  index.php;
        }
        location ~ \.php$ {
            root           /apps/nginx/html;
            fastcgi_pass   127.0.0.1:9000;
            fastcgi_index  index.php;
            fastcgi_param  SCRIPT_FILENAME  $document_root$fastcgi_script_name;
            include        fastcgi_params;
        }
    server {
        listen 80;
        server_name admin.x.com;
        location / {
            root /apps/nginx/html/wordpress;
            index wp-login.php index.php;
        }
        location ~ \.php$ {
            root           /apps/nginx/html/wordpress;
            fastcgi_pass   127.0.0.1:9000;
            fastcgi_index  index.php;
            fastcgi_param  SCRIPT_FILENAME  $document_root$fastcgi_script_name;
            include        fastcgi_params;
        }
    }
[root@lnmp conf]# nginx -t
nginx: the configuration file /apps/nginx/conf/nginx.conf syntax is ok
nginx: configuration file /apps/nginx/conf/nginx.conf test is successful
[root@lnmp conf]# nginx -s reload


原文地址:https://www.cnblogs.com/studywen/p/15009871.html
版权声明:本文内容由互联网用户自发贡献,该文观点与技术仅代表作者本人。本站仅提供信息存储空间服务,不拥有所有权,不承担相关法律责任。如发现本站有涉嫌侵权/违法违规的内容, 请发送邮件至 dio@foxmail.com 举报,一经查实,本站将立刻删除。