
Elasticsearch简介
前言
本文基于官方文档:Installing Elasticsearch
基于官方给出的几种不同环境不同的安装方式,本文将会选择在
-
Install Elasticsearch with .zip on Windows
使用.zip文件在Windows上安装Elasticsearch -
Install Elasticsearch from archive on Linux or MacOS
在Linux或macOS上从存档文件安装Elasticsearch -
Install Elasticsearch with Docker (此种方式待定)
使用Docker安装Elasticsearch

1. Windows环境部署Elasticsearch
-
Download Elasticsearch v7.9.3 : Elasticsearch v7.9.3
1.1 下载并解压Elasticsearch压缩包
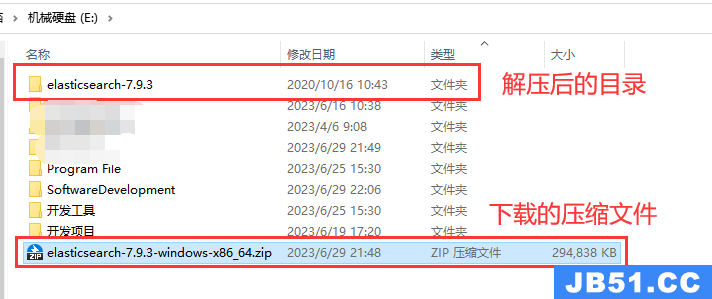
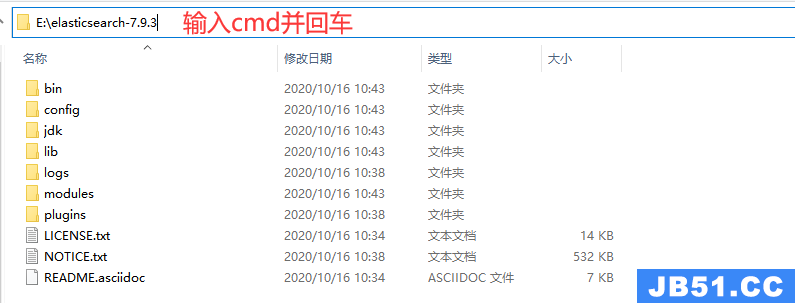
Unzip it with your favourite unzip tool. This will create a folder called elasticsearch-7.9.3,which we will refer to as %ES_HOME%. In a terminal window,cd to the %ES_HOME% directory,for instance:
将解压目录作为es的home目录,在 elasticsearch-7.9.3文件夹地址栏输入cmd 进入命令行
1.2 命令行启动elasticsearch
-
启动elasticsearch
Running Elasticsearch from the command line.Elasticsearch can be started from the command line as follows:
从命令行运行Elasticsearch,可以按以下方式从命令行启动Elasticsearch:.\bin\elasticsearch.bat -
启动页面
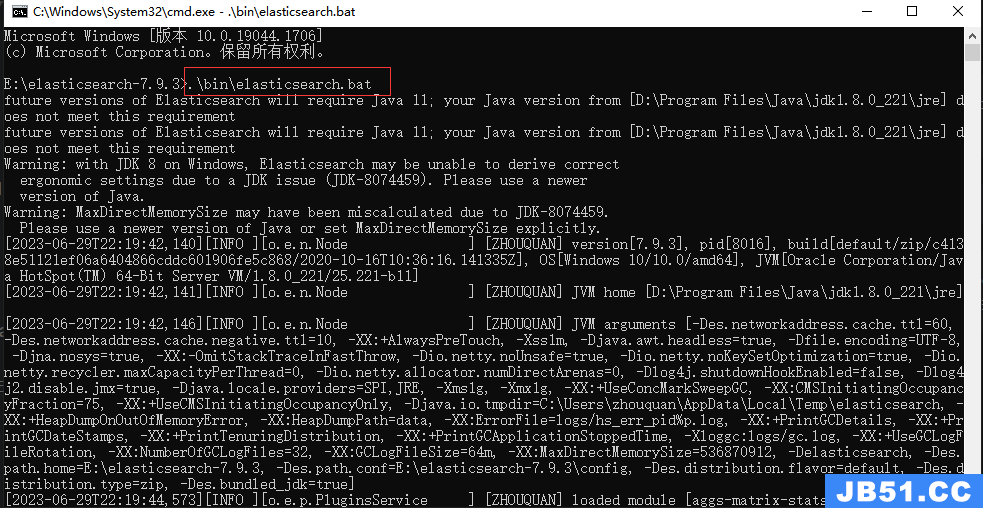
-
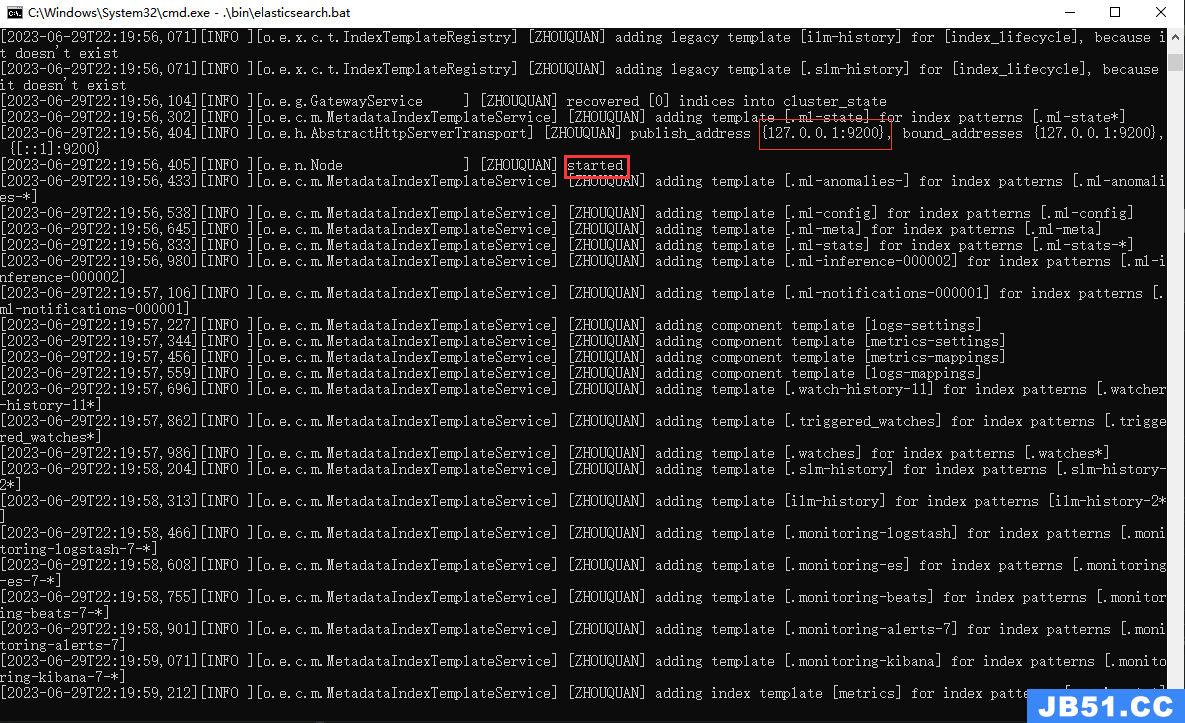
启动成功页面
1.3 验证是否成功启动elasticsearch
Checking that Elasticsearch is running
You can test that your Elasticsearch node is running by sending an HTTP request to port 9200 on localhost:
检查Elasticsearch是否正在运行
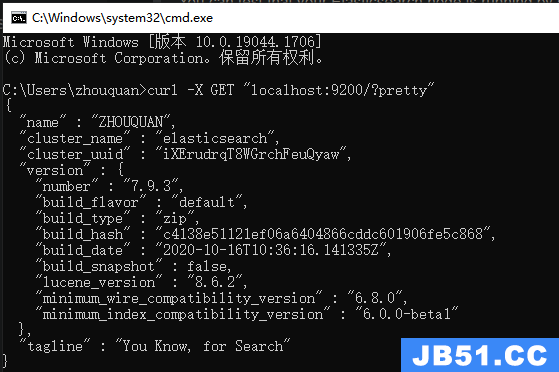
可以通过向本地主机的端口9200发送HTTP请求来测试您的Elasticsearch节点是否正在运行:
win+r输入cmd回车后输入下列请求url
curl -X GET "localhost:9200/?pretty"
表示启动成功
或者在浏览器地址栏输入:
localhost:9200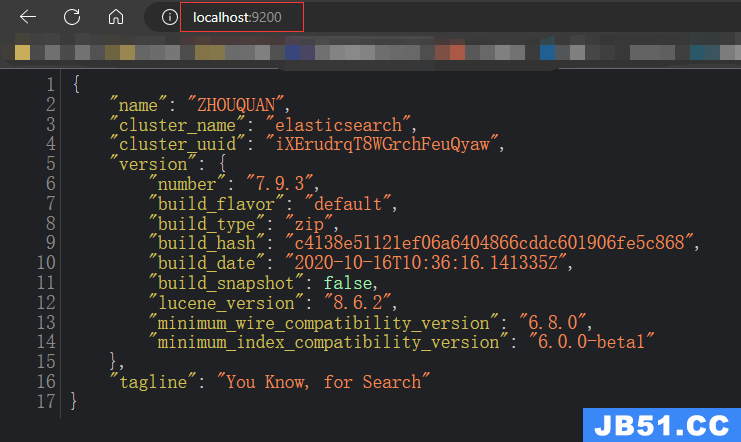
1.4 关闭Elasticsearch
-
Ctrl+C停止Elasticsearch
By default,Elasticsearch runs in the foreground,prints its logs to STDOUT,and can be stopped by pressing Ctrl-C.
默认情况下,Elasticsearch在前台运行,将日志打印到标准输出(STDOUT),可以通过按下Ctrl-C来停止它。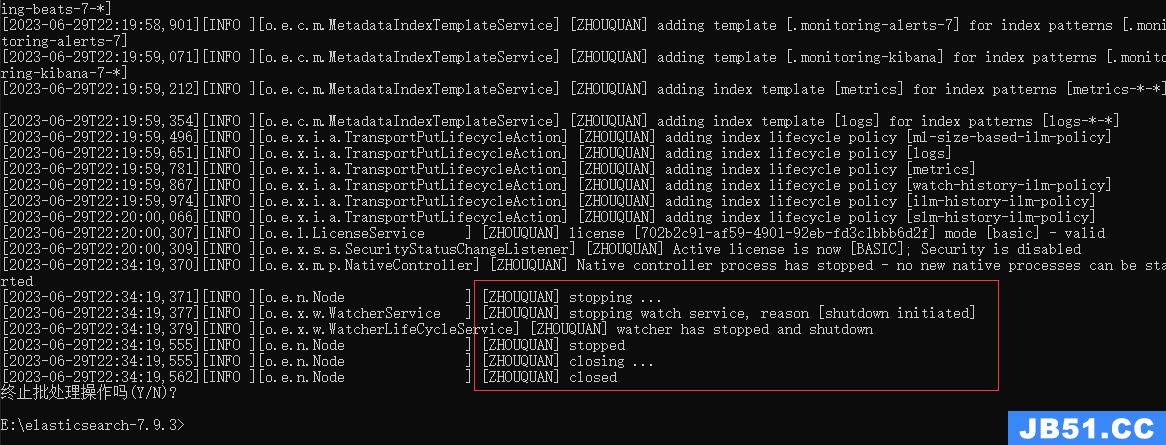
-
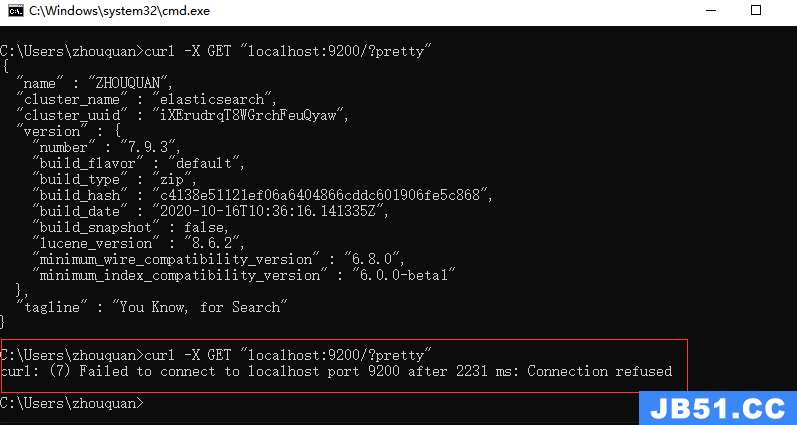
验证是否已经关闭(直接关闭上面的命令行窗口也可以停止es)
1.5 在Windows上安装Elasticsearch作为服务
Elasticsearch can be installed as a service to run in the background or start automatically at boot time without any user interaction. This can be achieved through the elasticsearch-service.bat script in the bin\ folder which allows one to install,remove,manage or configure the service and potentially start and stop the service,all from the command-line.
Elasticsearch可以安装为服务,在后台运行或在启动时自动启动,而无需任何用户交互。这可以通过bin\文件夹中的elasticsearch-service.bat脚本实现,该脚本允许您从命令行安装、删除、管理或配置服务,并且还可以潜在地启动和停止服务。
e:\elasticsearch-7.9.3\bin>elasticsearch-service.bat

Usage: elasticsearch-service.bat install|remove|start|stop|manager [SERVICE_ID]

The script requires one parameter (the command to execute) followed by an optional one indicating the service id (useful when installing multiple Elasticsearch services).
该脚本需要一个参数(要执行的命令),后面可以跟一个可选参数来指示服务ID(在安装多个Elasticsearch服务时很有用)
以下是elasticsearch-service.bat脚本可用的命令及其描述:
| 命令 | 描述 |
|---|---|
| install | 安装Elasticsearch作为服务 |
| remove | 移除已安装的Elasticsearch服务(如果已启动则停止服务) |
| start | 启动Elasticsearch服务(如果已安装) |
| stop | 停止Elasticsearch服务(如果已启动) |
| manager | 打开用于管理已安装服务的GUI界面 |
- 指定服务名安装
安装为服务,服务ID(务必唯一):elasticsearch-9200-testelasticsearch-service.bat install elasticsearch-9200-test - 命令行启动或停止服务
- 启动服务
elasticsearch-service.bat start elasticsearch-9200-test
- 停止服务
elasticsearch-service.bat stop elasticsearch-9200-test
- 启动服务
- 服务页面启动或停止服务
win+r回车输入services.msc进入服务列表,右击选择启动或者停止
- 设置为开机自启
右击服务名,点击属性,选择启动类型为自动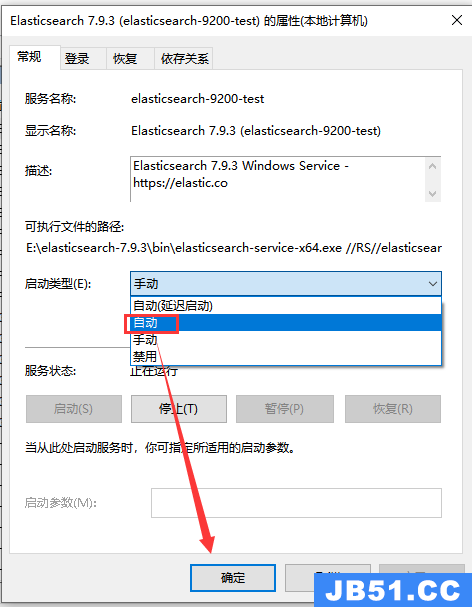
2. Liunx环境部署Elasticsearch
安装 Elasticsearch 7.17.11 并配置
本文介绍如何在 Linux 操作系统上下载、安装 Elasticsearch 7.17.11,并进行必要的配置。在centos或者是unbuntu中配置启动的流程基本一致,开放端口处的脚本不相同。
1. 下载es数据库并上传到服务器
首先,访问 Elasticsearch 下载页面 并下载 Elasticsearch 7.17.11
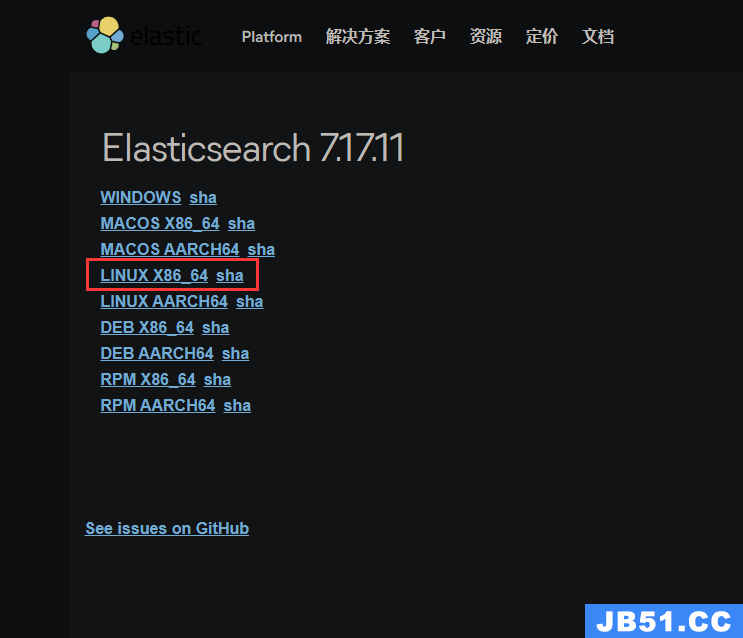
点击 “下载” 并将下载的文件上传到服务器指定目录中
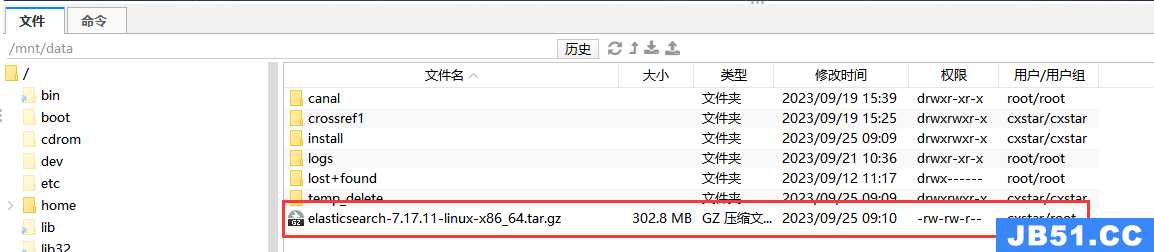
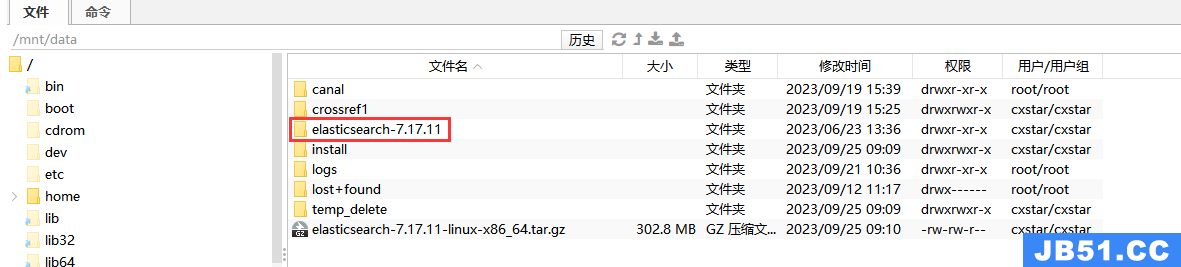
在服务器上,使用以下命令解压 Elasticsearch:
tar -zxvf elasticsearch-7.17.11-linux-x86_64.tar.gz
2. 创建 Elasticsearch 用户和组
创建一个名为 “es” 的用户和一个名为 “es” 的群组,然后将用户添加到该群组中:
# 新建群组es
 groupadd es
# 新建用户es并指定群组为es
 useradd -g es es
# 设置用户密码
 passwd es
# usermod 将用户添加到某个组group
 usermod -aG root es
3. 系统配置
3.1 修改文件句柄数和线程数
为了防止 Elasticsearch 用户拥有的可创建文件描述符权限过低而导致错误,需要修改文件句柄数和线程数。编辑 /etc/security/limits.conf 文件并添加以下内容:
# 文件句柄
es  soft nofile 65536
es  hard nofile 65536
# 线程
es  soft nproc 4096
es  hard nproc 4096
保存退出后,需要重新启动系统
以上配置是为了解决:
报错问题:max file descriptors [4096] for elasticsearch process is too low,increase to at least [65535]
问题描述:elasticsearch用户拥有的可创建文件描述的权限太低,至少需要65536;
3.2 修改虚拟内存
编辑 /etc/sysctl.conf 文件并添加以下内容:
vm.max_map_count=262144
保存退出后,刷新配置文件:
sysctl -p
验证是否修改成功:
sysctl vm.max_map_count
以上配置是为了解决:
报错问题:max virtual memory areas vm.max_map_count [65530] is too low,increase to at least [262144]
3.3 关闭交换空间(Swap)
官方建议:把内存的一半给Lucene+不要超过32G+关闭swap
ES建议要关闭 swap 内存交换空间,禁用swapping。因为当内存交换到磁盘上,一个100微秒的操作可能变成 10毫秒,然后100 微秒的操作时延累加起来,可以看出 swapping 对于性能的影响是致命的
vim /etc/fstab
注释含有swap一行
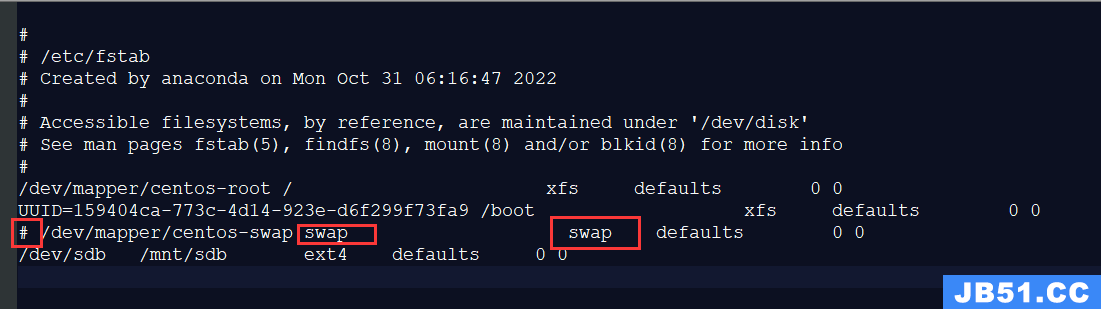
注释前:

保存退出后需要系统重启!
注释后:

4. 修改 Elasticsearch 配置
编辑 Elasticsearch 配置文件 conf/elasticsearch.yml 并根据你的需求进行配置,以下是一些示例配置项:
# 禁用了 es 的机器学习功能(Machine Learning)减少资源消耗
xpack.ml.enabled: false
# 设置 Elasticsearch 集群的名称
cluster.name: es-single
# 设置当前 Elasticsearch 节点的名称
node.name: node
# 数据目录
path.data: /home/es/path/node/data
# 日志目录
path.logs: /home/es/path/node/logs
# 当前主机的 IP
network.host: 192.168.0.10
# 暴露的 HTTP 端口
http.port: 11700
# 暴露的 Transport 端口
transport.port: 11710
# 设置节点发现的种子主机列表
discovery.seed_hosts: ["192.168.0.10:11710"]
# 设置初始的主节点列表,新节点将联系这些主节点以加入集群
cluster.initial_master_nodes: ["node"]
5. 设置目录权限
设置 Elasticsearch 数据目录所属的用户和组:
chown -R es:es /mnt/data/elasticsearch-7.17.11
6. 启动 Elasticsearch 服务
注意当前目录是在 ../elasticsearch-7.17.11
创建启动和停止 Elasticsearch 服务的脚本:
startes-single.sh
#!/bin/bash
cd "$(dirname "$0")"
# -d:后台(daemon)方式运行 Elasticsearch
./bin/elasticsearch -d -p pid
stopes-single.sh
#!/bin/bash
cd "$(dirname "$0")"
if [ -f "pid" ]; then
  pkill -F pid
fi
给这两个脚本赋予执行权限:
chmod 755 startes-single.sh stopes-single.sh
chown es:es startes-single.sh stopes-single.sh
然后,以 Elasticsearch 用户身份启动 Elasticsearch 服务:
su - es
cd /mnt/data/elasticsearch-7.17.11
./startes-single.sh
7. 开放防火墙端口
CentOS
# 查看防火墙状态
systemctl status firewalld
# 查看开放的端口
firewall-cmd --query-port=9200/tcp
# 添加端口
firewall-cmd --zone=public --add-port=9200/tcp --permanent
# 重载防火墙
firewall-cmd --reload
# 再次查看端口是否已经开放
firewall-cmd --query-port=9200/tcp
Ubuntu
# 查看防火墙状态
sudo ufw status
# 开放端口 9200
sudo ufw allow 9200/tcp
# 查看已添加的规则
sudo ufw status numbered
# 查看防火墙状态
sudo ufw status
原文地址:https://blog.csdn.net/qq_29864051/article/details/131446118
版权声明:本文内容由互联网用户自发贡献,该文观点与技术仅代表作者本人。本站仅提供信息存储空间服务,不拥有所有权,不承担相关法律责任。如发现本站有涉嫌侵权/违法违规的内容, 请发送邮件至 dio@foxmail.com 举报,一经查实,本站将立刻删除。