

uniapp上传图片使用组件Upload+java后端代码
效果展示
数据库展示

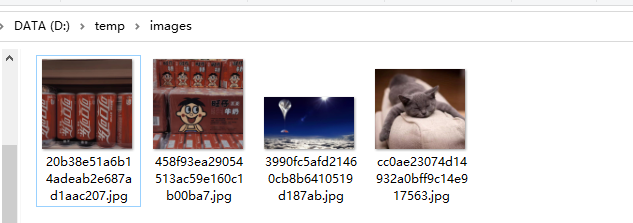
本地展示
网页展示

代码展示
前端 uniapp
<!-- 单张图片 -->
<!-- <u-upload v-model="form.attachment" ref="uUpload" :file-list="fileList" :action="action" accept="image"
 :max-size="2 * 1024 * 1024" @oversize="oversize" :sizeType="sizeType" :show-progress="false" :auto-upload="false"
max-count="1" width="150" height="150" @on-choose-complete="afterRead">
</u-upload> -->

<!-- 多张图片 -->
<u-upload v-model="form.attachment" ref="uUploadMultiple" :file-list="multipleImgs" :action="action" accept="image"
 :max-size="2 * 1024 * 1024" @oversize="oversize" :sizeType="sizeType" :show-progress="false" :auto-upload="false"
 max-count="3" width="150" height="150" @on-choose-complete="afterReadImgs">
</u-upload>
上面是使用组件选择图片

// 方法段
		// 文件超出大小限制
		oversize() {
			uni.showToast({
				title: "图片最大不能超过2M",
				icon: 'none'
			})
		},
		// 读取文件 -- 单个
		afterRead() {
			this.multipleUpload(this.$refs.uUpload.lists, 0)
		},
		// 读取文件 多张图片上传
		afterReadImgs(event) {
			this.multipleUpload(this.$refs.uUploadMultiple.lists, 2)
		},
		// 多张图片上传
		multipleUpload(event, type) {
			let that = this;
			let num = 3;
			event.map(item => {
				if (num === event.length) {
					uni.showToast({
						title: '最多上传3张图片',
						icon: 'none'
					})
					return
				}
				num += 1
				if (item.file) {
					that.uploadDo(item, type)
				}
			})
		},
		// 执行上传
		uploadDo(event, type) {
			let that = this;
			uni.uploadFile({
				url: “后端java接口路径",
				filePath: event.file.path,
				name: 'content',
				success(res) {
					console.log("res--------" + res.data);
					let json = JSON.parse(res.data);
					that.arr = that.arr.concat(json.data.data);
					that.form.attachment = that.arr;
				}
			});
		}
后端 java
1

2
下面控制层。最好理解代码。InfoModel这个是我定义的一个类。你们可以改成别的就行了。很简单
private static final Logger logger = LoggerFactory.getLogger(WXReportController.class);
@Value("${uploadFile}")
private String picFolder;
@RequestMapping("/picture/")
public InfoModel picture(HttpServletRequest request) throws IOException {
InfoModel infoModel = new InfoModel();
try {
request.setCharacterEncoding("utf-8");
StandardMultipartHttpServletRequest req = (StandardMultipartHttpServletRequest) request;
Iterator<String> iterator = req.getFileNames();
File folder = new File(picFolder);
if(!folder.exists()){
folder.mkdirs();
}
List<String> filePaths = new ArrayList<>();
while (iterator.hasNext()) {
multipartfile multipartfile = req.getFile(iterator.next());
String originalFirstName = multipartfile.getoriginalFilename();
String uuid = UUID.randomUUID().toString().replace("-", "");
String kzm = originalFirstName.substring(originalFirstName.lastIndexOf("."));
String filename = uuid + kzm;
File file = new File(picFolder + filename);
//真正写到磁盘上
OutputStream out = new FileOutputStream(file);
out.write(multipartfile.getBytes());
out.close();
filePaths.add( request.getScheme() + "://" +
request.getServerName() + ":"
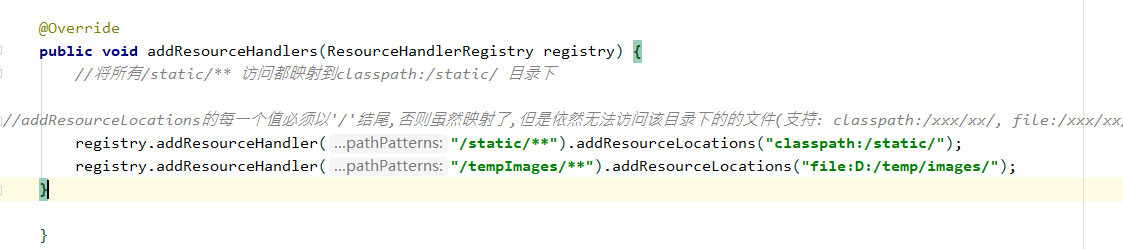
+ request.getServerPort()+"/tempImages/" + filename);
System.out.println("图片访问路径:"+filePaths);
Map<String, Object> map = new HashMap<>(1);
map.put("data", filePaths);
infoModel.setData(map);
infoModel.setRet("200");
infoModel.setMsg("请求成功");
}
} catch (Exception e) {
logger.error("error:{}", e.getMessage(), e);
infoModel.setRet("500");
infoModel.setMsg("服务请求失败");
}
return infoModel;

最后返回图片的路径。到这一步大家应该就懂了吧。网页直接可以访问。
支持一下弟弟吧。谢谢

上面都是我看了几个大哥的博客,反正研究出来的。很感觉那几位大哥的博客。谢谢。
感觉关注。
版权声明:本文内容由互联网用户自发贡献,该文观点与技术仅代表作者本人。本站仅提供信息存储空间服务,不拥有所有权,不承担相关法律责任。如发现本站有涉嫌侵权/违法违规的内容, 请发送邮件至 [email protected] 举报,一经查实,本站将立刻删除。
