
配套资料,免费下载
链接:https://pan.baidu.com/s/1jA217UgqXpONi_fV-aOzqw
提取码:bm2g
复制这段内容后打开百度网盘手机App,操作更方便哦
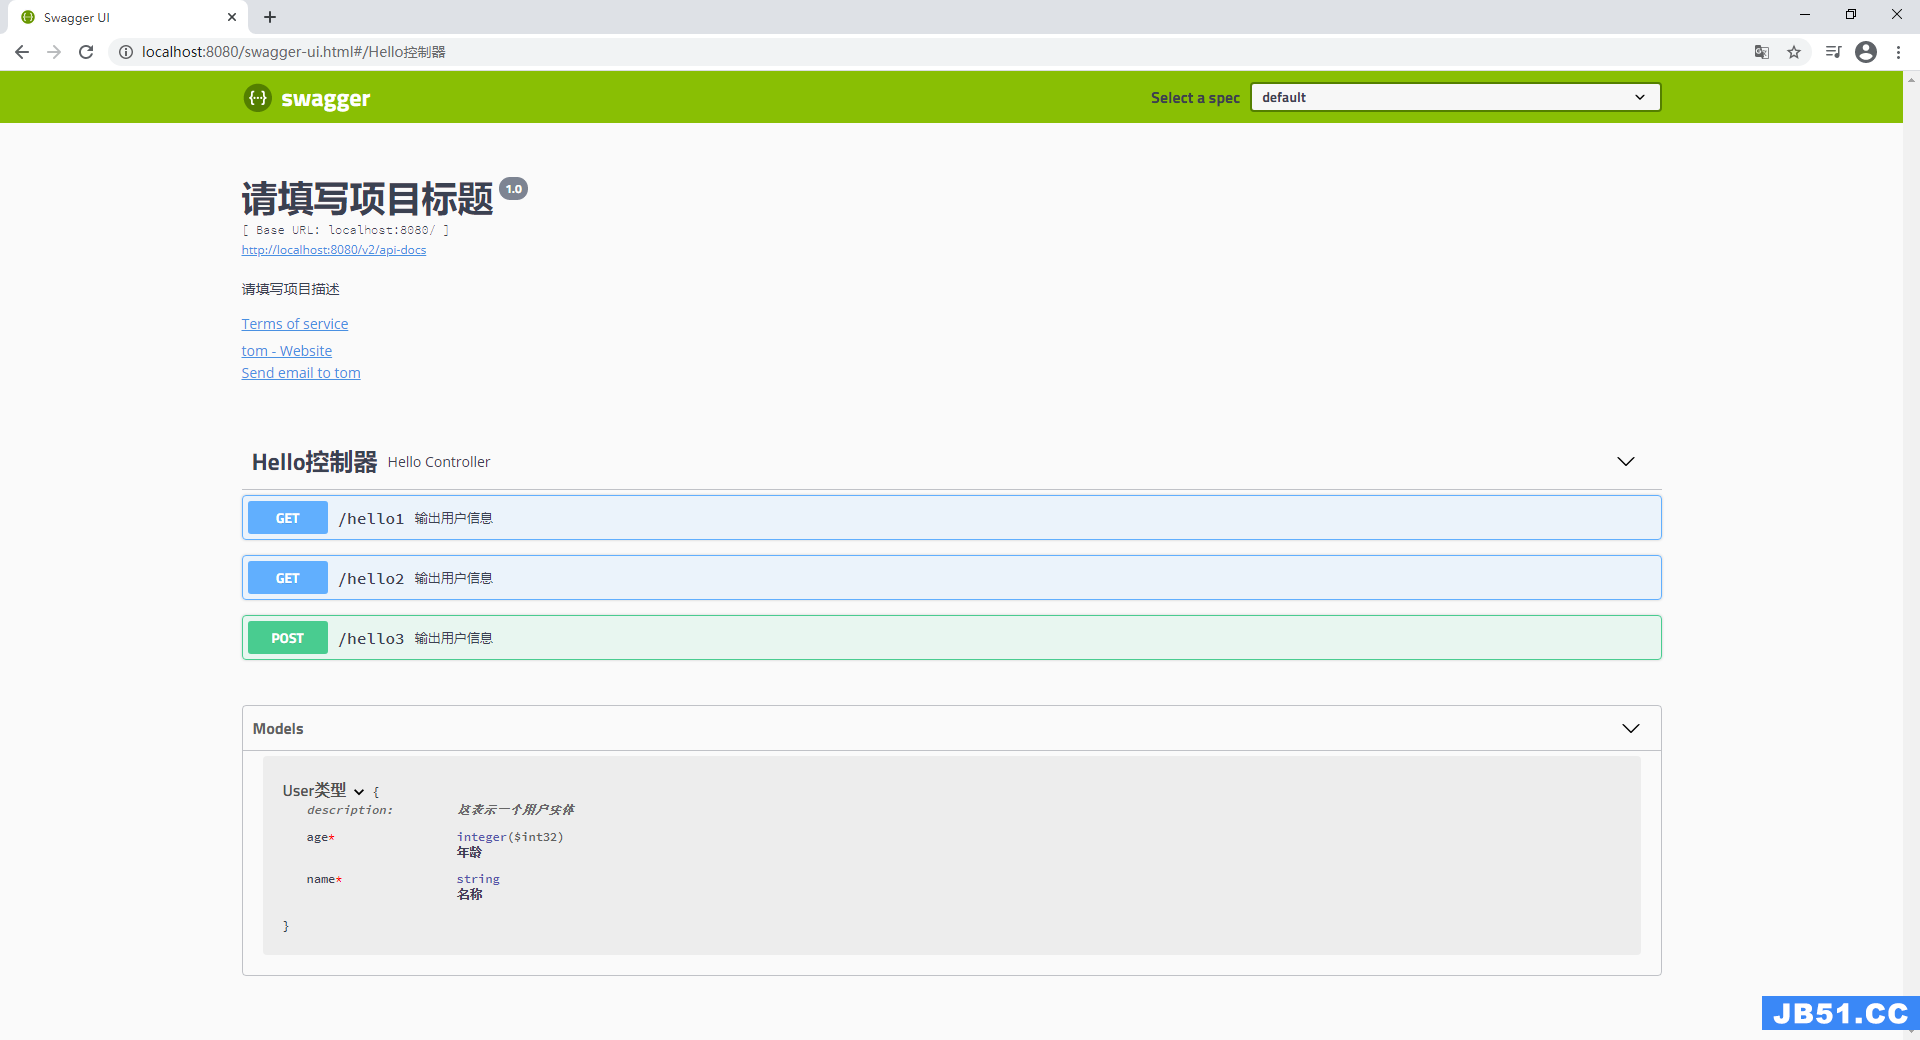
1、Swagger UI的概述
在前后端大行其道的今天,前端与后端如何更高效的交互,其中很重要的一个环节就是编写api的接口文档,但是,这个工作由谁来做,怎么来做,似乎很难来回答,那么,有没有一种技术或者是软件,能够帮我们自动生成api的接口文档,答案是肯定的,他就是Swagger UI,一个专注自动生成在线api文档的工具。
2、Swagger UI的使用
导入所需依赖:
<dependency>
    <groupId>io.springfox</groupId>
    <artifactId>springfox-swagger2</artifactId>
    <version>2.8.0</version>
</dependency>
<dependency>
    <groupId>io.springfox</groupId>
    <artifactId>springfox-swagger-ui</artifactId>
    <version>2.8.0</version>
</dependency>
配置基本信息:
@Configuration
public class SwaggerUIConfig {
@Bean
public Docket docket() {
return new Docket(DocumentationType.SWAGGER_2)
.apiInfo(apiInfo())
.select()
.apis(RequestHandlerSelectors.basePackage("com.caochenlei.controller"))
.paths(PathSelectors.any())
.build();
}
//配置项目基本信息
private ApiInfo apiInfo() {
return new ApiInfoBuilder()
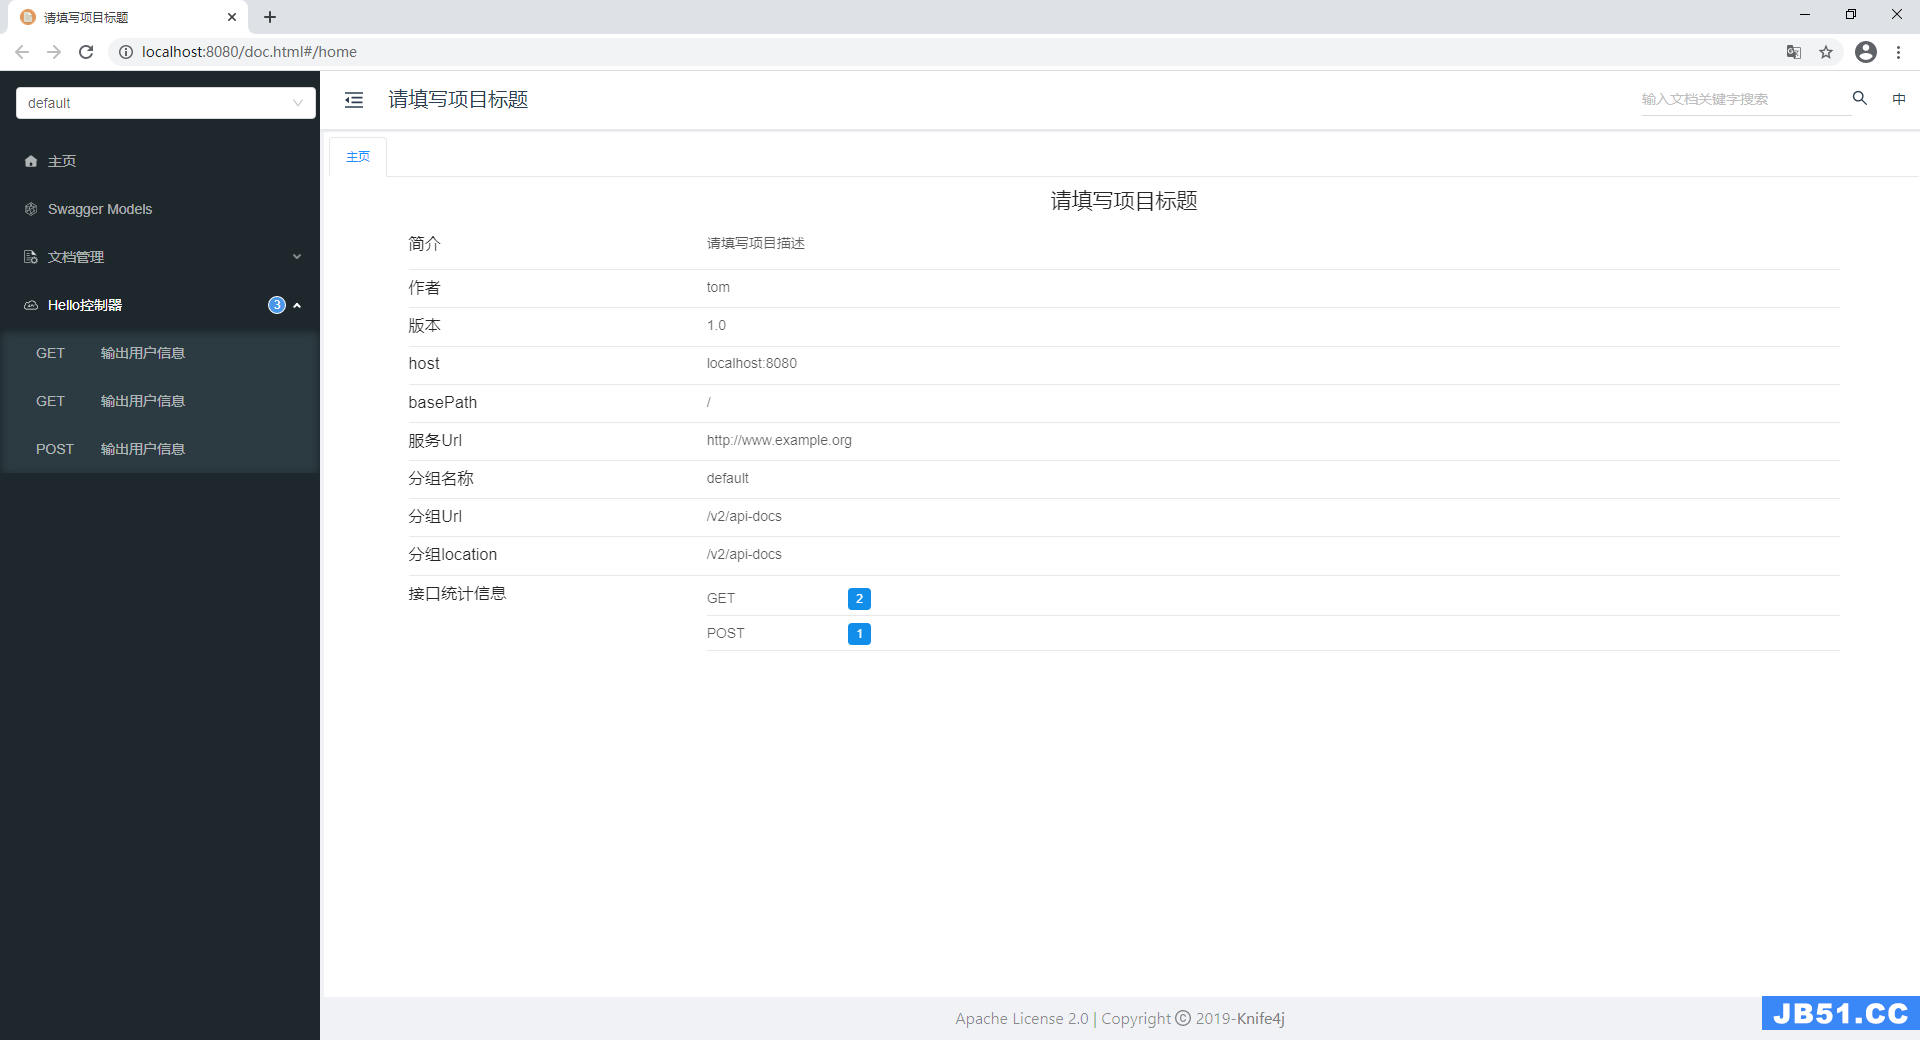
.title("请填写项目标题")
.description("请填写项目描述")
.termsOfServiceUrl("http://www.example.org")
//请填写项目联系人信息(名称、网址、邮箱)
.contact(new Contact("tom", "tom.com", "tom@163.com"))
//请填写项目版本号
.version("1.0")
.build();
}
}
开启框架功能:
@SpringBootApplication
@EnableSwagger2
public class SwaggerUIApplication {
    public static void main(String[] args) {
        SpringApplication.run(SwaggerUIApplication.class, args);
    }
}
编写测试代码:
@RestController
//该注解用于描述当前控制器的作用
@Api(tags = "Hello控制器")
public class HelloController {
    /**
     * 第一种描述方式,使用注解:@ApiOperation、@ApiParam
     *
     * @param name
     * @param age
     * @return
     */
    @GetMapping("/hello1")
    // value:描述该方法的作用,notes:描述该方法的备注信息
    @ApiOperation(value = "输出用户信息", notes = "返回一个拼接的字符串")
    public String hello1(
            // name:参数名称,value:参数说明,required:是否必填
            @ApiParam(name = "name", value = "名称", required = true) @RequestParam("name") String name,
            @ApiParam(name = "age", value = "年龄", required = true) @RequestParam("age") Integer age) {
        return name + ":" + age;
    }

    /**
     * 第二种描述方式,使用注解:@ApiOperation、@ApiImplicitParams、@ApiImplicitParam
     *
     * @param name
     * @param age
     * @return
     */
    @GetMapping("/hello2")
    @ApiOperation(value = "输出用户信息", notes = "返回一个拼接的字符串")
    //该注解用于在方法上描述该方法的参数
    @ApiImplicitParams({
            // name:参数名称,value:参数说明,required:是否必填
            @ApiImplicitParam(name = "name", required = true),
            @ApiImplicitParam(name = "age", required = true)
    })
    public String hello2(@RequestParam("name") String name, @RequestParam("age") Integer age) {
        return name + ":" + age;
    }

    @PostMapping("/hello3")
    @ApiOperation(value = "输出用户信息", notes = "返回一个对象")
    @ApiImplicitParams({
            @ApiImplicitParam(name = "name", required = true)
    })
    public User hello3(@RequestParam("name") String name, @RequestParam("age") Integer age) {
        User user = new User();
        user.setName(name);
        user.setAge(age);
        return user;
    }
}
@ApiModel(value = "User类型", description = "这表示一个用户实体")
public class User {
    @ApiModelProperty(name = "name", required = true)
    private String name;
    @ApiModelProperty(name = "age", required = true)
    private Integer age;

    public String getName() {
        return name;
    }

    public void setName(String name) {
        this.name = name;
    }

    public Integer getAge() {
        return age;
    }

    public void setAge(Integer age) {
        this.age = age;
    }
}
打开文档页面: http://localhost:8080/swagger-ui.html
3、Swagger UI的注解
@Api:用在请求的类上,表示对类的说明
    tags:用于描述当前类的作用

@ApiOperation:用在请求的方法上,表示对方法的说明
    value:用于描述当前方法的作用
    notes:用于描述当前方法的备注信息
    @ApiParam:用在请求方法的参数上,表示对该参数的说明
    	name:参数名称
        value:参数说明
        required:参数是否必须传
        defaultValue:参数的默认值
    	example:参数示例

@ApiImplicitParams:用在请求的方法上,表示该方法参数的说明
    @ApiImplicitParam:用在@ApiImplicitParams注解中,表示对该参数的说明
        name:参数名称
        value:参数说明
        required:参数是否必须传
        paramType:参数放在哪个地方
            · header --> 请求参数的获取:@RequestHeader
            · query --> 请求参数的获取:@RequestParam
            · path --> 请求参数的获取:@PathVariable
            · body(不常用)
            · form(不常用)
        dataType:参数的类型,默认String,其它值dataType="Integer"
        defaultValue:参数的默认值
    	example:参数示例

@ApiResponses:用在请求的方法上,表示一组响应
    @ApiResponse:用在@ApiResponses注解中,一般用于表达一个错误的响应信息
        code:错误码,例如400
        message:错误信息,例如"请求参数未知"
        response:抛出异常的类

@ApiModel:用于实体类上,表示一个复杂类型的描述,可用作参数接收、可用作返回对象
	value:实体类名称
    description:实体类描述
    @ApiModelProperty:用在属性上,描述响应类的属性
    	name:参数名称
        value:参数说明
        required:参数是否必须传
        dataType:参数的类型,默认String,其它值dataType="Integer"
    	example:参数示例
4、Swagger UI的美化
导入所需依赖: 只导入这一个就可以了,之前导入的那两个可以全部删掉了,其他代码均保持不变即可
<dependency>
    <groupId>com.github.xiaoymin</groupId>
    <artifactId>knife4j-spring-boot-starter</artifactId>
    <version>3.0.2</version>
</dependency>
打开文档页面: http://localhost:8080/doc.html
原文地址:https://caochenlei.blog.csdn.net
版权声明:本文内容由互联网用户自发贡献,该文观点与技术仅代表作者本人。本站仅提供信息存储空间服务,不拥有所有权,不承担相关法律责任。如发现本站有涉嫌侵权/违法违规的内容, 请发送邮件至 dio@foxmail.com 举报,一经查实,本站将立刻删除。