
linux系统中 ssh-keygen命令用于进行安全密钥验证,实现linux机器之间使用ssh远程登录不需要输入密码。
密钥分公钥和私钥,只要公钥和私钥实现配对,就表示验证成功。
首先准备了三台测试虚拟机,pc1、pc2和pc3,包括RHEL7和RHEL8,网络均采用桥接模式。
测试1,以pc1为服务器,pc2为客户机测试免密登录的基本用法
1、生成密钥对(公钥和私钥)
登录pc2主机,执行如下操作:
[root@pc2 ~]# whoami  ## root用户
root
[root@pc2 ~]# ifconfig | head -n 3  ## 查看pc2主机的IP地址
eno16777728: flags=4163<UP,BROADCAST,RUNNING,MULTICAST> mtu 1500
inet 192.168.3.13 netmask 255.255.255.0 broadcast 192.168.3.255
inet6 fe80::20c:29ff:feaa:2b29 prefixlen 64 scopeid 0x20<link>
[root@pc2 /]# cd ~  ## 回到家目录
[root@pc2 ~]# ls -a  ## 查看目录所有文件,包含隐藏文件
.                .bash_history  .bashrc  .cshrc   Documents  .ICEauthority         Music     .tcshrc    .viminfo
..               .bash_logout   .cache   .dbus    Downloads  initial-setup-ks.cfg  Pictures  Templates
anaconda-ks.cfg  .bash_profile  .config  Desktop  .esd_auth  .local                Public    Videos
[root@pc2 ~]# ssh-keygen -t rsa   ## 生成密钥对,-t rsa 指定生成密钥对的类型
Generating public/private rsa key pair.   ## 生成公钥和私钥对
Enter file in which to save the key (/root/.ssh/id_rsa):    ## 这里指定保存目录,直接回车,选择默然目录/root/.ssh/,id_rsa为私钥
Created directory '/root/.ssh'.
Enter passphrase (empty for no passphrase): ## 这里可以设置密码,也可以不设置,直接回车,选择不设置,直接回车
Enter same passphrase again:  ## 输入设置的密码,或者再次回车,这里选择再次回车
Your identification has been saved in /root/.ssh/id_rsa.  ## 生成了私钥
Your public key has been saved in /root/.ssh/id_rsa.pub.  ## 生成了公钥
The key fingerprint is:
de:8a:a4:64:62:f1:13:05:76:23:69:57:da:3c:03:66 root@pc2
The key's randomart image is:
+--[ RSA 2048]----+
|    +.E..        |
|   .o*.*         |
|   . .o =        |
|     .   o       |
|  . .   S        |
|   o . . .       |
|  o = . . .      |
| . + + . .       |
|    . . .        |
+-----------------+
[root@pc2 ~]# ls -a  ## 此时查看家目录下的所有文件,发现多出一个目录文件.ssh
.   anaconda-ks.cfg  .bash_logout   .bashrc  .config  .dbus    Documents  .esd_auth      initial-setup-ks.cfg  Music     Public  .tcshrc    Videos
..  .bash_history    .bash_profile  .cache   .cshrc   Desktop  Downloads  .ICEauthority  .local                Pictures  .ssh    Templates  .viminfo
[root@pc2 ~]# file .ssh/
.ssh/: directory
[root@pc2 ~]# ls -a .ssh/  ## 查看.ssh目录下的所有文件,id_rsa为密钥文件;id_rsa.pub为公钥文件,pub后缀为单词public。
.  ..  id_rsa  id_rsa.pub
2、把pc2主机中生成的公钥文件传送至pc1主机:
登陆pc1主机,查看传送前家目录的所有文件:
[root@pc1 ~]# whoami
root
[root@pc1 ~]# ifconfig | head -n 3  ## 查看pc1主机的IP地址
eno16777728: flags=4163<UP,BROADCAST,RUNNING,MULTICAST> mtu 1500
inet 192.168.3.20 netmask 255.255.255.0 broadcast 192.168.3.255
inet6 fe80::20c:29ff:fee4:f7b9 prefixlen 64 scopeid 0x20<link>
[root@pc1 ~]# cd ~  ## 回到pc1家目录
[root@pc1 ~]# ls -a  ##  ## 查看pc1主机家目录下的所有文件
.                .bash_history  .bashrc  .cshrc   Documents  .ICEauthority         Music     .tcshrc    .viminfo
..               .bash_logout   .cache   .dbus    Downloads  initial-setup-ks.cfg  Pictures  Templates
anaconda-ks.cfg  .bash_profile  .config  Desktop  .esd_auth  .local                Public    Videos
在pc2主机中将公钥文件传送至pc1主机,执行如下命令:
[root@pc2 ~]# ssh-copy-id 192.168.3.20  ## 192.168.3.20为pc1主机的IP地址
The authenticity of host '192.168.3.20 (192.168.3.20)' can't be established.
ECDSA key fingerprint is 55:84:57:c6:8d:66:a0:1d:72:35:24:5d:ba:7d:1d:50.
Are you sure you want to continue connecting (yes/no)? yes   ## 此处输入yes
/usr/bin/ssh-copy-id: INFO: attempting to log in with the new key(s), to filter out any that are already installed
/usr/bin/ssh-copy-id: INFO: 1 key(s) remain to be installed -- if you are prompted now it is to install the new keys
root@192.168.3.20's password:   ## 此处输入pc1主机的root密码

Number of key(s) added: 1

Now try logging into the machine, with:   "ssh '192.168.3.20'"
and check to make sure that only the key(s) you wanted were added.
在pc1主机中检查是否收到了pc2主机传送的公钥:
[root@pc1 ~]# pwd  ## 家目录
/root
[root@pc1 ~]# ls -a  ## 查看家目录的所有文件,和传输前相比多出一个目录.ssh
.   anaconda-ks.cfg  .bash_logout   .bashrc  .config  .dbus    Documents  .esd_auth      initial-setup-ks.cfg  Music     Public  .tcshrc    Videos
..  .bash_history    .bash_profile  .cache   .cshrc   Desktop  Downloads  .ICEauthority  .local                Pictures  .ssh    Templates  .viminfo
[root@pc1 ~]# file .ssh/
.ssh/: directory
[root@pc1 ~]# ls -a .ssh/  ## 查看目录下的文件
.  ..  authorized_keys
[root@pc1 ~]# md5sum .ssh/*   ## 生成多出文件的md5码
2df4cd89ea43828b291494c947837c22  .ssh/authorized_keys
在pc2中生成公钥和私钥的md5码,和pc1中接收的文件md5码比较验证:
[root@pc2 ~]# pwd
/root
[root@pc2 ~]# ls -a  ## 查看pc2主机家目录下所有文件
.   anaconda-ks.cfg  .bash_logout   .bashrc  .config  .dbus    Documents  .esd_auth      initial-setup-ks.cfg  Music     Public  .tcshrc    Videos
..  .bash_history    .bash_profile  .cache   .cshrc   Desktop  Downloads  .ICEauthority  .local                Pictures  .ssh    Templates  .viminfo
[root@pc2 ~]# md5sum .ssh/*  ## 生成公钥和密钥的md5码,除此之外,不知何时多出known_hosts文件
800dfbb5cc2f05c817df9e2d300ea562  .ssh/id_rsa
2df4cd89ea43828b291494c947837c22  .ssh/id_rsa.pub
30863371576dfd085e647a3b0f8f3d8c  .ssh/known_hosts
## 比较md5码,pc1主机接收的文件就是公钥,只是两个文件在pc1和pc2中的名字不一致罢了
3、在pc2主机中验证,远程登录pc1主机是否还需要输入pc1root密码
[root@pc2 ~]# ssh 192.168.3.20  ## 192.168.3.20是pc1主机的IP地址,已经可以实现免密登录
Last login: Wed Nov  4 10:32:29 2020 from 192.168.3.4
[root@pc1 ~]# ifconfig | head -n 3  ## 登录后的IP已经是pc1主机的IP地址了
eno16777728: flags=4163<UP,BROADCAST,RUNNING,MULTICAST>  mtu 1500
        inet 192.168.3.20  netmask 255.255.255.0  broadcast 192.168.3.255
        inet6 fe80::20c:29ff:fee4:f7b9  prefixlen 64  scopeid 0x20<link>
[root@pc1 ~]# exit  ## 退出pc1主机
logout
Connection to 192.168.3.20 closed.
总结:pc2免密远程登录pc1主机的条件:pc2主机(客户机)家目录下的.ssh目录下有密钥文件id_rsa,pc1主机(被远程登录主机)家目录下的.ssh目录下有公钥文件authorized_keys。
验证: 是否公钥文件authorized_keys和密钥文件id_rsa必须在家目录下.ssh目录中才可以实现远程登录
将pc1主机家目录.ssh目录下的公钥文件authorized_keys移出,检测pc2主机是否还能远程免密登录pc1主机
1、将pc1主机家目录.ssh目录下的公钥文件authorized_keys移出
[root@pc1 ~]# cd /root/.ssh/  ## 进入pc1主机/root/.ssh目录
[root@pc1 .ssh]# pwd
/root/.ssh
[root@pc1 .ssh]# ls -a
.  ..  authorized_keys
[root@pc1 .ssh]# mv authorized_keys ..  ## 把公钥文件移动至上一级目录
[root@pc1 .ssh]# ls -a ## 查看
.  ..
2、在pc2主机中验证还能否免密远程登录
[root@pc2 ~]# ssh 192.168.3.20  ## 已经不能免密远程登录
root@192.168.3.20's password:
3、在pc1主机中将公钥文件移动回/root/.ssh/目录中
[root@pc1 .ssh]# cd ..
[root@pc1 ~]# pwd
/root
[root@pc1 ~]# ls -a
.                authorized_keys  .bash_profile  .config  Desktop    .esd_auth             .local    Public   Templates
..               .bash_history    .bashrc        .cshrc   Documents  .ICEauthority         Music     .ssh     Videos
anaconda-ks.cfg  .bash_logout     .cache         .dbus    Downloads  initial-setup-ks.cfg  Pictures  .tcshrc  .viminfo
[root@pc1 ~]# mv authorized_keys .ssh/  ## 将公钥文件移动回 /root/.ssh/目录中
4、在pc2主机中验证免密登录是否恢复:
[root@pc2 ~]# ssh 192.168.3.20  ## 已经恢复免密登录
Last login: Wed Nov  4 11:51:58 2020 from 192.168.3.13
[root@pc1 ~]# ifconfig | head -n 3
eno16777728: flags=4163<UP,BROADCAST,RUNNING,MULTICAST>  mtu 1500
        inet 192.168.3.20  netmask 255.255.255.0  broadcast 192.168.3.255
        inet6 fe80::20c:29ff:fee4:f7b9  prefixlen 64  scopeid 0x20<link>
[root@pc1 ~]# exit
logout
Connection to 192.168.3.20 closed.
5、pc2主机中密钥文件id_rsa移出/root/.ssh/目录,然后测试能否免密远程登录
[root@pc2 .ssh]# pwd
/root/.ssh
[root@pc2 .ssh]# ls -a
.  ..  id_rsa  id_rsa.pub  known_hosts
[root@pc2 .ssh]# mv id_rsa ..  ## 移出密钥文件
[root@pc2 .ssh]# ssh 192.168.3.20  ## 已经不能远程登录
root@192.168.3.20's password:
6、将pc2主机中的密钥文件id_rsa移回至/root/.ssh/目录,测试pc2主机是否恢复免密远程登录pc1主机:
[root@pc2 .ssh]# cd ..
[root@pc2 ~]# pwd
/root
[root@pc2 ~]# ls -a
.                .bash_history  .bashrc  .cshrc   Documents  .ICEauthority         .local    Public   Templates
..               .bash_logout   .cache   .dbus    Downloads  id_rsa                Music     .ssh     Videos
anaconda-ks.cfg  .bash_profile  .config  Desktop  .esd_auth  initial-setup-ks.cfg  Pictures  .tcshrc  .viminfo
[root@pc2 ~]# mv i .ssh/  ## 将密钥文件id_rsa移回/root/.ssh/目录中
[root@pc2 ~]# ssh 192.168.3.20  ## 测试pc2主机登录pc1主机,恢复了远程免密登录
Last login: Wed Nov  4 12:07:13 2020 from 192.168.3.13
[root@pc1 ~]# ifconfig | head -n 3
eno16777728: flags=4163<UP,BROADCAST,RUNNING,MULTICAST>  mtu 1500
        inet 192.168.3.20  netmask 255.255.255.0  broadcast 192.168.3.255
        inet6 fe80::20c:29ff:fee4:f7b9  prefixlen 64  scopeid 0x20<link>
[root@pc1 ~]# exit
logout
Connection to 192.168.3.20 closed.
总结:pc2主机(客户机)中的密钥文件id_rsa和pc1主机(被远程登录机)的公钥文件authorized_keys都应该在各自的/root/.ssh/目录中才能实现免密远程登录。
验证:引入pc3主机,将pc1中的公钥文件authorized_keys复制至pc3主机的/root/.ssh/目录下,验证能否实现pc1主机免密远程登录pc3主机。
1、登录pc3主机,查看IP地址,创建/root/.ssh/目录
[root@pc3 ~]# ifconfig | head -n 3  ## 查看pc3主机IP地址
ens160: flags=4163<UP,BROADCAST,RUNNING,MULTICAST>  mtu 1500
        inet 192.168.3.14  netmask 255.255.255.0  broadcast 192.168.3.255
        inet6 fe80::d7fe:9dfc:42ec:c255  prefixlen 64  scopeid 0x20<link>
[root@pc3 ~]# cd /root/
[root@pc3 ~]# ls -a
.                .bash_history  .bashrc  .cshrc   Documents  .ICEauthority         Music     Public     Videos
..               .bash_logout   .cache   .dbus    Downloads  initial-setup-ks.cfg  Pictures  .tcshrc    .viminfo
anaconda-ks.cfg  .bash_profile  .config  Desktop  .esd_auth  .local                .pki      Templates
[root@pc3 ~]# mkdir .ssh  ## 创建/root/.ssh/目录
[root@pc3 ~]# ls -a
.                .bash_history  .bashrc  .cshrc   Documents  .ICEauthority         Music     Public   Templates
..               .bash_logout   .cache   .dbus    Downloads  initial-setup-ks.cfg  Pictures  .ssh     Videos
anaconda-ks.cfg  .bash_profile  .config  Desktop  .esd_auth  .local                .pki      .tcshrc  .viminfo
[root@pc3 ~]# cd .ssh/
[root@pc3 .ssh]# ls -a
. ..
2、将pc1主机中的公钥文件authorized_keys远程传输至pc3主机的/root/.ssh/目录下:
[root@pc1 .ssh]# pwd
/root/.ssh
[root@pc1 .ssh]# ls -a
.  ..  authorized_keys
[root@pc1 .ssh]# scp authorized_keys root@192.168.3.14:/root/.ssh/   ## 192.168.3.14为pc3主机IP地址,/root/.ssh/表示传输至的文件目录
The authenticity of host '192.168.3.14 (192.168.3.14)' can't be established.
ECDSA key fingerprint is 48:0b:8b:d6:47:33:13:e1:92:b0:68:7f:e6:46:3f:e7.
Are you sure you want to continue connecting (yes/no)? yes  ## 此处输入yes
Warning: Permanently added '192.168.3.14' (ECDSA) to the list of known hosts.
root@192.168.3.14's password:  ## 此处输入pc3主机的root密码
authorized_keys                                                                                                    100%  390     0.4KB/s   00:00
3、在pc3主机目录/root/.ssh/中检查是否接收到pc1主机传输的公钥文件authorized_keys
[root@pc3 .ssh]# pwd
/root/.ssh
[root@pc3 .ssh]# ls -a  ## 已经接收到公钥文件
.  ..  authorized_keys
[root@pc3 .ssh]# md5sum authorized_keys
2df4cd89ea43828b291494c947837c22  authorized_keys
4、测试pc2主机能否免密远程登录pc3主机
[root@pc2 ~]# ssh 192.168.3.14  ## 测试远程免密登录pc3主机,192.168.3.14是pc3主机IP地址,可以实现
The authenticity of host '192.168.3.14 (192.168.3.14)' can't be established.
ECDSA key fingerprint is 48:0b:8b:d6:47:33:13:e1:92:b0:68:7f:e6:46:3f:e7.
Are you sure you want to continue connecting (yes/no)? yes  ## 此处输入yes
Warning: Permanently added '192.168.3.14' (ECDSA) to the list of known hosts.
Activate the web console with: systemctl enable --now cockpit.socket

Last login: Wed Nov  4 10:32:56 2020 from 192.168.3.4
[root@pc3 ~]# ifconfig | head -n 3
ens160: flags=4163<UP,BROADCAST,RUNNING,MULTICAST>  mtu 1500
        inet 192.168.3.14  netmask 255.255.255.0  broadcast 192.168.3.255
        inet6 fe80::d7fe:9dfc:42ec:c255  prefixlen 64  scopeid 0x20<link>
[root@pc3 ~]# exit
logout
Connection to 192.168.3.14 closed.
总结:任何主机(被登录主机)获取了公钥文件authorized_keys,而且放在/root/.ssh/目录中,只要登录主机的密钥文件id_rsa和该公钥文件配对,就可以实现被免密远程登录。
将pc2主机/root/.ssh/目录下的密钥文件id_rsa远程传输至pc1主机的/root/.ssh目录下,测试pc1主机能否免密远程控制pc3主机。
1、将pc2主机/root/.ssh/目录下的密钥文件id_rsa远程传输至pc1主机的/root/.ssh目录下
[root@pc2 .ssh]# pwd
/root/.ssh
[root@pc2 .ssh]# ls -a
.  ..  id_rsa  id_rsa.pub  known_hosts
[root@pc2 .ssh]# scp id_rsa root@192.168.3.20:/root/.ssh/  ## 远程传输,192.168.3.20为pc1主机的IP地址,/root/.ssh/为传输密钥的目的地目录
id_rsa                                                                                                             100% 1679     1.6KB/s   00:00
2、检测pc1主机/root/.ssh/目录下是否接收到密钥id.rsa文件
[root@pc1 .ssh]# pwd
/root/.ssh
[root@pc1 .ssh]# ls -a  ## 已经接收到密钥文件id_rsa
.  ..  authorized_keys  id_rsa  known_hosts
[root@pc1 .ssh]# md5sum id_rsa
800dfbb5cc2f05c817df9e2d300ea562  id_rsa
3、检查pc3主机/root/.ssh/目录下是否有公钥文件
[root@pc3 .ssh]# pwd
/root/.ssh
[root@pc3 .ssh]# ls -a  ## 有公钥文件
.  ..  authorized_keys
[root@pc3 .ssh]# md5sum authorized_keys
2df4cd89ea43828b291494c947837c22  authorized_keys
4、测试pc1主机能否免密远程登录pc3主机
[root@pc1 .ssh]# ssh 192.168.3.14  ## 已经可以实现pc1免密远程登录pc3主机
Activate the web console with: systemctl enable --now cockpit.socket

Last login: Wed Nov  4 12:31:43 2020 from 192.168.3.13
[root@pc3 ~]# ifconfig | head -n 3
ens160: flags=4163<UP,BROADCAST,RUNNING,MULTICAST>  mtu 1500
        inet 192.168.3.14  netmask 255.255.255.0  broadcast 192.168.3.255
        inet6 fe80::d7fe:9dfc:42ec:c255  prefixlen 64  scopeid 0x20<link>
[root@pc3 ~]# exit
logout
Connection to 192.168.3.14 closed.
总结:任务两台主机(root用户)只要获取了密钥文件id_rsa和公钥文件authorized_keys,并且将两个文件各自放在/root/.ssh/目录下,就可以实现远程免密登录。
普通用户获取了密钥文件id_rsa,能否实现免密远程登录?
将pc1主机/root/.ssh/目录下的密钥文件剪切至普通用户linuxprobe的/home/linuxorobe/.ssh/目录下,测试pc1主机普通用户能否远程控制pc3主机。
1、在pc1主机中切换至linuxprobe普通用户,创建/home/linuxprobe/.ssh/目录
[root@pc1 .ssh]# su - linuxprobe  ## 切换至普通用户
Last login: Sun Nov  1 15:41:04 CST 2020 on :0
[linuxprobe@pc1 ~]$ mkdir -p /home/linuxprobe/.ssh ## 创建/home/linuxprobe/.ssh目录
[linuxprobe@pc1 ~]$ file /home/linuxprobe/.ssh/  ## 目录文件
/home/linuxprobe/.ssh/: directory
[linuxprobe@pc1 ~]$ ls -a /home/linuxprobe/.ssh/  ## 查看目录下文件
.  ..
2、在pc1主机中切换至root用户,并且将密钥文件id_rsa的所有者、所属组赋予linuxprobe用户,将密钥文件剪切至/root/linxuprobe/.ssh/目录下
[linuxprobe@pc1 ~]$ su - root  ## 切换至root用户
Password:
Last login: Wed Nov  4 12:12:37 CST 2020 from 192.168.3.13 on pts/1
[root@pc1 ~]# whoami
root
[root@pc1 ~]# cd /root/.ssh/
[root@pc1 .ssh]# ls -a
.  ..  authorized_keys  id_rsa  known_hosts
[root@pc1 .ssh]# ll -h
total 12K
-rw-------. 1 root root  390 Nov  4 11:13 authorized_keys
-rw-------. 1 root root 1.7K Nov  4 12:46 id_rsa
-rw-r--r--. 1 root root  174 Nov  4 12:26 known_hosts
[root@pc1 .ssh]# chown linuxprobe:linuxprobe id_rsa  ## 将密钥文件id_rsa的所有者和所属组该为linuxprobe用户
[root@pc1 .ssh]# ll -h
total 12K
-rw-------. 1 root       root        390 Nov  4 11:13 authorized_keys
-rw-------. 1 linuxprobe linuxprobe 1.7K Nov  4 12:46 id_rsa
-rw-r--r--. 1 root       root        174 Nov  4 12:26 known_hosts
[root@pc1 .ssh]# mv id_rsa /home/linuxprobe/.ssh/  ## 剪切至/home/linuxprobe/.ssh/目录
[root@pc1 .ssh]# ls -a
.  ..  authorized_keys  known_hosts
[root@pc1 .ssh]# ls -a /home/linuxprobe/.ssh/
.  ..  id_rsa
[root@pc1 .ssh]# ll /home/linuxprobe/.ssh/id_rsa
-rw-------. 1 linuxprobe linuxprobe 1679 Nov  4 12:46 /home/linuxprobe/.ssh/id_rsa
[root@pc1 .ssh]# md5sum /home/linuxprobe/.ssh/id_rsa
800dfbb5cc2f05c817df9e2d300ea562  /home/linuxprobe/.ssh/id_rsa
3、检查pc3主机/root/.ssh/目录下公钥文件
[root@pc3 .ssh]# pwd
/root/.ssh
[root@pc3 .ssh]# ls -a
.  ..  authorized_keys
[root@pc3 .ssh]# md5sum authorized_keys
2df4cd89ea43828b291494c947837c22  authorized_keys
4、在pc1主机中切换至linuxprobe用户,测试linuxprobe用户能否免密远程控制pc3主机
[root@pc1 .ssh]# su - linuxprobe  ## 切换至普通用户
Last login: Wed Nov  4 13:00:28 CST 2020 on pts/0
[linuxprobe@pc1 ~]$ ssh 192.168.3.14  ## 测试普通用户远程免密登录pc3主机,不能实现
The authenticity of host '192.168.3.14 (192.168.3.14)' can't be established.
ECDSA key fingerprint is 48:0b:8b:d6:47:33:13:e1:92:b0:68:7f:e6:46:3f:e7.
Are you sure you want to continue connecting (yes/no)? yes
Warning: Permanently added '192.168.3.14' (ECDSA) to the list of known hosts.
linuxprobe@192.168.3.14's password:

[linuxprobe@pc1 ~]$ ssh root@192.168.3.14  ## 加root@,可以实现普通用户免密远程控制pc3主机
Activate the web console with: systemctl enable --now cockpit.socket

Last login: Wed Nov  4 12:52:48 2020 from 192.168.3.20
[root@pc3 ~]# ifconfig | head -3
ens160: flags=4163<UP,BROADCAST,RUNNING,MULTICAST>  mtu 1500
        inet 192.168.3.14  netmask 255.255.255.0  broadcast 192.168.3.255
        inet6 fe80::d7fe:9dfc:42ec:c255  prefixlen 64  scopeid 0x20<link>
[root@pc3 ~]# exit
logout
Connection to 192.168.3.14 closed.
总结:普通用户获取密钥文件id_rsa,也可以实现免密远程控制另一台主机。
将pc3主机/root/.ssh/目录下的公钥文件authorized_keys所有者和所属组改为普通用户testuser,并且将密钥文件剪切至/home/testuser/.ssh/目录下,能否实现pc1的普通用户linuxprobe免密远程控制pc3主机。
1、在pc3主机中切换至testuser用户,创建目录/home/testuser/.ssh/
[root@pc3 .ssh]# su - testuser  ## 切换至普通用户
[testuser@pc3 ~]$ whoami
testuser
[testuser@pc3 ~]$ mkdir -p /home/testuser/.ssh  ## 创建/home/testuser/.ssh目录
[testuser@pc3 ~]$ file /home/testuser/.ssh/
/home/testuser/.ssh/: directory
[testuser@pc3 ~]$ ls -a /home/testuser/.ssh/
.  ..
2、在pc3主机中切换至root用户,将公钥文件authorized_keys的所有者、所属组改为testuser,将公钥文件authorized_keys剪切至/home/test/user/.ssh/目录下
[testuser@pc3 ~]$ su - root
Password:
[root@pc3 ~]# cd /root/.ssh/
[root@pc3 .ssh]# ls -a
.  ..  authorized_keys
[root@pc3 .ssh]# mv authorized_keys /home/testuser/.ssh/  ## 剪切公钥文件
[root@pc3 .ssh]# ls /home/testuser/.ssh/
authorized_keys
[root@pc3 .ssh]# md5sum /home/testuser/.ssh/authorized_keys
2df4cd89ea43828b291494c947837c22  /home/testuser/.ssh/authorized_keys
3、检查pc1主机/home/linuxprobe/.ssh/目录下的密钥文件
[linuxprobe@pc1 .ssh]$ pwd
/home/linuxprobe/.ssh
[linuxprobe@pc1 .ssh]$ ls -a
.  ..  id_rsa  known_hosts
[linuxprobe@pc1 .ssh]$ md5sum id_rsa
800dfbb5cc2f05c817df9e2d300ea562  id_rsa
3、在pc1主机中测试普通用户能否免密远程控制pc3主机
[linuxprobe@pc1 .ssh]$ ssh 192.168.3.14  ## 均不能免密远程登录
linuxprobe@192.168.3.14's password:

[linuxprobe@pc1 .ssh]$ ssh root@192.168.3.14
root@192.168.3.14's password:

[linuxprobe@pc1 .ssh]$ ssh testuser@192.168.3.14
testuser@192.168.3.14's password:

[linuxprobe@pc1 .ssh]$ ssh linuxprobe@192.168.3.14
linuxprobe@192.168.3.14's password:
总结:公钥文件必须在被登录主机的/root/.ssh/目录下才能实现被免密远程登录。
验证:
设置一台主机只能实现公钥和密钥配对登录,而不能实现普通的密码登录。
测试pc1主机/root/.ssh/目录无公钥文件时,pc2主机登录pc1主机的方式
1、在pc1主机中删除/home/linuxprobe/.ssh目录,排除干扰
[root@pc1 .ssh]# whoami
root
[root@pc1 .ssh]# rm -rf /home/linuxprobe/.ssh/
2、在pc1主机将/root/.ssh/目录下的公钥文件authorized_keys移动至上一级目录
[root@pc1 .ssh]# pwd
/root/.ssh
[root@pc1 .ssh]# ls
authorized_keys  known_hosts
[root@pc1 .ssh]# mv * ..
[root@pc1 .ssh]# ls -a
.  ..
3、测试此时pc2主机远程控制pc1主机的方式
[root@pc2 .ssh]# ssh 192.168.3.20  ## 默认密码登录
root@192.168.3.20's password:
Last login: Wed Nov  4 13:36:31 2020
[root@pc1 ~]# ifconfig | head -n 3
eno16777728: flags=4163<UP,BROADCAST,RUNNING,MULTICAST>  mtu 1500
        inet 192.168.3.20  netmask 255.255.255.0  broadcast 192.168.3.255
        inet6 fe80::20c:29ff:fee4:f7b9  prefixlen 64  scopeid 0x20<link>
[root@pc1 ~]# exit
logout
Connection to 192.168.3.20 closed.
4、在pc1主机中将被远程控制的密码登录方式关闭
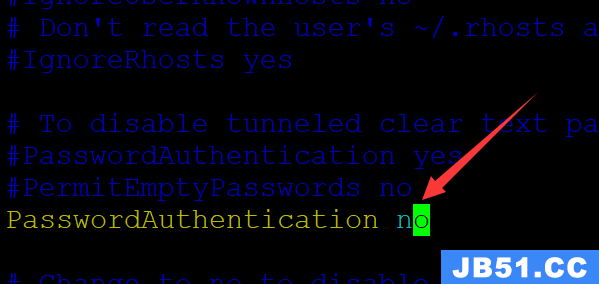
[root@pc1 .ssh]# vim /etc/ssh/sshd_config  ##将PasswordAuthentication 由yes改为no,然后保存退出
# To disable tunneled clear text passwords, change to no here!
#PasswordAuthentication yes
#PermitEmptyPasswords no
PasswordAuthentication no  ## 将此处的yes改为no

# Change to no to disable s/key passwords
#ChallengeResponseAuthentication yes
ChallengeResponseAuthentication no
5、在pc1主机中重启sshd服务,使修改的配置文件生效
[root@pc1 .ssh]# systemctl restart sshd
6、在pc2主机中检测pc2主机此时登录pc1主机
[root@pc2 .ssh]# ssh 192.168.3.20  ## 已经无法登陆
Permission denied (publickey,gssapi-keyex,gssapi-with-mic).
7、在pc1主机中将公钥文件authorized_keys移回/root/.ssh/目录中
[root@pc1 ~]# pwd
/root
[root@pc1 ~]# ls -a
.                authorized_keys  .bash_profile  .config  Desktop    .esd_auth             known_hosts  Pictures  .tcshrc    .viminfo
..               .bash_history    .bashrc        .cshrc   Documents  .ICEauthority         .local       Public    Templates
anaconda-ks.cfg  .bash_logout     .cache         .dbus    Downloads  initial-setup-ks.cfg  Music        .ssh      Videos
[root@pc1 ~]# mv authorized_keys .ssh/   ## 将公钥文件authorized_keys移回/root/.ssh/目录中
[root@pc1 ~]# ls -a .ssh/
.  ..  authorized_keys
[root@pc1 ~]# md5sum .ssh/authorized_keys
2df4cd89ea43828b291494c947837c22  .ssh/authorized_keys
8、在pc2主机中测试远程登录控制pc1
[root@pc2 .ssh]# ssh 192.168.3.20  ## 已经实现免密远程登录控制
Last login: Wed Nov  4 13:45:40 2020 from 192.168.3.13
总结:关闭被远程控制主机/etc/ssh/sshd_config配置文件中的密码登录方式,将配对的公钥和私钥放置/root/.ssh/目录(root情况),可以实现不允许密码登录,仅能公钥和密钥配对登录。
参考:https://blog.51cto.com/yuan2/1948260
linux就该这么学p185
版权声明:本文内容由互联网用户自发贡献,该文观点与技术仅代表作者本人。本站仅提供信息存储空间服务,不拥有所有权,不承担相关法律责任。如发现本站有涉嫌侵权/违法违规的内容, 请发送邮件至 dio@foxmail.com 举报,一经查实,本站将立刻删除。