
欢迎大家进群,一起探讨学习

微信公众号,每天给大家提供技术干货

博主技术平台地址
博主开源微服架构前后端分离技术博客项目源码地址,欢迎各位star
1. 背景
今年开源了一个博客系统;但其中一个项目开发完成后,遇到了大问题:由于采用的是Vue的单页面模式进行开发,网站信息搜索引擎无法做索引,导入收录只有是首页!
搜索引擎无法进行索引的核心原因就是,其在爬取网站数据的时候,是不会执行其中包含的JS过程的;而采用Vue的方式开发的应用,其数据都是来源于axios或者其它的ajax方法获取的数据!也就是说,想要友好的支持搜索引擎,就必须采用服务器端渲染的相关技术,比如JSP,就是一个典型的服务器端渲染技术,用户请求一个地址然后展示到浏览器中的数据都是服务器端处理好的,浏览器只管展示;又比如静态页面,所有页面都是预先编写或生成好的,浏览器将请求拿到的数据直接展现即可。
对于Vue生态来说,有以下方案可以实现服务器端渲染:
1.SSR服务器渲染;
2.静态化;
3.预渲染prerender-spa-plugin;
4.使用Phantomjs针对爬虫做处理。
对于Java生态来说,有以下方案可以实现服务器端渲染:
1.JSP
2.模板引擎,如Thymeleaf/Velocity等;
JSP基本已经算是步入老年,除了一些非常古老的系统,新的相信已经很少人使用。Thymeleaf在Spring官网文档中都有相关的集成案例,如果是一个全新的项目,应该算是比较好的方案;但对于已经完成前端所有功能开发的项目来说,使用模板引擎重新实现一套成本过高。对于我来说,也只能选择SSR服务器渲染方案了。
关于Vue服务器端渲染的介绍,可以参考官方文档:http://cn.vuejs.org/v2/guide/ssr.html。这其中主要有两种方式,其一是使用vue-server-renderer插件,其二是使用nuxt;在本项目做改造时,关于vue-server-renderer的介绍不如现有文档清晰,因此使用了nuxt的方案。
2. 现有博客项目改造
nuxt与传统的vue-cli项目,在目录结构、路由、组件生命周期上都有所不同;主要的改造步骤如下:
2.1创建项目
npx create-nuxt-app <项目名>
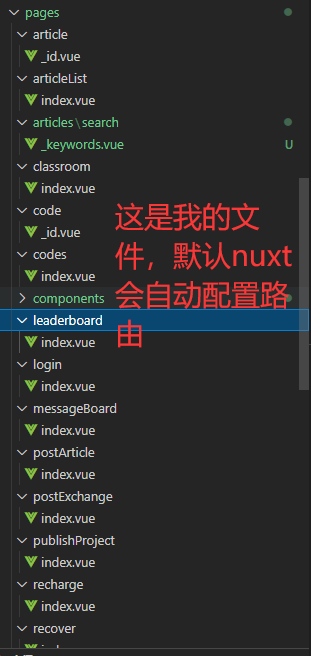
2.2将你的文件都复制过来
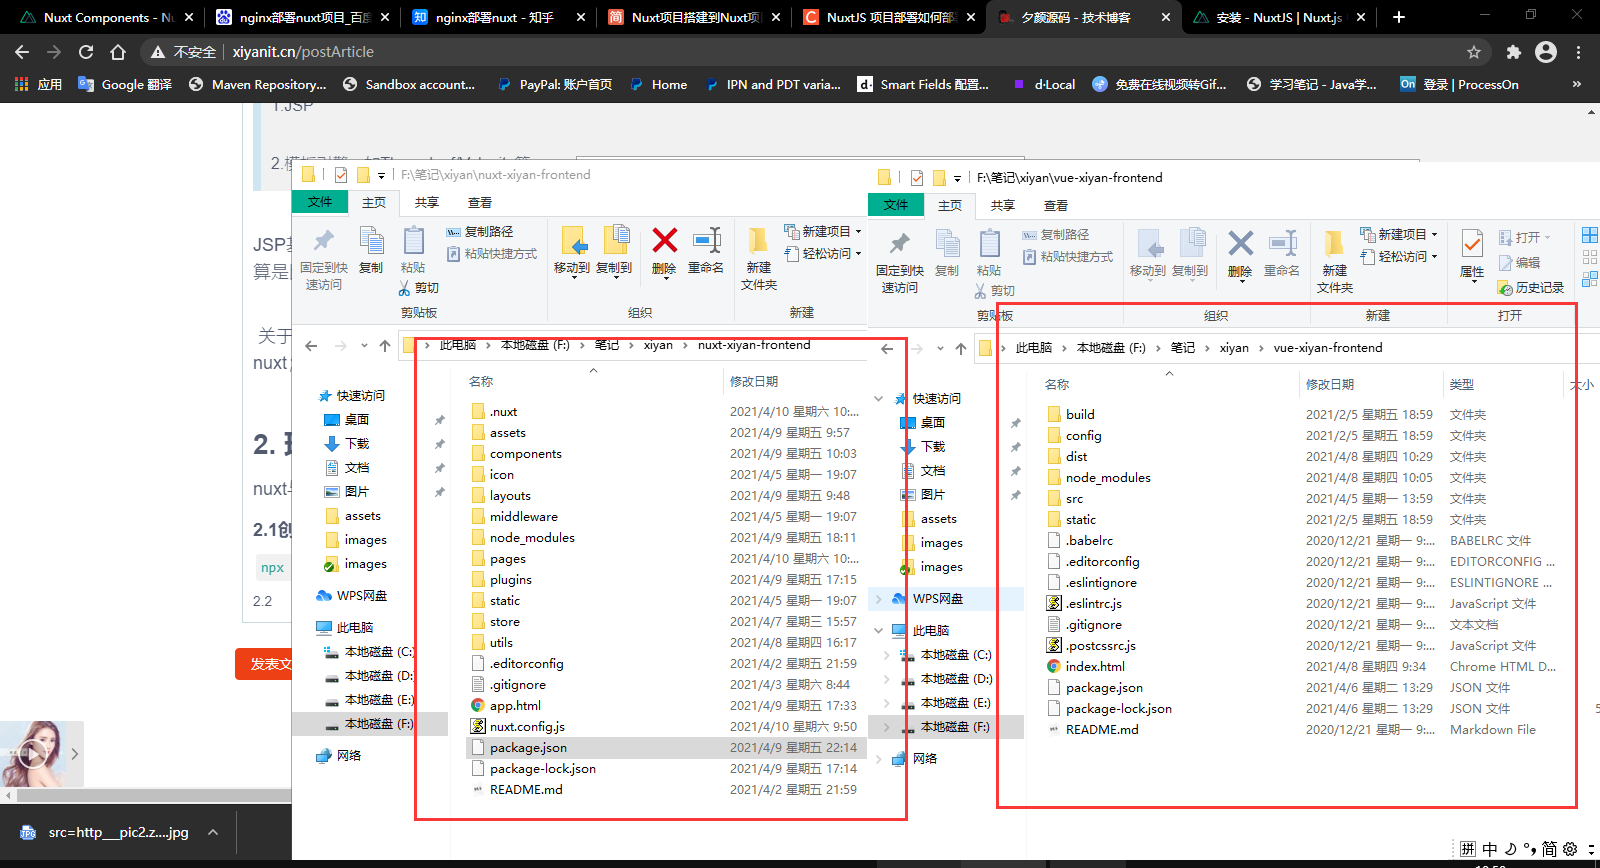
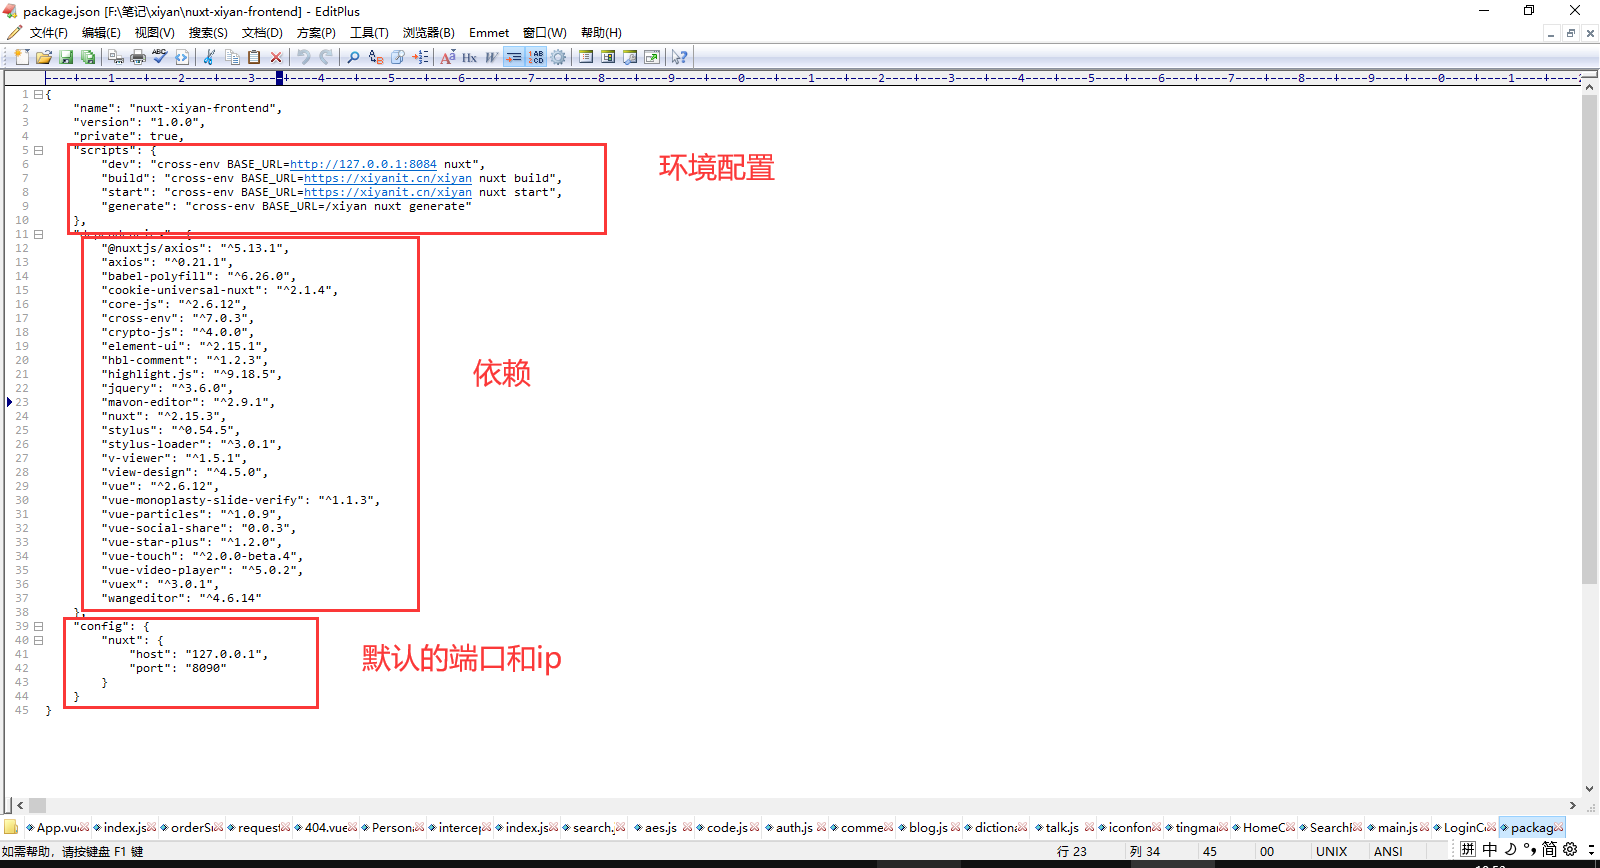
2.3 package.json
2.4安装组件

2.5 nuxt.config.js 引入组件
const webpack = require('webpack')
export default {
// Global page headers: http://go.nuxtjs.dev/config-head
head: {
htmlAttrs: {
lang: 'en'
},
meta: [
{ charset: 'utf-8' },
{ name: 'viewport', content: 'width=device-width,initial-scale=1.0, minimum-scale=1.0, maximum-scale=1.0, user-scalable=no' },
{ hid: 'description', name: 'description', content: '' }
],
link: [
{ rel: 'icon', type: 'image/x-icon', href: '/favicon.ico' }
],
// script: [
// //<!-- 51统计 -->
// {
// type: 'text/javascript',
// src: 'http://js.users.51.la/21038499.js'
// },
// // <!-- 百度统计 -->
// {
// src: 'http://hm.baidu.com/hm.js?88b551f7172ccc8bbee6f8928f5abbce'
// },
// //<!-- 360自动收录 -->
// {
// id: 'sozz',
// src: 'http://jspassport.ssl.qhimg.com/11.0.1.js?d182b3f28525f2db83acfaaf6e696dba'
// },
// ],
},
// Global CSS: http://go.nuxtjs.dev/config-css
css: [
'view-design/dist/styles/iview.css',
'@/icon/iconfont.css',
'element-ui/lib/theme-chalk/index.css',
'@/assets/stylus/index.styl',
'@/assets/stylus/article.css',
'@/assets/stylus/article.styl',
'@/assets/stylus/main.css',
'@/assets/stylus/theme.styl',
'@/assets/stylus/mixin.styl',
'@/assets/stylus/index.css',
'@/assets/stylus/base.styl',
'mavon-editor/dist/css/index.css',
'babel-polyfill',
'viewerjs/dist/viewer.css',
'@/assets/css/main.css',
'vue-social-share/dist/client.css'
],
// Plugins to run before rendering page: http://go.nuxtjs.dev/config-plugins
plugins: [{
src: '@/plugins/view-ui',
//是否需要服务端熏染
ssr: true,
}, {
src: '~/icon/iconfont.js',
//是否需要服务端熏染
ssr: false,
}, //elementui
{
src: '@/plugins/element-ui',
//是否需要服务端熏染
ssr: true,
}
//引入jquery的爱心js
, {
src: '@/assets/js/love',
//是否需要服务端熏染
ssr: false,
}, {
//mavon-editor 富文本编辑器
src: '@/plugins/mavon-editor',
//是否需要服务端熏染
ssr: true,
},
//wangeditor
{ src: '@/plugins/wangeditor', ssr: false },
{
src: '@/plugins/vue-particles',
//是否需要服务端熏染
ssr: false,
}, {
//兼容ie
src: '@/plugins/hls',
//是否需要服务端熏染
ssr: false,
},
{
//移动端手指滑动监控插件
src: '@/plugins/vue-touch',
//是否需要服务端熏染
ssr: false,
}, {
//滑动验证码
src: '@/plugins/vue-monoplasty-slide-verify',
//是否需要服务端熏染
ssr: true,
}, {
//图片预览插件
src: '@/plugins/v-viewer',
//是否需要服务端熏染
ssr: true,
}, {
//axios
src: "~/plugins/axios",
ssr: true
}, {
//分享插件
src: "~/plugins/vue-social-share",
ssr: false
},
//配置路由守卫
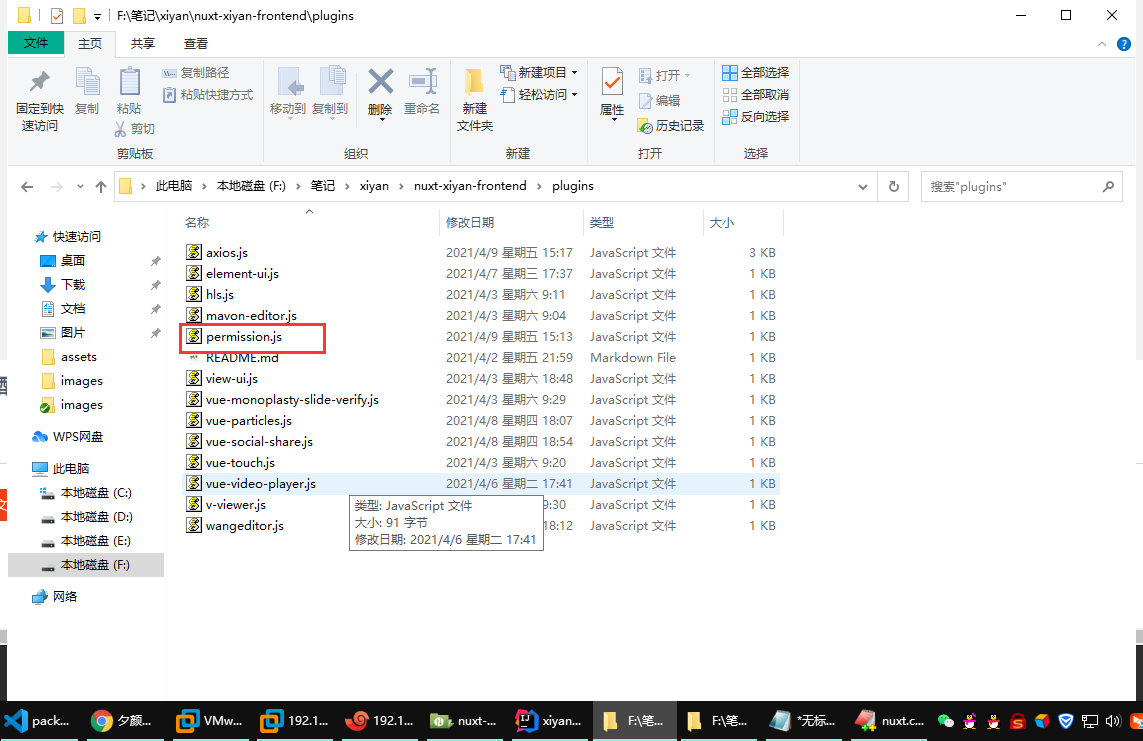
{ src: '@/plugins/permission', ssr: true },
{ src: '@/plugins/vue-video-player', ssr: false },
],
//设置接口地址环境变量
env: {
baseUrl: process.env.BASE_URL
},
// Auto import components: http://go.nuxtjs.dev/config-components
components: true,
// Modules for dev and build (recommended): http://go.nuxtjs.dev/config-modules
buildModules: [],
// Modules: http://go.nuxtjs.dev/config-modules
modules: [
//cookie
'cookie-universal-nuxt',
//axios
'@nuxtjs/axios',
],
//路由进度条配置
loading: {
color: '#19be6b',
},
// Build Configuration: http://go.nuxtjs.dev/config-build
build: {
//使用jquery
plugins: [
new webpack.ProvidePlugin({ jQuery: "jquery", $: "jquery" })
],
},
}
2.6配置路由守卫(路由拦截器)
// 不重定向白名单 [路由守卫]
const whiteList = ['/login', '/', '/regist', '/articleList', '/articles/search', '/recover', '/codes', '/talk', '/tool', "/article", "/messageBoard", "/leaderboard", "/code", "/classroom", "/tv", "/recharge"]
export default ({ app, $cookies, store }) => {
    app.router.beforeEach((to, from, next) => {
        //服务端直接放行,只做客户端处理
        let isClient = process.client
        if (isClient) {
            if ($cookies.get("token")) {
                if (to.path === '/login') {
                    next({ path: '/' })
                } else {
                    next()
                }
            } else {
                if (whiteList.indexOf(to.path) !== -1) {
                    next()
                } else {
                    next('/login')
                }
            }
        }
        next()
    })
}
2.7配置静态渲染模板
默认在根目录下,文件名字为app.html {{ HTML_ATTRS }} {{ HEAD_ATTRS }}都是固定写法
<!-- 模板,用来做定义script代码 -->
<!DOCTYPE html>
<html {{ HTML_ATTRS }}>

<head {{ HEAD_ATTRS }}>
    {{ HEAD }}
    <!-- 51统计 v5 -->
    <script charset="UTF-8" id="LA_COLLECT" src="//sdk.51.la/js-sdk-pro.min.js"></script>
    <script>
        LA.init({
            id: "JH1Squ4C6adLVG0B",
            ck: "JH1Squ4C6adLVG0B"
        })
    </script>
    <!-- 51统计 v6 -->
    <script type="text/javascript" src="http://js.users.51.la/21038499.js"></script>
    <!-- 360自动收录 -->
    <script>
        (function() {
            var src = "http://jspassport.ssl.qhimg.com/11.0.1.js?d182b3f28525f2db83acfaaf6e696dba";
            document.write('<script src="' + src + '" id="sozz"><\/script>');
        })();
    </script>
</head>

<body {{ BODY_ATTRS }} class="docs">
    {{ APP }}
</body>

</html>
2.8 标签使用
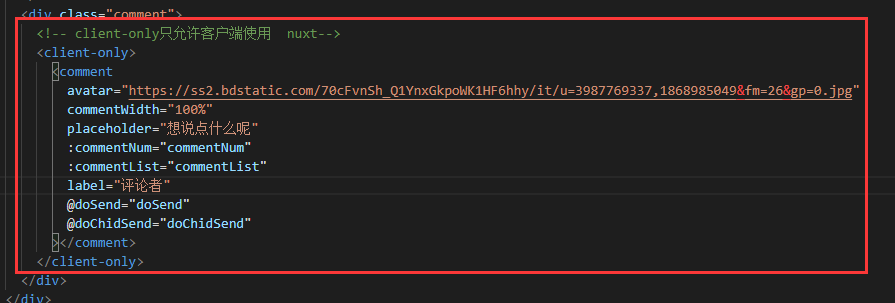
由于很多是组件是客户端使用的,如果你在服务端渲染,就会报doment找不到的问题所以采用nuxt的client-only标签
2.9路由配置
具体我这里不做演示了,请参考官方文档 http://www.nuxtjs.cn/guide/routing
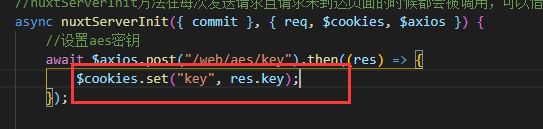
2.10数据存储
请使用cookie-universal-nuxt 进行存储,如果使用cookie.js会出现只能客户端获取收据服务端获取不到
2.11数据请求
请安装官网推荐的@nuxtjs/axios
封装axios

import {
    AESDecrypt
} from '@/assets/js/aes'
export default function({ store, redirect, app: { $axios, $cookies } }) {

    // 数据访问前缀,指定配置的环境变量接口地址
    $axios.defaults.baseURL = process.env.baseUrl

    // request拦截器,我这里设置了一个token,当然你可以不要
    $axios.onRequest(config => {
        //请求超时时间
        config.timeout = 600000
        if (store.state.token) {
            //如果有toekn才携带请求头中的token到后端
            config.headers.common['x-access-token'] = store.state.token
        }
        //服务端请求数据不需要参数加密和响应加密
        if (!process.client) {
            config.headers.common['x-aes'] = '0';
        }
    })
    $axios.onError(error => {
            //如果客户端密钥已经失效或者token失效提示用户重新登录
            if (error.response.status === 678) {
                $cookies.remove("token")
                $cookies.remove("user")
                store.commit('removeUserInfo');
                return Promise.reject(error);
            }
            if (error.response.status === 401) {
                redirect("/login")
                return Promise.reject(error);
            }
            return Promise.reject(error.response)
        })
        // response拦截器,数据返回后,你可以先在这里进行一个简单的判断
    $axios.interceptors.response.use(response => {
        /**
         * code为非200是抛错 可结合自己业务进行修改
         */
        var res;
        //判断服务器返回是否是加密数据
        if (response.data.responseData != null && response.data.responseData != "") {
            //进行解密数据
            let aesDecrypt = AESDecrypt(response.data.responseData, $cookies.get("key"));
            //解密后转换成json
            res = JSON.parse(aesDecrypt);
        } else {
            //不是加密的数据正常返回
            res = response.data
        }
        return res
    })
}
使用
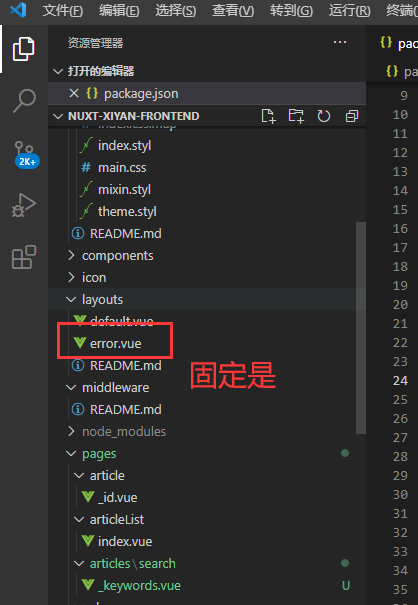
2.12配置默认错误页面
<template>
  <div class="wscn-http404-container">
    <div class="wscn-http404">
      <div class="pic-404">
        <img
          v-if="error.statusCode === 404"
          src="@/assets/images/404.png"
          alt="404"
          class="pic-404__parent"
        />
        <img
          v-else
          src="@/assets/images/500.gif"
          alt="500"
          class="pic-404__parent"
        />
        <img
          class="pic-404__child left"
          src="@/assets/images/404_cloud.png"
          alt="404"
        />
        <img
          class="pic-404__child mid"
          src="@/assets/images/404_cloud.png"
          alt="404"
        />
        <img
          class="pic-404__child right"
          src="@/assets/images/404_cloud.png"
          alt="404"
        />
      </div>
      <div class="bullshit">
        <div class="bullshit__oops">OOPS!</div>
        <div class="bullshit__info">
          All rights reserved
          <a style="color: #20a0ff" href="http://xiyanit.cn" target="_blank"
            >wallstreetcn</a
          >
        </div>
        <div class="bullshit__headline" v-if="error.statusCode === 404">
          {{ message }}
        </div>
        <div class="bullshit__headline" v-else>{{ message1 }}</div>
        <div class="bullshit__info">
          Please check that the URL you entered is correct, or click the button
          below to return to the homepage.
        </div>
        <a href="/" class="bullshit__return-home">Back to home</a>
      </div>
    </div>
  </div>
</template>

<script>
export default {
  props: ["error"],
  name: "Page404",
  computed: {
    message() {
      return "The page you visited has flown away! ! ! ! !";
    },
    message1() {
      return "Server Error! ! ! ! !";
    },
  },
};
</script>

<style lang="stylus" scoped>
.wscn-http404-container {
  margin: 250px 0px;
}

.wscn-http404 {
  display: flex;
  align-items: center;
  justify-content: center;

  .pic-404 {
    position: relative;
    float: left;
    width: 600px;
    overflow: hidden;

    &__parent {
      width: 100%;
    }

    &__child {
      position: absolute;

      &.left {
        width: 80px;
        top: 17px;
        left: 220px;
        opacity: 0;
        animation-name: cloudLeft;
        animation-duration: 2s;
        animation-timing-function: linear;
        animation-fill-mode: forwards;
        animation-delay: 1s;
      }

      &.mid {
        width: 46px;
        top: 10px;
        left: 420px;
        opacity: 0;
        animation-name: cloudMid;
        animation-duration: 2s;
        animation-timing-function: linear;
        animation-fill-mode: forwards;
        animation-delay: 1.2s;
      }

      &.right {
        width: 62px;
        top: 100px;
        left: 500px;
        opacity: 0;
        animation-name: cloudRight;
        animation-duration: 2s;
        animation-timing-function: linear;
        animation-fill-mode: forwards;
        animation-delay: 1s;
      }

      @keyframes cloudLeft {
        0% {
          top: 17px;
          left: 220px;
          opacity: 0;
        }

        20% {
          top: 33px;
          left: 188px;
          opacity: 1;
        }

        80% {
          top: 81px;
          left: 92px;
          opacity: 1;
        }

        100% {
          top: 97px;
          left: 60px;
          opacity: 0;
        }
      }

      @keyframes cloudMid {
        0% {
          top: 10px;
          left: 420px;
          opacity: 0;
        }

        20% {
          top: 40px;
          left: 360px;
          opacity: 1;
        }

        70% {
          top: 130px;
          left: 180px;
          opacity: 1;
        }

        100% {
          top: 160px;
          left: 120px;
          opacity: 0;
        }
      }

      @keyframes cloudRight {
        0% {
          top: 100px;
          left: 500px;
          opacity: 0;
        }

        20% {
          top: 120px;
          left: 460px;
          opacity: 1;
        }

        80% {
          top: 180px;
          left: 340px;
          opacity: 1;
        }

        100% {
          top: 200px;
          left: 300px;
          opacity: 0;
        }
      }
    }
  }

  .bullshit {
    position: relative;
    float: left;
    width: 300px;
    padding: 30px 0;
    overflow: hidden;

    &__oops {
      font-size: 32px;
      font-weight: bold;
      line-height: 40px;
      color: #1482f0;
      opacity: 0;
      margin-bottom: 20px;
      animation-name: slideUp;
      animation-duration: 0.5s;
      animation-fill-mode: forwards;
    }

    &__headline {
      font-size: 20px;
      line-height: 24px;
      color: #222;
      font-weight: bold;
      opacity: 0;
      margin-bottom: 10px;
      animation-name: slideUp;
      animation-duration: 0.5s;
      animation-delay: 0.1s;
      animation-fill-mode: forwards;
    }

    &__info {
      font-size: 13px;
      line-height: 21px;
      color: grey;
      opacity: 0;
      margin-bottom: 30px;
      animation-name: slideUp;
      animation-duration: 0.5s;
      animation-delay: 0.2s;
      animation-fill-mode: forwards;
    }

    &__return-home {
      display: block;
      float: left;
      width: 110px;
      height: 36px;
      background: #1482f0;
      border-radius: 100px;
      text-align: center;
      color: #ffffff;
      opacity: 0;
      font-size: 14px;
      line-height: 36px;
      cursor: pointer;
      animation-name: slideUp;
      animation-duration: 0.5s;
      animation-delay: 0.3s;
      animation-fill-mode: forwards;
    }

    @keyframes slideUp {
      0% {
        transform: translateY(60px);
        opacity: 0;
      }

      100% {
        transform: translateY(0);
        opacity: 1;
      }
    }
  }
}
</style>
大概基本改造完了,git源码地址:http://gitee.com/bright-boy/xiyan-blog
原文地址:https://blog.csdn.net/qq_40942490/article/details/116931179
版权声明:本文内容由互联网用户自发贡献,该文观点与技术仅代表作者本人。本站仅提供信息存储空间服务,不拥有所有权,不承担相关法律责任。如发现本站有涉嫌侵权/违法违规的内容, 请发送邮件至 dio@foxmail.com 举报,一经查实,本站将立刻删除。