
声明:本项目使用的是vue脚手架+elementui
脚手架创建项目(vue init webpack 项目名)
引入element-ui
npm i element-ui -S在main.js中添加
import ElementUI from 'element-ui';
import 'element-ui/lib/theme-chalk/index.css';

Vue.use(ElementUI);
添加axios
npm install axios --save-dev在main.js添加下面代码
import axios from 'axios';
axios.defaults.baseURL = "http://localhost:8080/"; // 关键步骤–填写后台请求统一的地址 这两段代码就是让后面请求后台时不用重复写地址
axios.defaults.headers.post['Content-Type'] = 'application/json;charset=UTF-8';
Vue.prototype.$http=axios;
前端html代码:把这个div
<div>
    <div style="text-align: left">
      <el-button type="success" @click="to"> 返回</el-button>
    </div>
    <el-form :model="formValue" :rules="rules" ref="formValue" label-width="100px" class="demo-formValue">
      <el-form-item label="中文名称" prop="cnName">
        <el-input v-model="formValue.cnName"></el-input>
      </el-form-item>
      <el-form-item label="英文名称" prop="enName">
        <el-input v-model="formValue.enName"></el-input>
      </el-form-item>


      <el-form-item ref="upload_attach_item_iamge" label="展示图片" prop="image" size='small' v-if="!isUpdate">
        <el-upload style="float: left"

                   :drag="true"
                   ref="upload_attach"
                   class="upload-demo"
                   action=""
                   multiple
                   accept=".jpg,.png,.jpeg"
                   :limit="4"
                   :on-change="changFileImage"
                   :on-exceed="handleExceed"
                   :on-remove="removeImageFile"
                   :file-list="imageFileList"
                   :auto-upload="false"
        >
          <i class="el-icon-upload"></i>
          <div class="el-upload__text">将文件拖到此处,或<em>点击上传</em></div>
          <!--          <div style="width:5vh;margin-top: 5px">-->
          <!--            <el-image v-if=isUpdate  fit="fill" :src="formValue.imagePath" :preview-src-list="srcList" ></el-image>-->
          <!--          </div>-->

          <div class="el-upload__tip" slot="tip">只能上传jpg/png文件,且不超过500kb</div>
        </el-upload>
        <el-progress :percentage="progressPercent" v-show="show_progress"></el-progress>

      </el-form-item>


      <el-form-item>
        <el-button type="primary" @click="submitForm('formValue')" v-if="!isUpdate">{{buttonTitle}}</el-button>
        <el-button type="primary" @click="updateExhibits()" v-if="isUpdate">{{buttonTitle}}</el-button>
        <el-button @click="resetForm('formValue')">重置</el-button>
      </el-form-item>
    </el-form>
  </div>
前端js代码
import loading from "../../../loading";

  export default {
    name: "CaseTypeManager",
    data() {
      return {
        formValue: {
          id: 0,
          cnName: "",
          enName: "",
          image: ""
        },
        isUpdate: false,
        imageFileList: [],
        //上传文件进度条
        progressPercent: 0,
        show_progress: false,

        buttonTitle : "创建",

        rules:{
          cnName: [
            {required: true, message: '请输入中文名称', trigger: 'blur'},
          ],
          enName: [
            {required: true, message: '请输入英文名称', trigger: 'blur'},
          ],
        }
      }
    },
    methods: {
      to() {
        this.$router.push({path: "/caseType/caseTypeList"});
      },
      changFileImage(file, imageFileList) {
        //选择文件后,给fileList对象赋值
        this.imageFileList = imageFileList
      },
      removeImageFile(file, fileList) {
        this.imageFileList = fileList
      },
      handleExceed(image, fileList) {
        this.$message.warning(`当前限制最多选择 4个文件`);
      },
      resetForm(formName) {
        this.$refs[formName].resetFields();
        this.imageFileList = [];
      },
      submitForm(formName) {

        let _this = this;
        this.$refs[formName].validate((valid) => {
          if (valid) {
            let data = new FormData();
            for (let i = 0; i < this.imageFileList.length; i++) {
              // files[i] = this.fileList[i].raw;
              data.append("images",this.imageFileList[i].raw);
            }

            for (let key in this.formValue) {
              if (key != "exhibitionHall") {
                data.append(key, this.formValue[key])
              }
            }
            const _loading = loading(`文件上传中,请稍后...`)

            // this.show_progress = true
            const config = {
              onUploadProgress: progressEvent => {
                // progressEvent.loaded:已上传文件大小
                // progressEvent.total:被上传文件的总大小
                this.progressPercent = Number((progressEvent.loaded / progressEvent.total * 100).toFixed(0))
                _loading.setText('文件上传中,进度:' + this.progressPercent + "%") //更新dialog进度,优化体验
              },
              headers: {
                'Content-Type': 'multipart/form-data'
              }
            }


            this.addCaseType(data, _loading, config, _this)


          } else {
            this.$message({
              message: '请填写完整信息再后提交',
              type: 'error'
            });
            return false;
          }
        });
      },

      addCaseType(data, _loading, config, _this) {
        this.$http.post("casetype/addCaseType", data, config).then((res) => {

          _loading.close(); // 关闭加载框
          // this.show_progress = false
          this.progressPercent = 0
          if (res.data.success == true) {

            this.$message({
                message: "创建成功",
                type: 'success',
              }
            );
            setTimeout(function () {
              _this.imageFileList = [];// 提交完成清空附件列表
              _this.to();

            }, 100)

          } else {
            this.$message({
              message: res.data.msg,
              type: 'error'
            });
          }
        }).catch(function (error) { // 请求失败处理
        });
      },

    }
  }
js代码
  import loading from "../../../loading";

  export default {
    name: "CaseTypeManager",
    data() {
      return {
        formValue: {
          id: 0,
          cnName: "",
          enName: "",
          image: ""
        },
        isUpdate: false,
        imageFileList: [],
        //上传文件进度条
        progressPercent: 0,
        show_progress: false,

        buttonTitle : "创建",

        rules:{
          cnName: [
            {required: true, message: '请输入中文名称', trigger: 'blur'},
          ],
          enName: [
            {required: true, message: '请输入英文名称', trigger: 'blur'},
          ],
        }
      }
    },
    methods: {
      to() {
        this.$router.push({path: "/caseType/caseTypeList"});
      },
      changFileImage(file, imageFileList) {
        //选择文件后,给fileList对象赋值
        this.imageFileList = imageFileList
      },
      removeImageFile(file, fileList) {
        this.imageFileList = fileList
      },
      handleExceed(image, fileList) {
        this.$message.warning(`当前限制最多选择 4个文件`);
      },
      resetForm(formName) {
        this.$refs[formName].resetFields();
        this.imageFileList = [];
      },
      submitForm(formName) {

        let _this = this;
        this.$refs[formName].validate((valid) => {
          if (valid) {
            let data = new FormData();
            for (let i = 0; i < this.imageFileList.length; i++) {
              // files[i] = this.fileList[i].raw;
              data.append("images",this.imageFileList[i].raw);
            }

            for (let key in this.formValue) {
              if (key != "exhibitionHall") {
                data.append(key, this.formValue[key])
              }
            }
            const _loading = loading(`文件上传中,请稍后...`)

            // this.show_progress = true
            const config = {
              onUploadProgress: progressEvent => {
                // progressEvent.loaded:已上传文件大小
                // progressEvent.total:被上传文件的总大小
                this.progressPercent = Number((progressEvent.loaded / progressEvent.total * 100).toFixed(0))
                _loading.setText('文件上传中,进度:' + this.progressPercent + "%") //更新dialog进度,优化体验
              },
              headers: {
                'Content-Type': 'multipart/form-data'
              }
            }


            this.addCaseType(data, _loading, config)


          } else {
            this.$message({
              message: '请填写完整信息再后提交',
              type: 'error'
            });
            return false;
          }
        });
      },

      addCaseType(data, _loading, config) {
        let _this = this;
        this.$http.post("casetype/addCaseType", data, config).then((res) => {

          _loading.close(); // 关闭加载框
          // this.show_progress = false
          this.progressPercent = 0
          if (res.data.success == true) {

            this.$message({
                message: "创建成功",
                type: 'success',
              }
            );
            setTimeout(function () {
              _this.imageFileList = [];// 提交完成清空附件列表
              _this.to();

            }, 100)

          } else {
            this.$message({
              message: res.data.msg,
              type: 'error'
            });
          }
        }).catch(function (error) { // 请求失败处理
        });
      },

    }
  }
核心 将文件添加到data中
let data = new FormData();
            for (let i = 0; i < this.imageFileList.length; i++) {
              // files[i] = this.fileList[i].raw;
              data.append("images",this.imageFileList[i].raw);
            }
将form添加到data
for (let key in this.formValue) {
              if (key != "exhibitionHall") {
                data.append(key, this.formValue[key])
              }
            }
使用axios提交到服务器
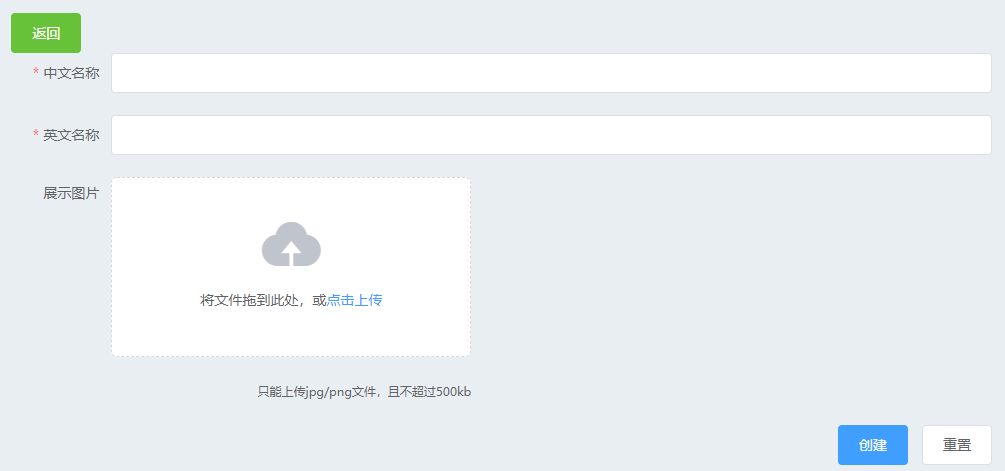
this.$http.post("casetype/addCaseType", data, config).then((res) => {}页面就是下面这个狗样子
后端代码
 @PostMapping("addCaseType")
    public Message addCaseType(CaseType caseType, @RequestParam MultipartFile[] images) {
        File tempFile = new File(serviceResPath + "casetype/"+caseType.getEnName()+"/");

        try {

            caseTypeService.save(caseType);
            FileUtil.createDir(tempFile);
            System.out.println(tempFile.isDirectory());
            for (int i=0;i<images.length;i++) {
                images[i].transferTo(new File(tempFile+("/"+(i+1)+".jpg")));
            }
        }catch (Exception e){
            e.printStackTrace();
            FileUtil.deleteDir(tempFile);
        }

        return Message.ok();
    }
然后就完成了 想要代码我过两天在上传 工程项目
原文地址:https://blog.csdn.net/qq_36710445/article/details/112790359
版权声明:本文内容由互联网用户自发贡献,该文观点与技术仅代表作者本人。本站仅提供信息存储空间服务,不拥有所有权,不承担相关法律责任。如发现本站有涉嫌侵权/违法违规的内容, 请发送邮件至 dio@foxmail.com 举报,一经查实,本站将立刻删除。