
CentOS7——搭建LNMP环境(WordPress案例)
LNMP组成介绍
LNMP(Linux-Nginx-MySQL-PHP)网站架构是目前国际流行的Web框架,该框架包括:Linux操作系统,Nginx网络服务器,MySQL数据库,PHP编程语言,所有组成产品均是免费开源软件,这四种软件组合到一起,成为一个免费、高效的网站服务系统。
LNMP工作原理
浏览器发送http request请求到服务器(Nginx),服务器响应并处理web请求。如果是静态文本直接返回,否则将脚本(PHP)通过接口传输协议(网关协议)PHP-FCGI(fast-cgi)传输给PHP-FPM(进程管理程序),然后PHP-FPM调用PHP解析器的其中一个进程PHP-CGI来解析php脚本信息。【PHP-FPM在启动时启动了多个PHP-CGI子进程,并发执行。】然后将解析后的脚本返回到PHP-FPM,PHP-FPM再通过fast-cgi的形式将脚本信息传送给Nginx。服务器再通过Http response的形式传送给浏览器。浏览器再进行解析与渲染然后进行呈现。
WordPress介绍
WordPress 介绍 WordPress是一种使用PHP语言开发的博客平台,用户可以在支持PHP和MySQL 数据库的服务器上架设自己的网站。 也可以把WordPress 当作一个内容管理系统(CMS)来使用。 WordPress 是一个免费的开源项目,在GNU通用公共许可证下授权发布。
构建LNMP+WordPress案例
环境配置
关闭防火墙
systemctl stop firewalld
systemctl disable firewalld
临时关闭SELINUX
setenforce 0
永久关闭SELINUX
echo SELINUX=disabled>/etc/selinux/config
echo SELINUXTYPE=targeted>>/etc/selinux/config
安装Nginx
增加 Nginx 官方源
cat << EOF > /etc/yum.repos.d/nginx.repo
[nginx-stable]
name=nginx stable repo
baseurl=http://nginx.org/packages/centos/$releasever/$basearch/
gpgcheck=1
enabled=1
gpgkey=https://nginx.org/keys/nginx_signing.key
module_hotfixes=true

[nginx-mainline]
name=nginx mainline repo
baseurl=http://nginx.org/packages/mainline/centos/$releasever/$basearch/
gpgcheck=1
enabled=0
gpgkey=https://nginx.org/keys/nginx_signing.key
module_hotfixes=true
EOF
EPEL 源中的 nginx.service 由于 KILL 参数问题,启动后无法停止,不建议使用。
安装Nginx
yum install -y nginx
备份Nginx配置文件
echo y|cp /etc/nginx/nginx.conf /etc/nginx/nginx.conf.default
修改 nginx.conf
cat << EOF > /etc/nginx/nginx.conf
# For more information on configuration, see:
#   * Official English Documentation: http://nginx.org/en/docs/
#   * Official Russian Documentation: http://nginx.org/ru/docs/

user nginx;
worker_processes auto;
error_log  /var/log/nginx/error.log warn;
pid        /var/run/nginx.pid;

worker_rlimit_nofile 65535;

events {
    worker_connections 65535;
}

http {
    include             /etc/nginx/mime.types;
    default_type        application/octet-stream;

    log_format  main  '$host $server_port $remote_addr - $remote_user [$time_local] "$request" '
                      '$status $request_time $body_bytes_sent "$http_referer" '
                      '"$http_user_agent" "$http_x_forwarded_for"';

    access_log  /var/log/nginx/access.log  main;

    sendfile            on;
    tcp_nopush          on;
    tcp_nodelay         on;
    keepalive_timeout   65;
    types_hash_max_size 2048;

    server_names_hash_bucket_size 128;
    server_name_in_redirect off;
    client_header_buffer_size 32k;
    large_client_header_buffers 4 32k;

    client_header_timeout  3m;
    client_body_timeout    3m;
    client_max_body_size 50m;
    client_body_buffer_size 256k;
    send_timeout           3m;

    gzip  on;
    gzip_min_length  1k;
    gzip_buffers     4 16k;
    gzip_http_version 1.0;
    gzip_comp_level 2;
    gzip_types text/plain application/x-javascript text/css application/xml;
    gzip_vary on;

    proxy_redirect off;
    proxy_set_header Host $host;
    proxy_set_header X-Real-IP $remote_addr;
    proxy_set_header REMOTE-HOST $remote_addr;
    proxy_set_header X-Forwarded-For $proxy_add_x_forwarded_for;
    proxy_connect_timeout 60;
    proxy_send_timeout 60;
    proxy_read_timeout 60;
    proxy_buffer_size 256k;
    proxy_buffers 4 256k;
    proxy_busy_buffers_size 256k;
    proxy_temp_file_write_size 256k;
    proxy_next_upstream error timeout invalid_header http_500 http_503 http_404;
    proxy_max_temp_file_size 128m;
    #让代理服务端不要主动关闭客户端的连接,协助处理499返回代码问题
    proxy_ignore_client_abort on;

    fastcgi_buffer_size 64k;
    fastcgi_buffers 4 64k;
    fastcgi_busy_buffers_size 128k;

    index index.html index.htm index.php default.html default.htm default.php;

    # Load modular configuration files from the /etc/nginx/conf.d directory.
    # See http://nginx.org/en/docs/ngx_core_module.html#include
    # for more information.
    include /etc/nginx/conf.d/*.conf;
}
EOF
增加默认Host
mkdir /etc/nginx/conf.d

cat << EOF > /etc/nginx/conf.d/default.conf
server {
    listen       80 default_server;
    listen       [::]:80 default_server;
    server_name  _;
    root         /usr/share/nginx/html;

    # Load configuration files for the default server block.
    include /etc/nginx/default.d/*.conf;

    location / {
    }

    error_page 404 /404.html;
        location = /40x.html {
    }

    error_page 500 502 503 504 /50x.html;
        location = /50x.html {
    }
}
EOF
启动Nginx
systemctl start nginx
增加开机启动
systemctl enable nginx
查看Nginx状态
# systemctl status nginx
● nginx.service - nginx - high performance web server
   Loaded: loaded (/usr/lib/systemd/system/nginx.service; enabled; vendor preset: disabled)
   Active: active (running) since Mon 2020-05-25 05:50:22 EDT; 7s ago
     Docs: http://nginx.org/en/docs/
   CGroup: /system.slice/nginx.service
           ├─1853 nginx: master process /usr/sbin/nginx -c /etc/nginx/nginx.conf
           └─1854 nginx: worker process

May 25 05:50:22 mysql1 systemd[1]: Starting nginx - high performance web server...
May 25 05:50:22 mysql1 systemd[1]: Can't open PID file /var/run/nginx.pid (yet?) after start: No such file or directory
May 25 05:50:22 mysql1 systemd[1]: Started nginx - high performance web server.

# ss -antpl|grep nginx
LISTEN     0      128          *:80                       *:*                   users:(("nginx",pid=1854,fd=6),("nginx",pid=1853,fd=6))
LISTEN     0      128       [::]:80                    [::]:*                   users:(("nginx",pid=1854,fd=7),("nginx",pid=1853,fd=7))
安装 MySQL
安装 MySQL
yum install -y mariadb-server
备份 my.cnf
cp /etc/my.cnf /etc/my.cnf.default
修改 my.cnf
cat << EOF > /etc/my.cnf
[mysqld]
datadir=/var/lib/mysql
socket=/var/lib/mysql/mysql.sock
# Disabling symbolic-links is recommended to prevent assorted security risks
symbolic-links=0
# Settings user and group are ignored when systemd is used.
# If you need to run mysqld under a different user or group,
# customize your systemd unit file for mariadb according to the
# instructions in http://fedoraproject.org/wiki/Systemd

max_allowed_packet=20M
max_heap_table_size = 100M
read_buffer_size = 2M
read_rnd_buffer_size = 16M
sort_buffer_size = 8M
join_buffer_size = 8M
tmp_table_size = 100M

# 查询缓存
#query_cache_limit=4M
#query_cache_type=on
#query_cache_size=2G

bind-address = 127.0.0.1
# 跳过主机名解析,比如localhost,foo.com之类,加速访问
skip-name-resolve

# SQL执行日志
general_log=off
general_log_file=/var/log/mariadb/general.log

# SQL慢查询日志
slow_query_log=off
slow_query_log_file=/var/log/mariadb/slowquery.log
long_query_time = 5

max_connections = 1000

# 兼容老MySQL代码,比如使用空字符串代替NULL插入数据
sql_mode = ""

[mysqld_safe]
log-error=/var/log/mariadb/mariadb.log
pid-file=/var/run/mariadb/mariadb.pid

#
# include all files from the config directory
#
!includedir /etc/my.cnf.d
EOF
配置 mysqldump 命令参数
sed -i '16 aquicknquote-namesnmax_allowed_packet = 100M' /etc/my.cnf.d/mysql-clients.cnf
创建日志文件
touch /var/log/mariadb/general.log /var/log/mariadb/slowquery.log
chown mysql:mysql /var/log/mariadb/general.log /var/log/mariadb/slowquery.log
增加开机启动
systemctl enable mariadb
启动 MySQL 服务
systemctl start mariadb
修改root密码
mysqladmin -uroot password "000000"
查看 MySQL 服务状态
# systemctl status mariadb
● mariadb.service - MariaDB database server
   Loaded: loaded (/usr/lib/systemd/system/mariadb.service; enabled; vendor preset: disabled)
   Active: active (running) since Fri 2019-11-29 14:18:12 CST; 1h 7min ago
  Process: 16688 ExecStartPost=/usr/libexec/mariadb-wait-ready $MAINPID (code=exited, status=0/SUCCESS)
  Process: 16653 ExecStartPre=/usr/libexec/mariadb-prepare-db-dir %n (code=exited, status=0/SUCCESS)
 Main PID: 16687 (mysqld_safe)
   CGroup: /system.slice/mariadb.service
           ├─16687 /bin/sh /usr/bin/mysqld_safe --basedir=/usr
           └─17043 /usr/libexec/mysqld --basedir=/usr --datadir=/var/lib/mysql --plugin-dir=/usr/lib64/mysql/plugin --log-error=/var/log/mariadb/mariadb.lo...

Nov 29 14:18:10 iZ6weebcmroarpx8rrxscrZ systemd[1]: Starting MariaDB database server...
Nov 29 14:18:10 iZ6weebcmroarpx8rrxscrZ mariadb-prepare-db-dir[16653]: Database MariaDB is probably initialized in /var/lib/mysql already, nothing is done.
Nov 29 14:18:11 iZ6weebcmroarpx8rrxscrZ mysqld_safe[16687]: 191129 14:18:11 mysqld_safe Logging to '/var/log/mariadb/mariadb.log'.
Nov 29 14:18:11 iZ6weebcmroarpx8rrxscrZ mysqld_safe[16687]: 191129 14:18:11 mysqld_safe Starting mysqld daemon with databases from /var/lib/mysql
Nov 29 14:18:12 iZ6weebcmroarpx8rrxscrZ systemd[1]: Started MariaDB database server.

# ss -antpl|grep mysql
LISTEN     0      50     127.0.0.1:3306                     *:*                   users:(("mysqld",pid=17043,fd=14))
安装 PHP7
增加SCL源
yum install -y centos-release-scl
安装PHP7.2
yum install -y rh-php72
    rh-php72-php
    rh-php72-php-bcmath
    rh-php72-php-fpm
    rh-php72-php-gd
    rh-php72-php-intl
    rh-php72-php-mbstring
    rh-php72-php-mysqlnd
    rh-php72-php-opcache
    rh-php72-php-pdo
    rh-php72-php-pecl-apcu
    rh-php72-php-xmlrpc
    rh-php72-php-devel
进入 rh-php72 环境
scl enable rh-php72 bash
确认PHP状态
# php -v
PHP 7.2.24 (cli) (built: Nov  4 2019 10:23:08) ( NTS )
Copyright (c) 1997-2018 The PHP Group
Zend Engine v3.2.0, Copyright (c) 1998-2018 Zend Technologies
    with Zend OPcache v7.2.24, Copyright (c) 1999-2018, by Zend Technologies
备份php.ini
cp /etc/opt/rh/rh-php72/php.ini /etc/opt/rh/rh-php72/php.ini.default
修改php.ini
# 启用 '<? ... ?>' 代码风格
sed -i '197s/short_open_tag = Off/short_open_tag = On/' /etc/opt/rh/rh-php72/php.ini

# 禁止一些危险性高的函数
sed -i '314s/disable_functions =/disable_functions = system,exec,shell_exec,passthru,set_time_limit,ini_alter,dl,openlog,syslog,readlink,symlink,link,leak,popen,escapeshellcmd,virtual,socket_create,mail,eval/' /etc/opt/rh/rh-php72/php.ini

# 配置中国时区
sed -i '902s#;date.timezone =#date.timezone = Asia/Shanghai#' /etc/opt/rh/rh-php72/php.ini
增加开机启动
systemctl enable rh-php72-php-fpm
启动 PHP-FPM 服务
systemctl start rh-php72-php-fpm
查看 PHP-FPM 服务状态
# systemctl status rh-php72-php-fpm
● rh-php72-php-fpm.service - The PHP FastCGI Process Manager
   Loaded: loaded (/usr/lib/systemd/system/rh-php72-php-fpm.service; enabled; vendor preset: disabled)
   Active: active (running) since Fri 2019-11-29 13:36:03 CST; 1h 56min ago
 Main PID: 15360 (php-fpm)
   Status: "Processes active: 0, idle: 6, Requests: 56, slow: 0, Traffic: 0req/sec"
   CGroup: /system.slice/rh-php72-php-fpm.service
           ├─15360 php-fpm: master process (/etc/opt/rh/rh-php72/php-fpm.conf)
           ├─15361 php-fpm: pool www
           ├─15362 php-fpm: pool www
           ├─15363 php-fpm: pool www
           ├─15364 php-fpm: pool www
           ├─15365 php-fpm: pool www
           └─17211 php-fpm: pool www

Nov 29 13:36:03 iZ6weebcmroarpx8rrxscrZ systemd[1]: Starting The PHP FastCGI Process Manager...
Nov 29 13:36:03 iZ6weebcmroarpx8rrxscrZ systemd[1]: Started The PHP FastCGI Process Manager.

# ss -antpl|grep php-fpm
LISTEN     0      128    127.0.0.1:9000                     *:*                   users:(("php-fpm",pid=17211,fd=9),("php-fpm",pid=15365,fd=9),("php-fpm",pid=15364,fd=9),("php-fpm",pid=15363,fd=9),("php-fpm",pid=15362,fd=9),("php-fpm",pid=15361,fd=9),("php-fpm",pid=15360,fd=7))
LNMP 环境测试
增加数据库
mysql -uroot -p000000 -e 'create database wordpress;grant all privileges on wordpress.* to wordpress@"localhost" identified by "wordpress_password";flush privileges;'
增加Nginx Host设置
cat << EOF > /etc/nginx/conf.d/wordpress.conf
server{
    listen       8080;

    server_name  wordpress.com;
    root         /data/web/wordpress.com;
    error_log /var/log/nginx/wordpress.com_error.log;
    access_log /var/log/nginx/wordpress.com_access.log  main;

    location / {
        try_files $uri /index.php$is_args$query_string;
    }

    location ~ .php$ {
        root           /data/web/wordpress.com;
        fastcgi_pass   127.0.0.1:9000;
        fastcgi_index  index.php;
        fastcgi_param  SCRIPT_FILENAME  $document_root$fastcgi_script_name;
        include        fastcgi_params;
    }
}
EOF

# 重载Nginx配置
nginx -t && nginx -s reload
准备 Wordpress
mkdir -p /data/web/wordpress.com

# 使用 -O 参数指定保存文件名,会强制覆盖已经存在的文件
yum -y install wget
wget https://wordpress.org/latest.tar.gz -O wordpress.tar.gz
tar xf wordpress.tar.gz

mv wordpress/* /data/web/wordpress.com
rm -rf wordpress
chown -R apache:nginx /data/web/wordpress.com
chmod -R 755 /data/web/wordpress.com
最后,访问http://服务器地址:8080 进入博客安装界面
如果无法访问网站地址:
1.请确保服务器的防火墙和SELINUX为关闭状态,详细操作请看基础环境配置的关闭防火墙与SELINUX操作。
2.测试主机与服务器的通信状态是否正常
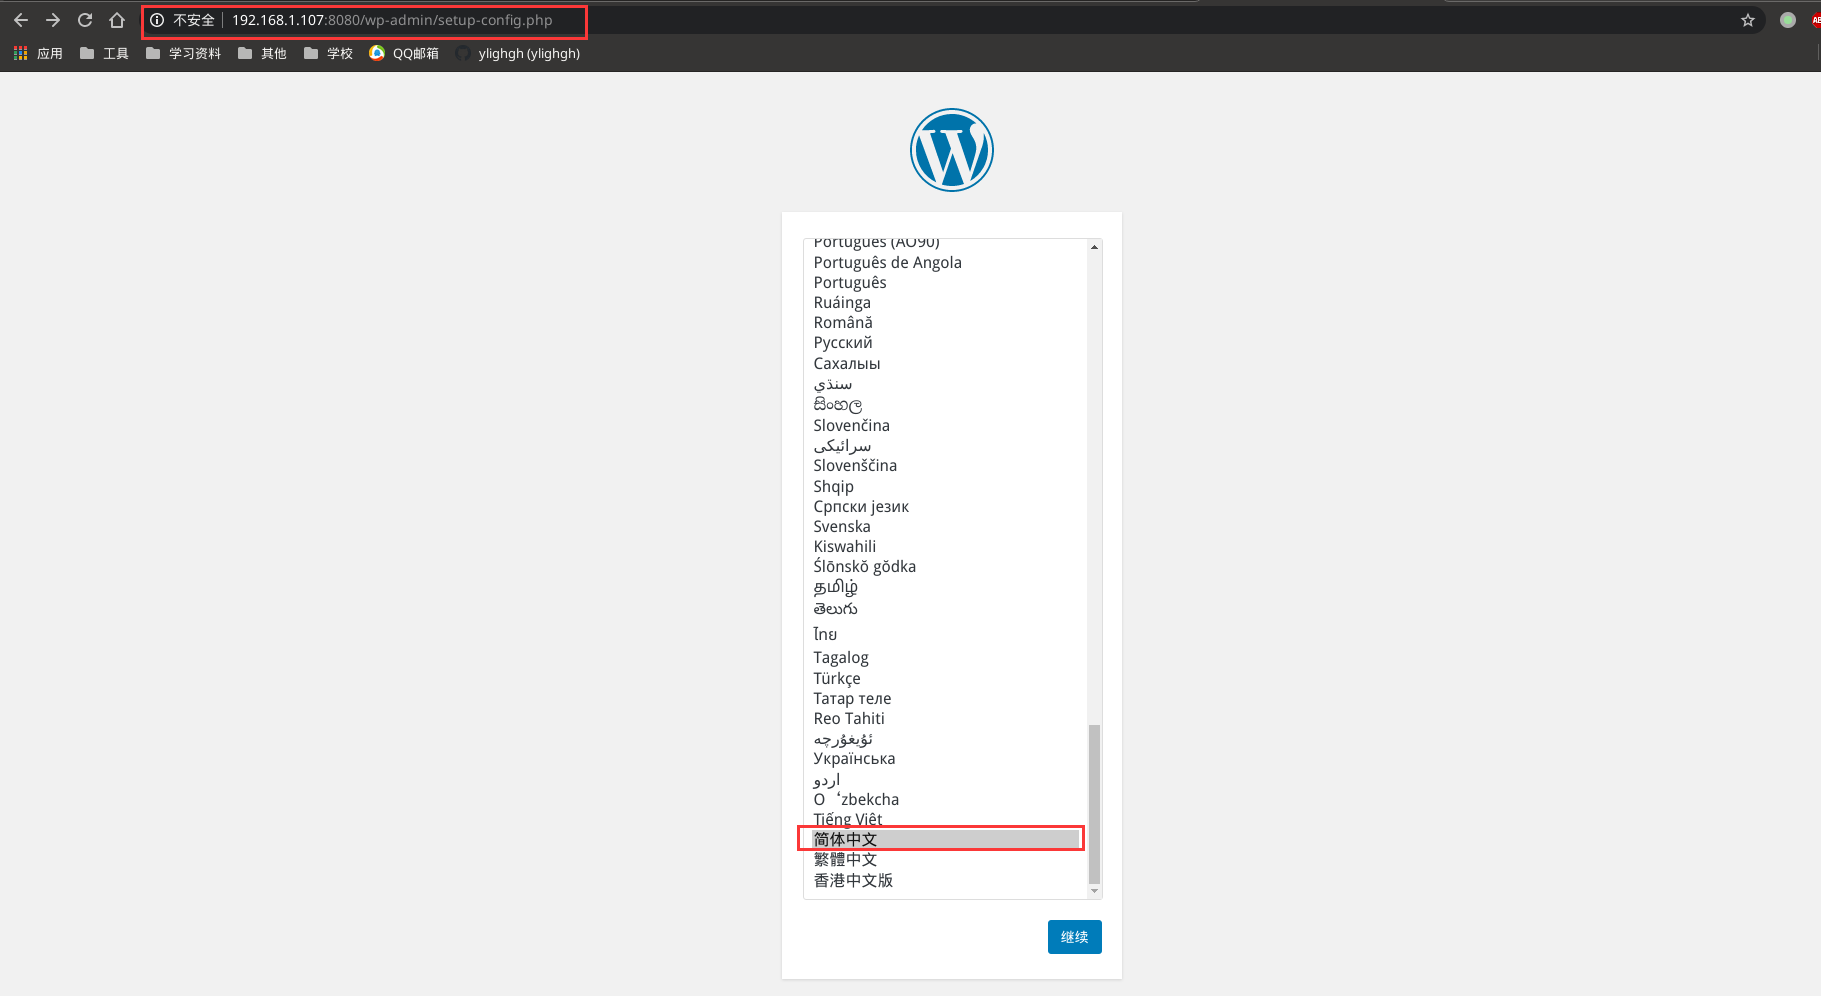
1.选择语言模式为中文
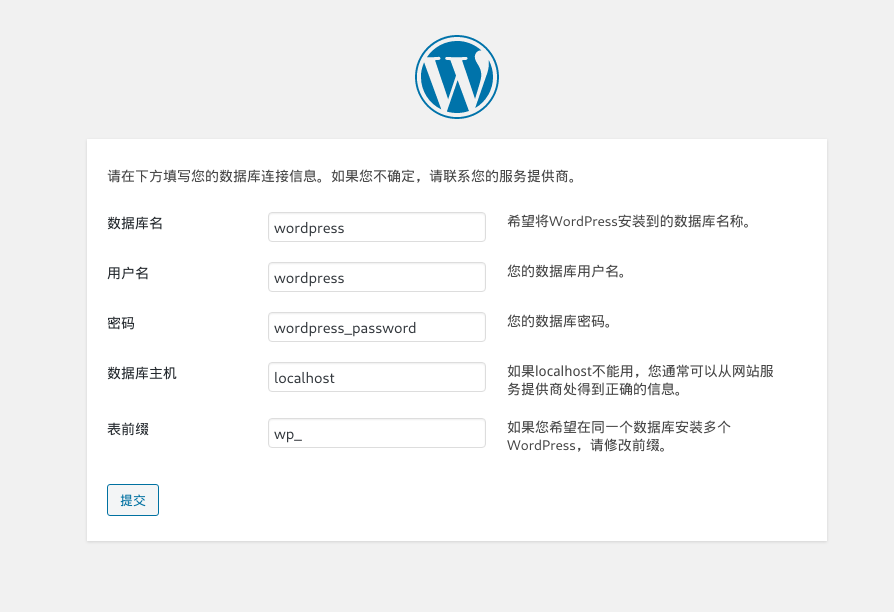
2.填写数据库信息
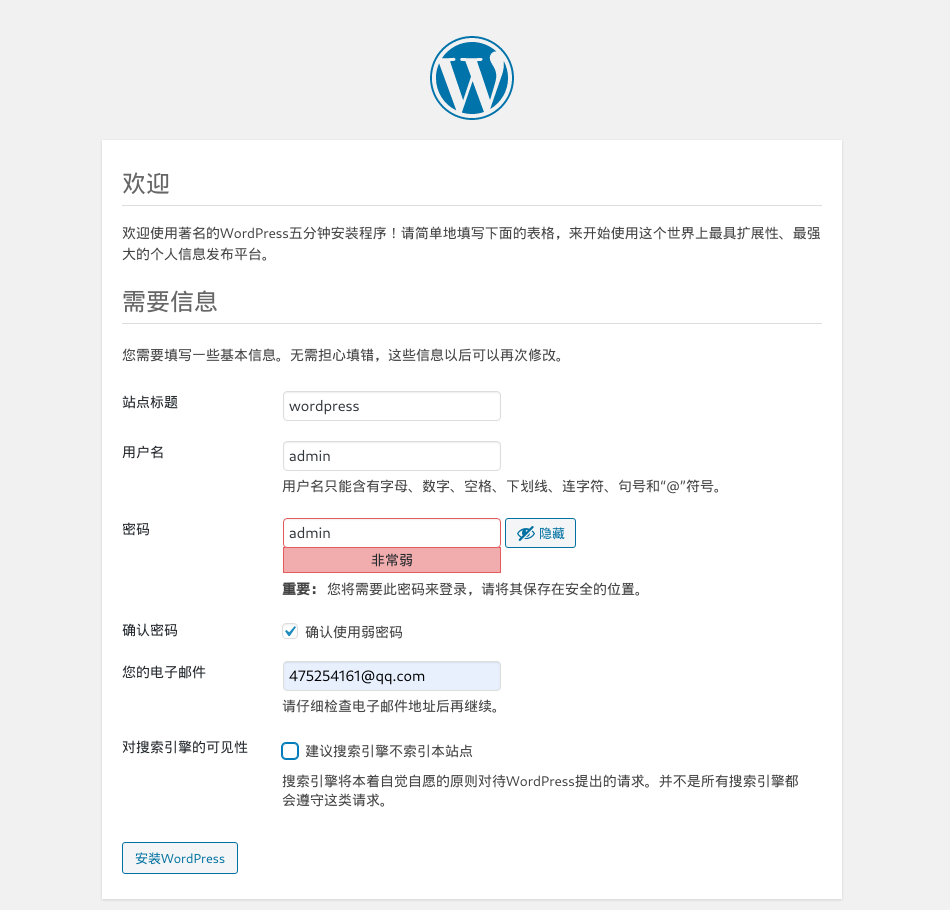
3.填写网站信息
4.访问http://服务器地址:8080 就可以看到博客已经搭起来了

- wordpress数据库相关信息:
- 数据库服务器:localhost
- 数据库端口:3306
- 数据库名称:wordpress
- 数据库用户名:wordpress
- 数据库密码:wordpress_password
写在最后
如果文档对你有帮助的话,请点击一下 推荐按钮 ,你的点击是我的最大动力。
我是键盘侠,现实中我唯唯诺诺,网络上我重拳出击,关注我,持续更新Linux干货教程。
版权声明:本文内容由互联网用户自发贡献,该文观点与技术仅代表作者本人。本站仅提供信息存储空间服务,不拥有所有权,不承担相关法律责任。如发现本站有涉嫌侵权/违法违规的内容, 请发送邮件至 dio@foxmail.com 举报,一经查实,本站将立刻删除。