


使用Let's Encrypt免费证书实现https
Let's Encrypt是一家免费、开放、自动化的证书颁发机构(CA),为公众的利益而运行(由非盈利组织互联网安全研究小组(ISRG)运营)。
前提:你需要有自己的域名
生成证书的方式有很多种,详情点击这里。
我这里以Certbot来生成证书。
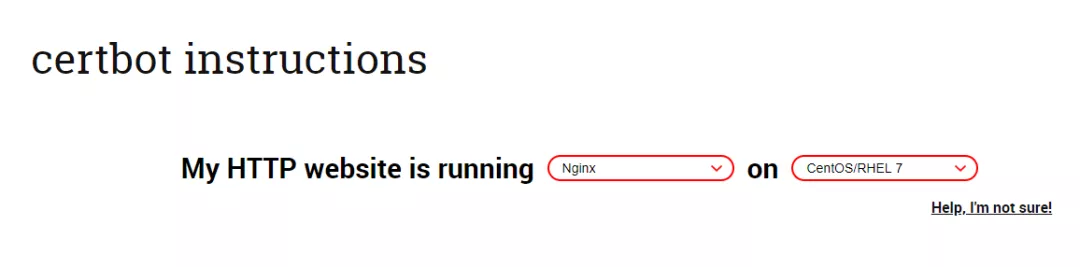
(1)、选择证书服务对象和操作系统
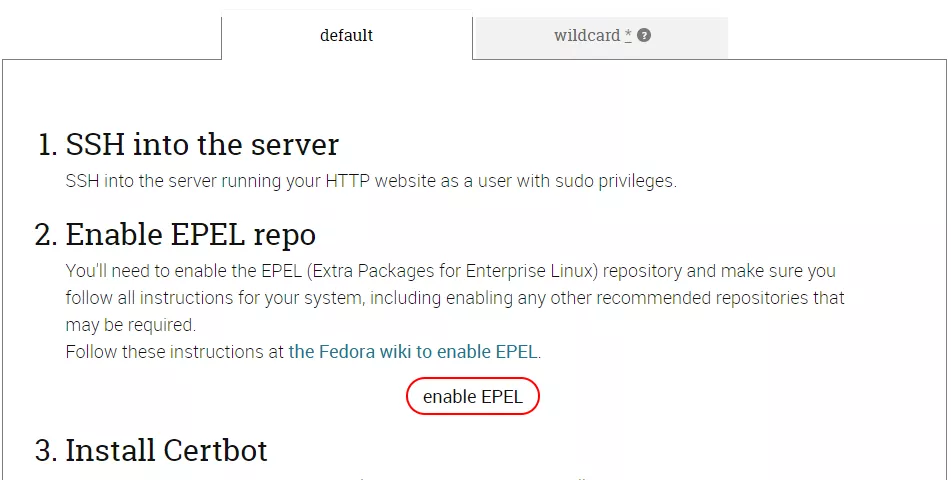
(2)、安装epel源
yum install epel-release -y其他操作系统及其安装方法可以点这里。
(3)、安装certbot
yum install certbot python2-certbot-nginx(4)、生成证书
可以选择两种方式。
第一种,直接生成证书并配置NGINX。
certbot --nginx第二种,只生成证书,NGINX需要自己配置
certbot certonly --nginx我选择的第二种,输出详情如下:
[root@VM_0_2_centos ssl]# certbot certonly --nginx
Saving debug log to /var/log/letsencrypt/letsencrypt.log
Plugins selected: Authenticator nginx, Installer nginx
Enter email address (used for urgent renewal and security notices) (Enter 'c' to
cancel): [email protected]
Starting new HTTPS connection (1): acme-v02.api.letsencrypt.org

- - - - - - - - - - - - - - - - - - - - - - - - - - - - - - - - - - - - - - - -
Please read the Terms of Service at
https://letsencrypt.org/documents/LE-SA-v1.2-November-15-2017.pdf. You must
agree in order to register with the ACME server at
https://acme-v02.api.letsencrypt.org/directory
- - - - - - - - - - - - - - - - - - - - - - - - - - - - - - - - - - - - - - - -
(A)gree/(C)ancel: A

- - - - - - - - - - - - - - - - - - - - - - - - - - - - - - - - - - - - - - - -
Would you be willing to share your email address with the Electronic Frontier
Foundation, a founding partner of the Let's Encrypt project and the non-profit
organization that develops Certbot? We'd like to send you email about our work
encrypting the web, EFF news, campaigns, and ways to support digital freedom.
- - - - - - - - - - - - - - - - - - - - - - - - - - - - - - - - - - - - - - - -
(Y)es/(N)o: Y
Starting new HTTPS connection (1): supporters.eff.org

Which names would you like to activate HTTPS for?
- - - - - - - - - - - - - - - - - - - - - - - - - - - - - - - - - - - - - - - -
1: jenkins.coolops.cn
2: www.coolops.cn
- - - - - - - - - - - - - - - - - - - - - - - - - - - - - - - - - - - - - - - -
Select the appropriate numbers separated by commas and/or spaces, or leave input
blank to select all options shown (Enter 'c' to cancel): 1
Obtaining a new certificate
Performing the following challenges:
http-01 challenge for jenkins.coolops.cn
Waiting for verification...
Cleaning up challenges

IMPORTANT NOTES:
 - Congratulations! Your certificate and chain have been saved at:
   /etc/letsencrypt/live/jenkins.coolops.cn/fullchain.pem
   Your key file has been saved at:
   /etc/letsencrypt/live/jenkins.coolops.cn/privkey.pem
   Your cert will expire on 2020-08-23. To obtain a new or tweaked
   version of this certificate in the future, simply run certbot
   again. To non-interactively renew *all* of your certificates, run
   "certbot renew"
 - Your account credentials have been saved in your Certbot
   configuration directory at /etc/letsencrypt. You should make a
   secure backup of this folder now. This configuration directory will
   also contain certificates and private keys obtained by Certbot so
   making regular backups of this folder is ideal.
 - If you like Certbot, please consider supporting our work by:

   Donating to ISRG / Let's Encrypt:   https://letsencrypt.org/donate
   Donating to EFF:                    https://eff.org/donate-le
安装步骤执行即可,当看到如上输出信息,则表明证书签发成功。
我们可以到相应的目录下查看证书
[root@VM_0_2_centos jenkins.coolops.cn]# cd /etc/letsencrypt/live/jenkins.coolops.cn
[root@VM_0_2_centos jenkins.coolops.cn]# ll
total 4
lrwxrwxrwx 1 root root  42 May 25 14:50 cert.pem -> ../../archive/jenkins.coolops.cn/cert1.pem
lrwxrwxrwx 1 root root  43 May 25 14:50 chain.pem -> ../../archive/jenkins.coolops.cn/chain1.pem
lrwxrwxrwx 1 root root  47 May 25 14:50 fullchain.pem -> ../../archive/jenkins.coolops.cn/fullchain1.pem
lrwxrwxrwx 1 root root  45 May 25 14:50 privkey.pem -> ../../archive/jenkins.coolops.cn/privkey1.pem
-rw-r--r-- 1 root root 692 May 25 14:50 README
注意:证书是有过期时间的,默认是3个月,我们可以使用脚本自动续约(见后文)。
(5)、配置NGINX
 server{
         listen 80 ;
         listen 443 ssl;
         server_name jenkins.coolops.cn;
         ssl_certificate /etc/letsencrypt/live/jenkins.coolops.cn/fullchain.pem;
         ssl_certificate_key /etc/letsencrypt/live/jenkins.coolops.cn/privkey.pem;
         ssl_ciphers ECDHE-RSA-AES128-GCM-SHA256:HIGH:!aNULL:!MD5:!RC4:!DHE;
         ssl_prefer_server_ciphers  on;
         ssl_session_cache    shared:SSL:1m;
         ssl_session_timeout  5m;

         location / {
                 proxy_connect_timeout 180;
                 proxy_send_timeout 180;
                 proxy_read_timeout 180;
                 proxy_set_header Host $host;
                 proxy_set_header X-Forwarder-For $remote_addr;
                 proxy_pass http://127.0.0.1:8080;
         }
 }
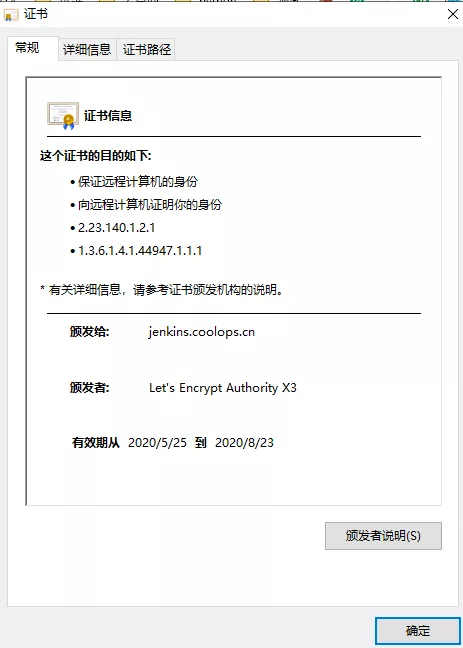
然后浏览器访问,并查看证书信息如下:
(6)、配置证书自动续签
官方已经提供了,直接加入cron即可。
echo "0 0,12 * * * root python -c 'import random; import time; time.sleep(random.random() * 3600)' && certbot renew -q" | sudo tee -a /etc/crontab > /dev/null完
版权声明:本文内容由互联网用户自发贡献,该文观点与技术仅代表作者本人。本站仅提供信息存储空间服务,不拥有所有权,不承担相关法律责任。如发现本站有涉嫌侵权/违法违规的内容, 请发送邮件至 [email protected] 举报,一经查实,本站将立刻删除。